 Welcome
 Linux
Linux Unix
Unix Download
Encourage FUNIX
Multimedia
Video editing
- Installation of video editing software
- Editing your video with Kdenlive
- Editing your video with Cinelerra
- Editing your video with OpenShot Video Editor
- Editing your video with Pitivi Video Editor
- Editing your video with Flowblade Video Editor
- Editing your video with Shotcut
Edit your video with kdenlive
Network and system
Email management
[ Purpose | Quick overview of the interface | Configuration | Importing files | Editing ( The principle , arranging clips on the timeline , adding compositions , adding G'MIC filters and effects , creating a title ) | Key images | Finalization | Exporting to the final video ]
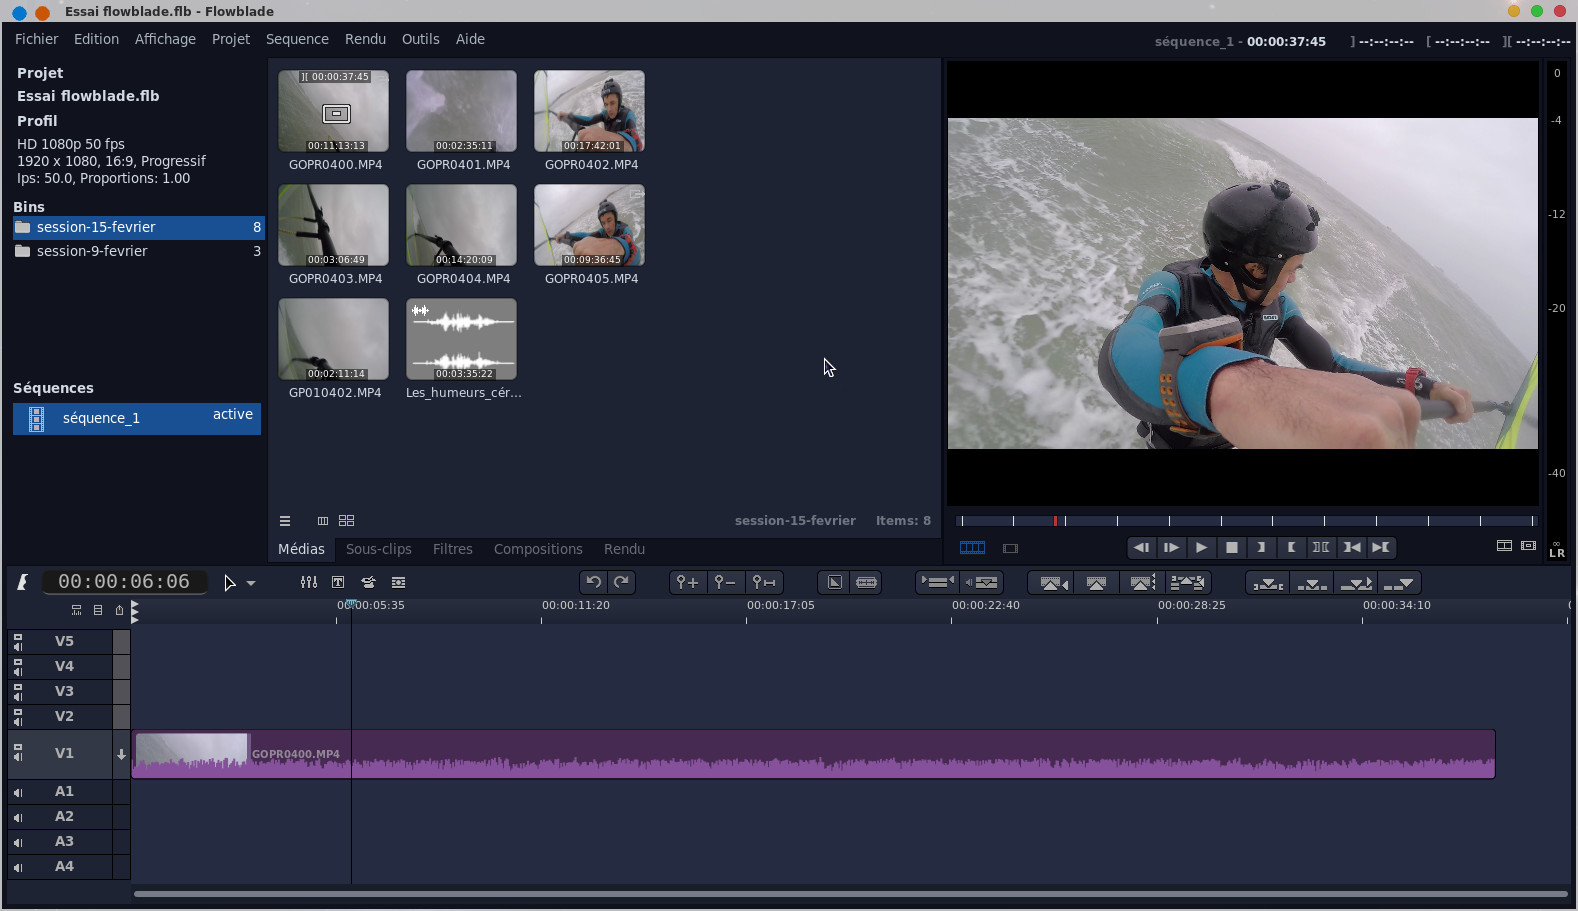
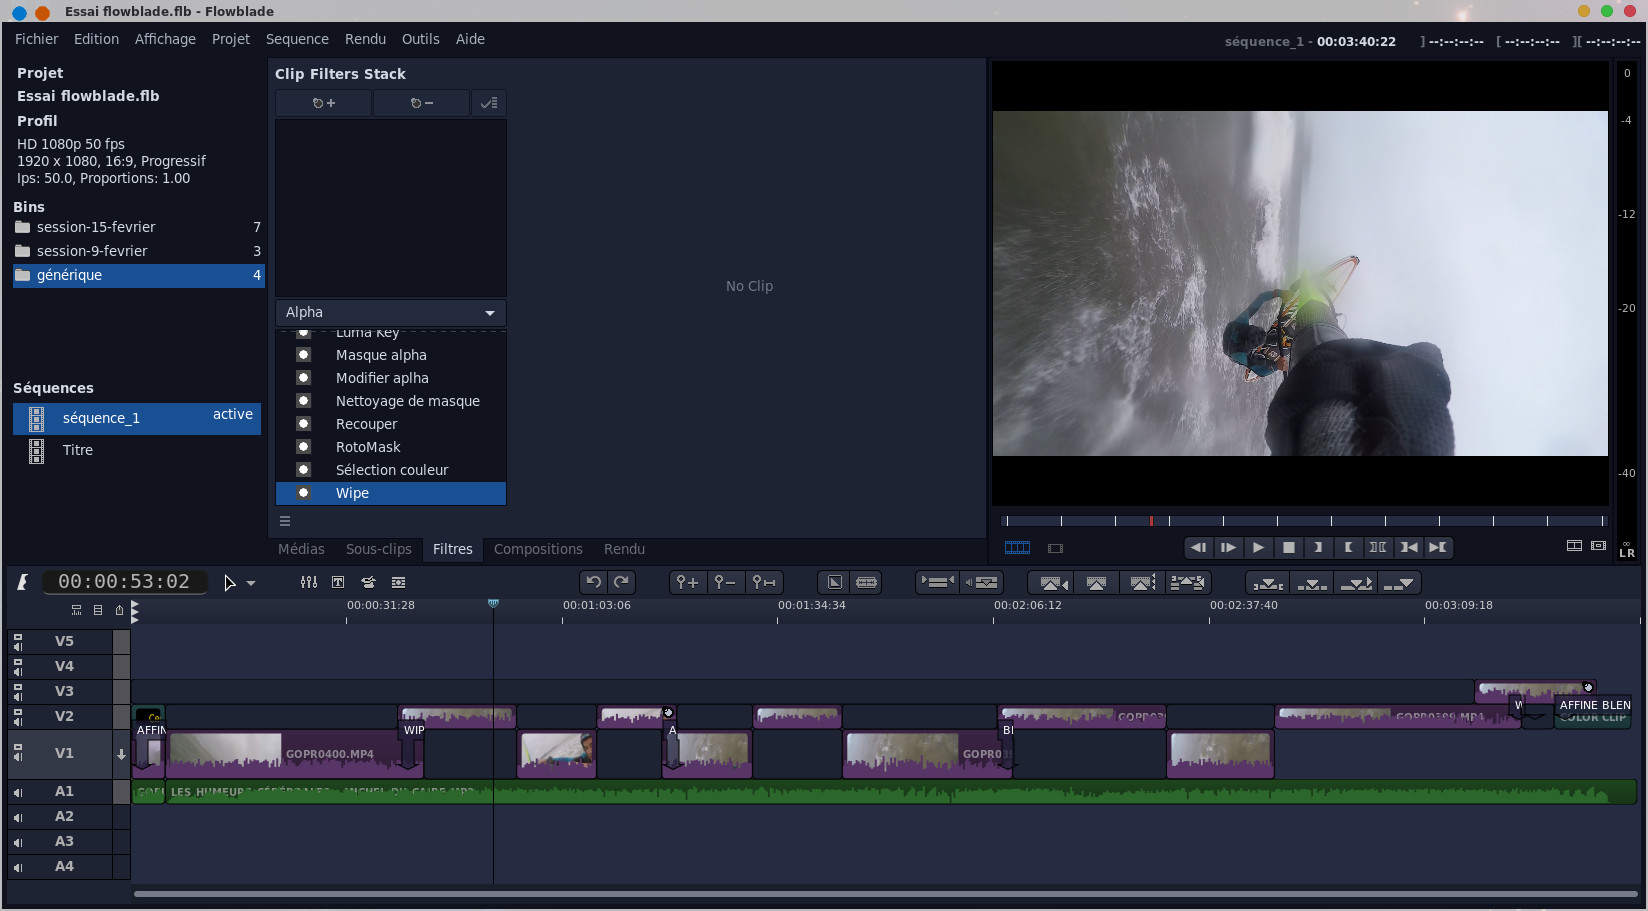
Tutorial to edit your video with Flowblade Movie Editor
Object
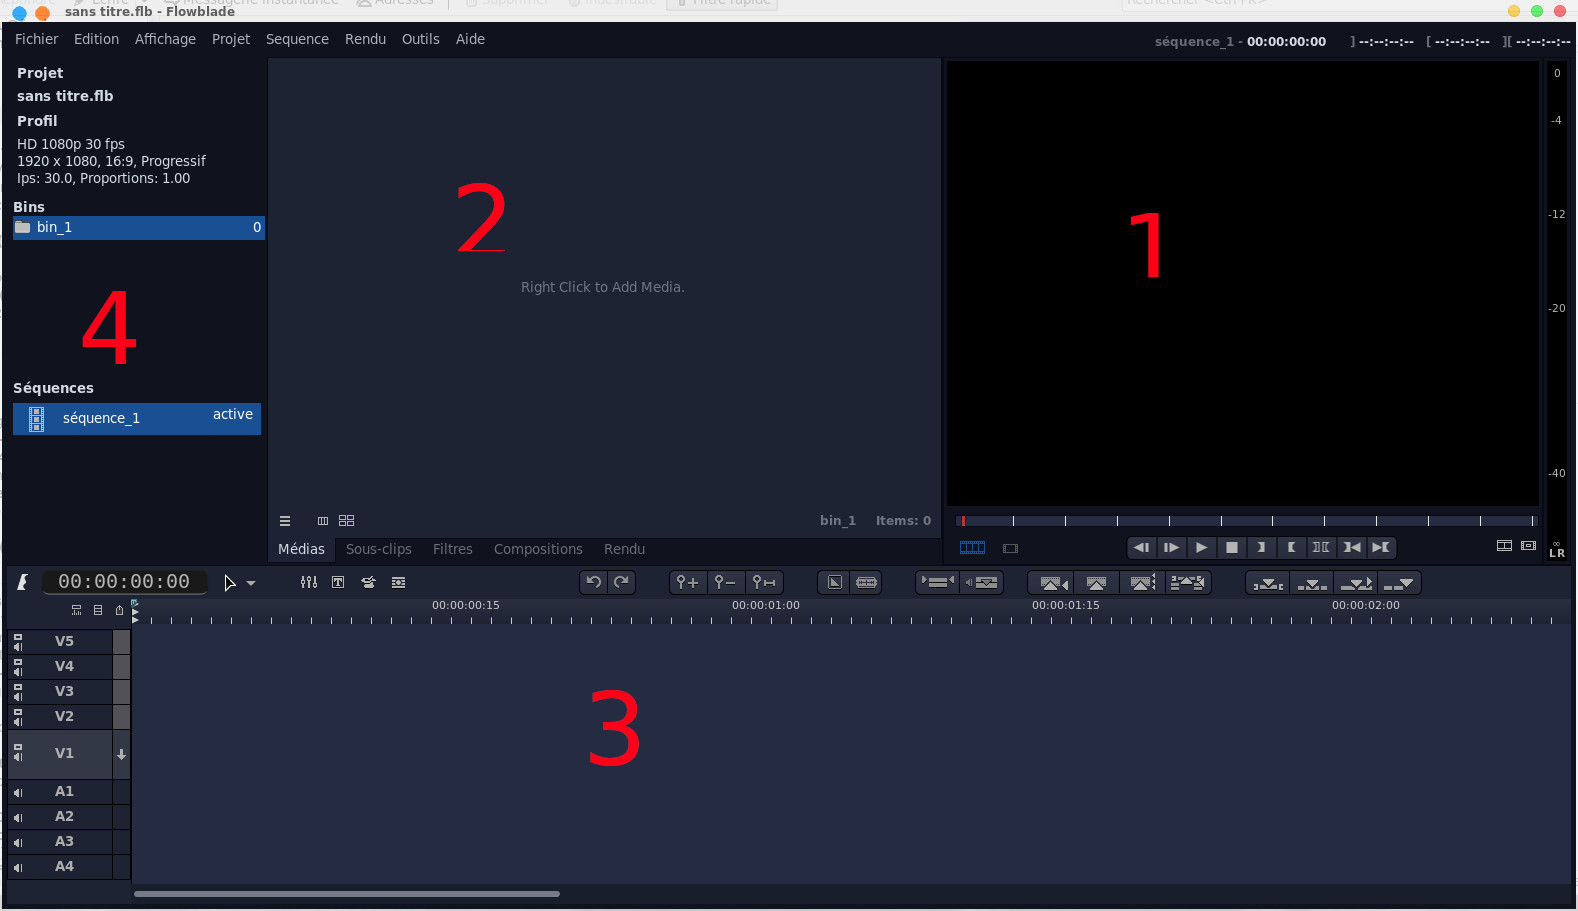
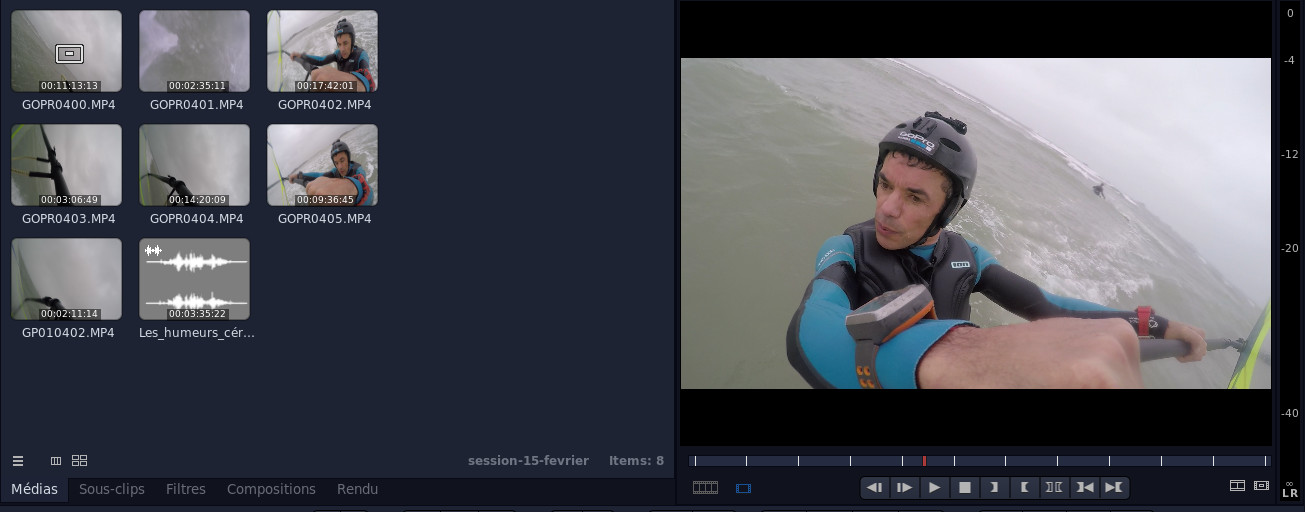
- 1 the display monitor
- 2 The contextual tabs where the properties of clips, filters, compositions and rendering will be displayed
- 3 The timeline which is made up of several tracks (5 video tracks and 4 audio tracks by default)
- 4 The library of project files and sequences
 found in the timeline tools.
  you have access to a menu
that allows you to customize the interface tools and we also
find the configuration between Standard mode and Film mode via Workflow
Presets .
you have access to a menu
that allows you to customize the interface tools and we also
find the configuration between Standard mode and Film mode via Workflow
Presets . 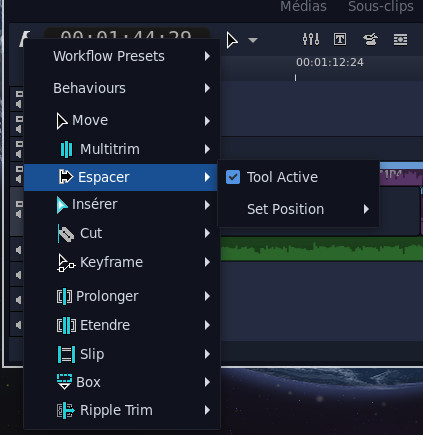
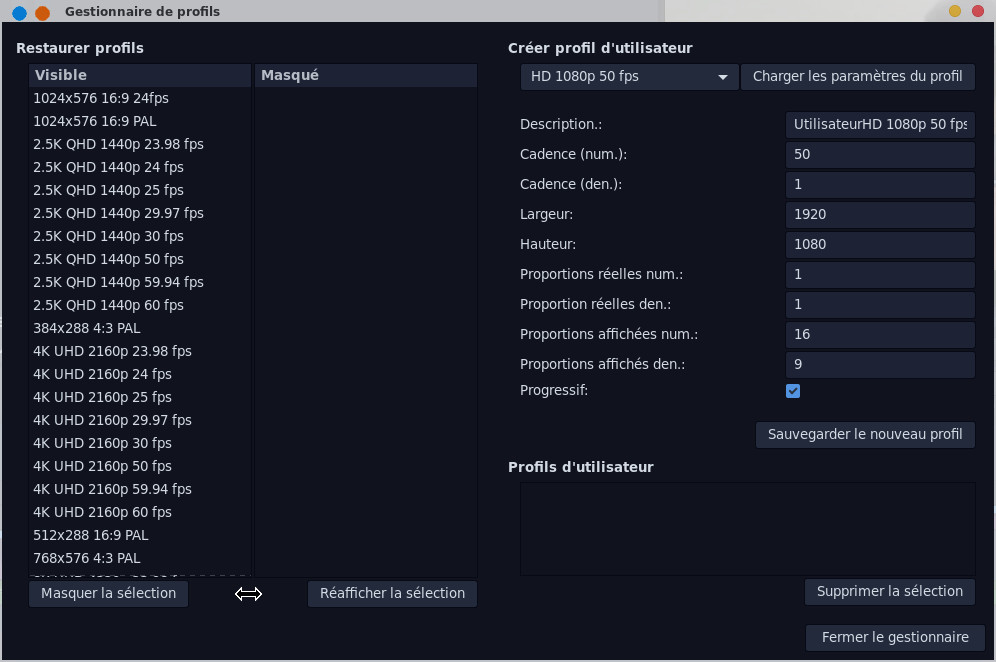
The project manager window accessible via the Edit menu allows you to define your own profiles, knowing that it is already well supplied as standard.
The assembly
The principle
Please refer to this page to learn the main principles of assembly.Arrange clips on the timeline
 . You will then need to
locate the part (or parts) that you would like to keep
in the final video, by clicking the Mark In
. You will then need to
locate the part (or parts) that you would like to keep
in the final video, by clicking the Mark In
 button at the
beginning of the sequence and the Mark Out
button at the
beginning of the sequence and the Mark Out
 button at the end of
the sequence. The selected sequence will appear grayed
out on the time scale as can be seen below.
button at the end of
the sequence. The selected sequence will appear grayed
out on the time scale as can be seen below. 
 . And you do the same
with the other imported videos by putting them on the
same track or alternating with the V2 track. In the end
you get something that looks like this.
. And you do the same
with the other imported videos by putting them on the
same track or alternating with the V2 track. In the end
you get something that looks like this. 
 to zoom in on the
timeline, the last button allows you to adjust the
timeline to the longest track. At this point you can add
a soundtrack by dragging an mp3 file onto audio track
A1.
to zoom in on the
timeline, the last button allows you to adjust the
timeline to the longest track. At this point you can add
a soundtrack by dragging an mp3 file onto audio track
A1.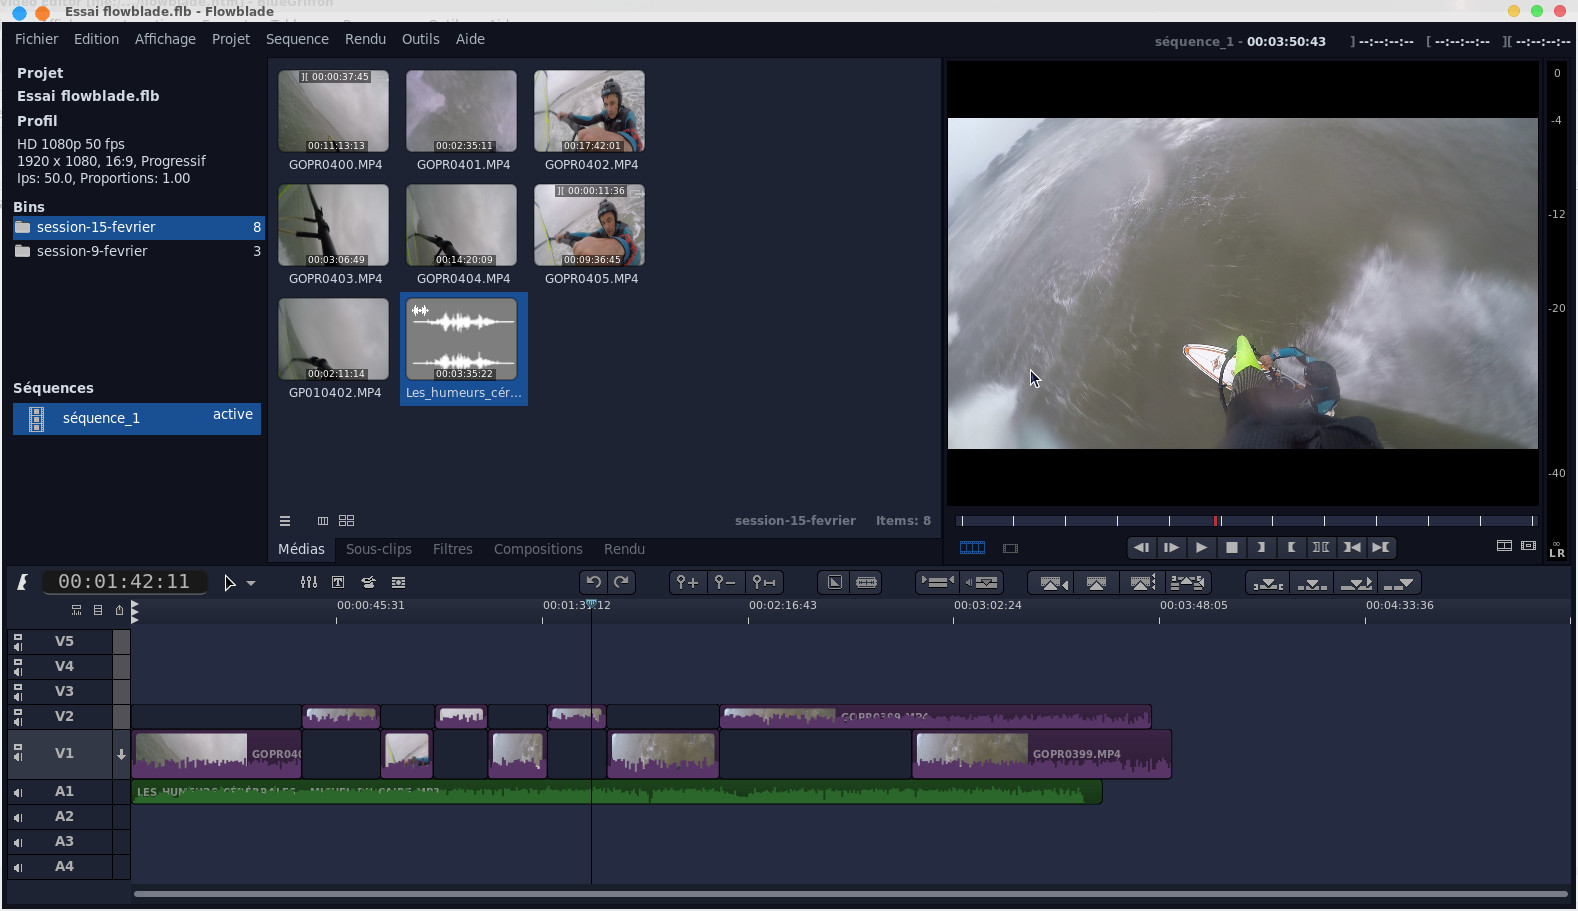
 must be present. We
place the cursor at the beginning of the sequence to cut
and click on the razor button
must be present. We
place the cursor at the beginning of the sequence to cut
and click on the razor button  the clip will be split
into two contiguous clips
the clip will be split
into two contiguous clips 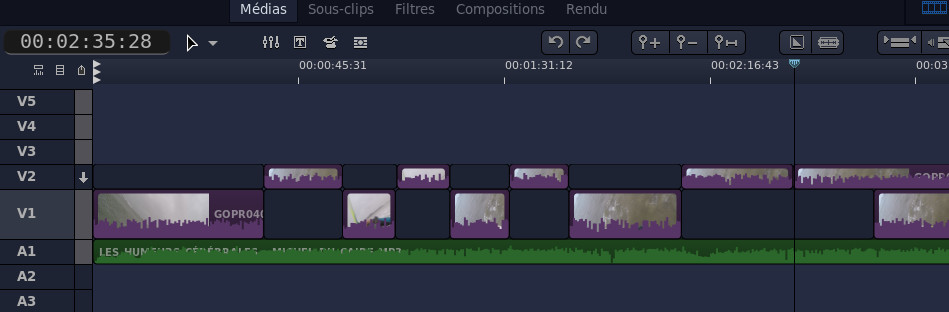

 this will give a
hole like this
this will give a
hole like this 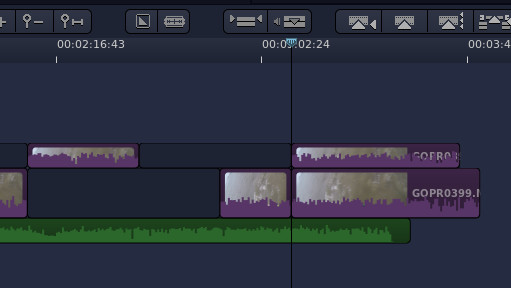
 it will automatically
fill the space by moving the following clip on the same
track like this
it will automatically
fill the space by moving the following clip on the same
track like this 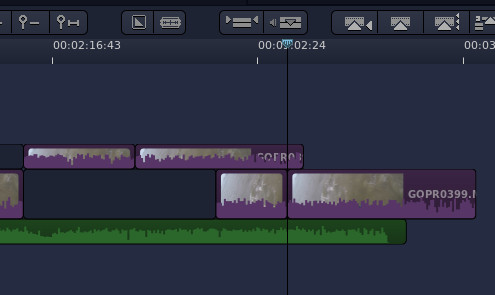
Add compositions
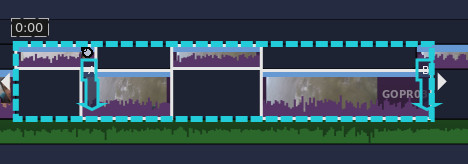
Transitions are video effects to go from one clip to another, we can obviously do without them in this case we will go abruptly from one clip to another. You will note that we will not put them everywhere because the excess of transitions can make the video heavy to watch. To set up a transition, we must prepare the clips by overlapping them (for the duration of a transition) from one track to another like this:
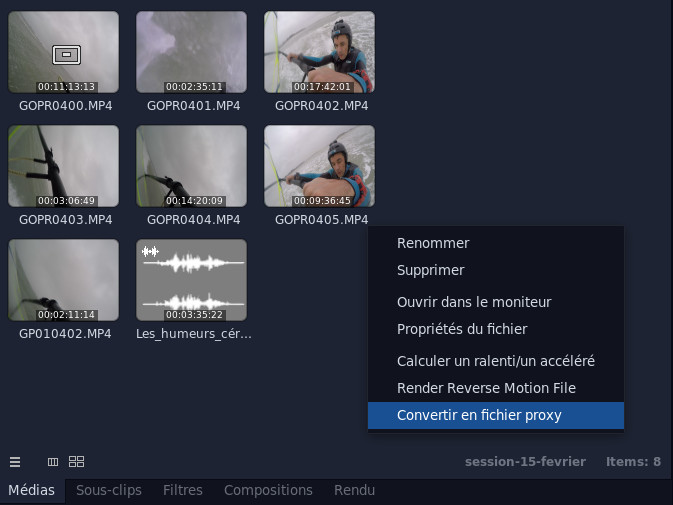
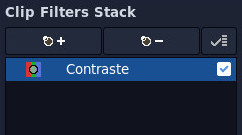
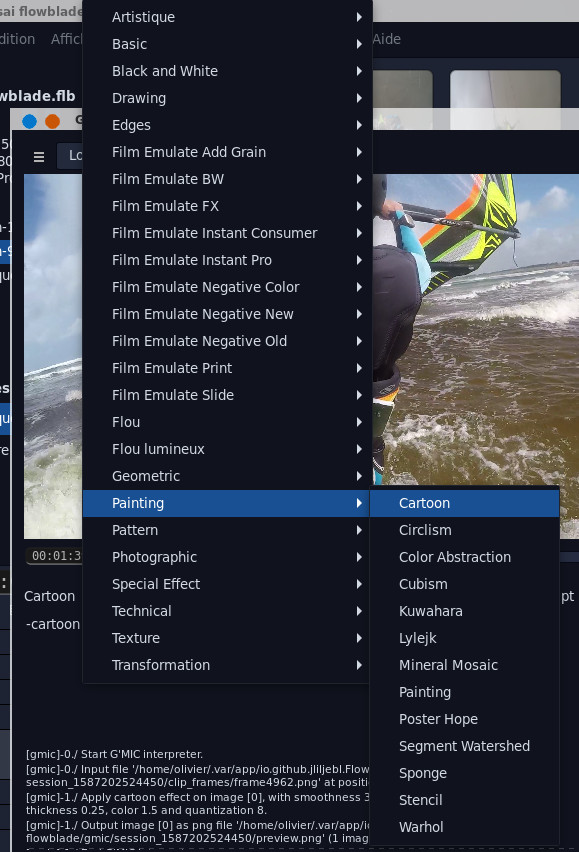
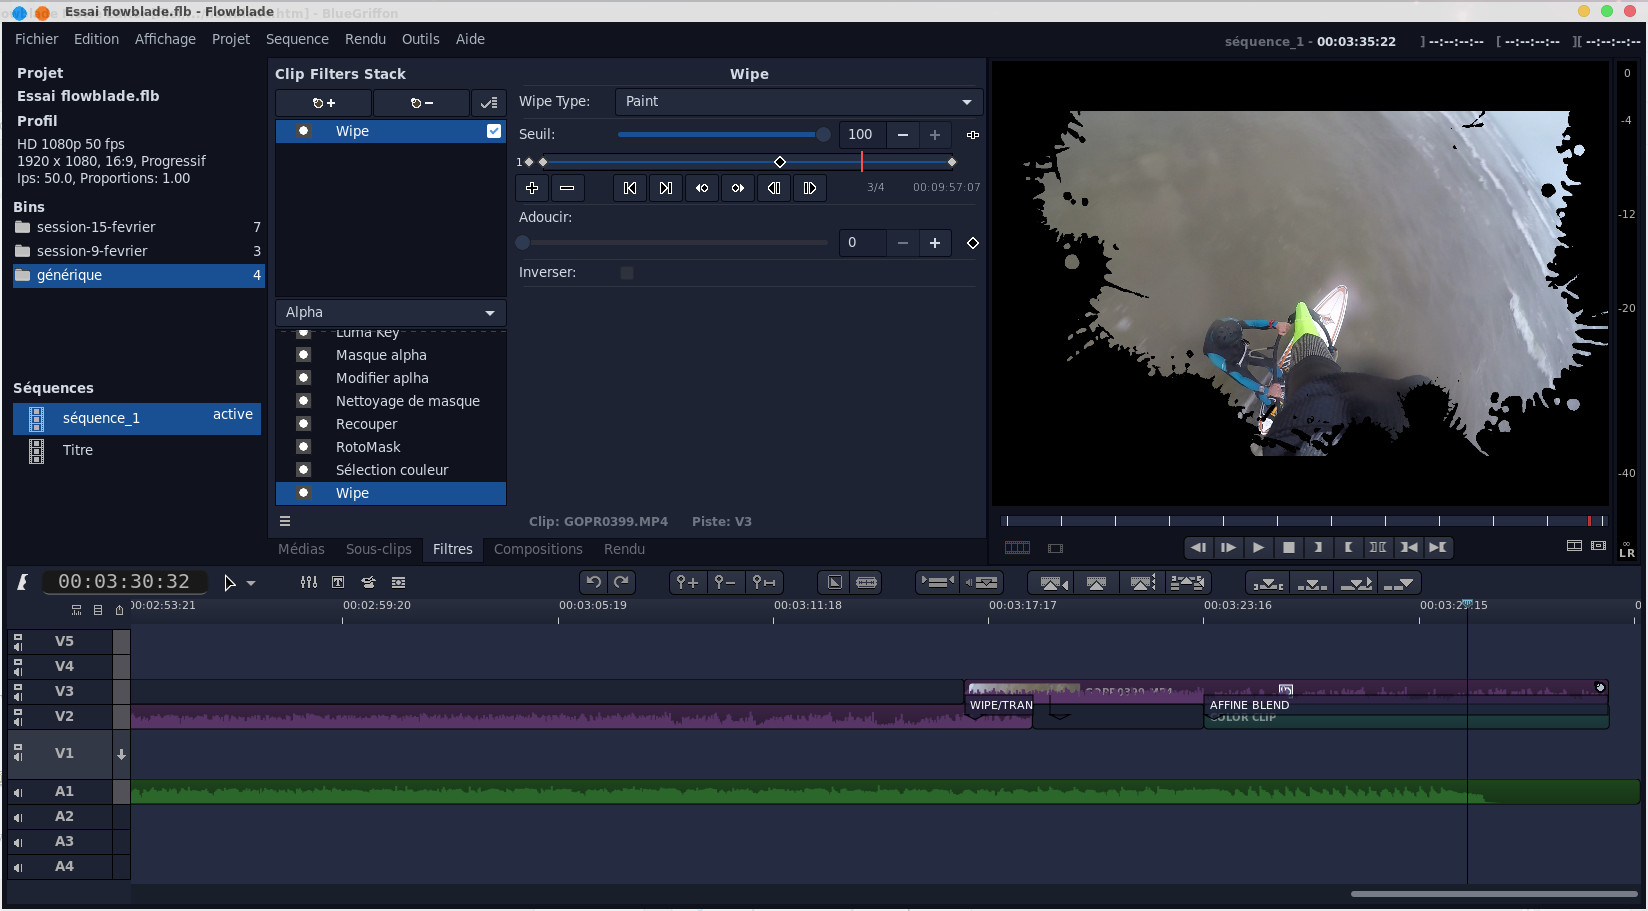
Add G'MIC filters
and effects
A
filter or more commonly effect is
a particular video treatment that
modifies the appearance of a clip,
we will quickly understand what it
is by selecting a filter in the
filter library. We access it via
the Filters
tab. They are stored in several
categories (Alpha, Enhancement,
Artistic, Audio, Border, Color,
Distortion, Color effect, Audio
filters, Blur, Motion,
Transformation). They are also
accessible by selecting a clip
then from the context menu Add
a filter.
In the example below I selected
the Contrast
effect that I dragged and dropped
onto a clip in the timeline. We
can then adjust the properties of
the filter which are visible in
the central position. We can also
see the two sequences appear, the
active sequence is marked with an
active.
To switch to the other sequence
and make it active you will have
to double-click on it. 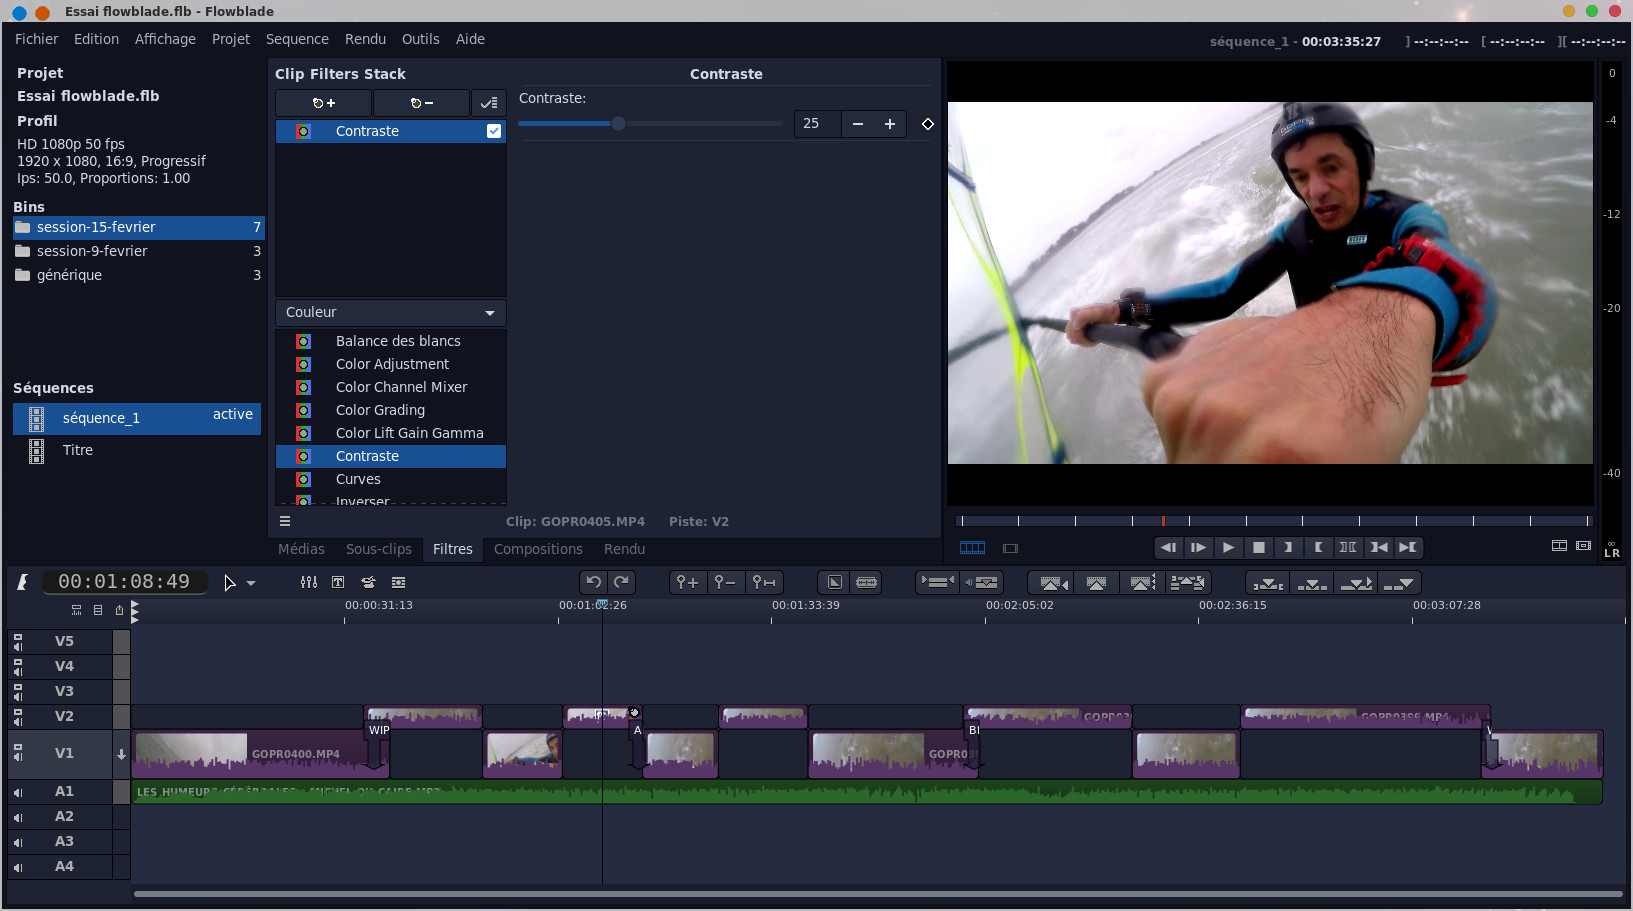
 effects window
you load a video with the Load
Clip
button , note that it is not
necessarily a video that has already
been loaded into the project. Then
you choose an effect from the list
(below on the left at the Cartoon
level),
in this case I chose a Cartoon
effect and
by clicking on Preview we
see the result that is displayed.
effects window
you load a video with the Load
Clip
button , note that it is not
necessarily a video that has already
been loaded into the project. Then
you choose an effect from the list
(below on the left at the Cartoon
level),
in this case I chose a Cartoon
effect and
by clicking on Preview we
see the result that is displayed. 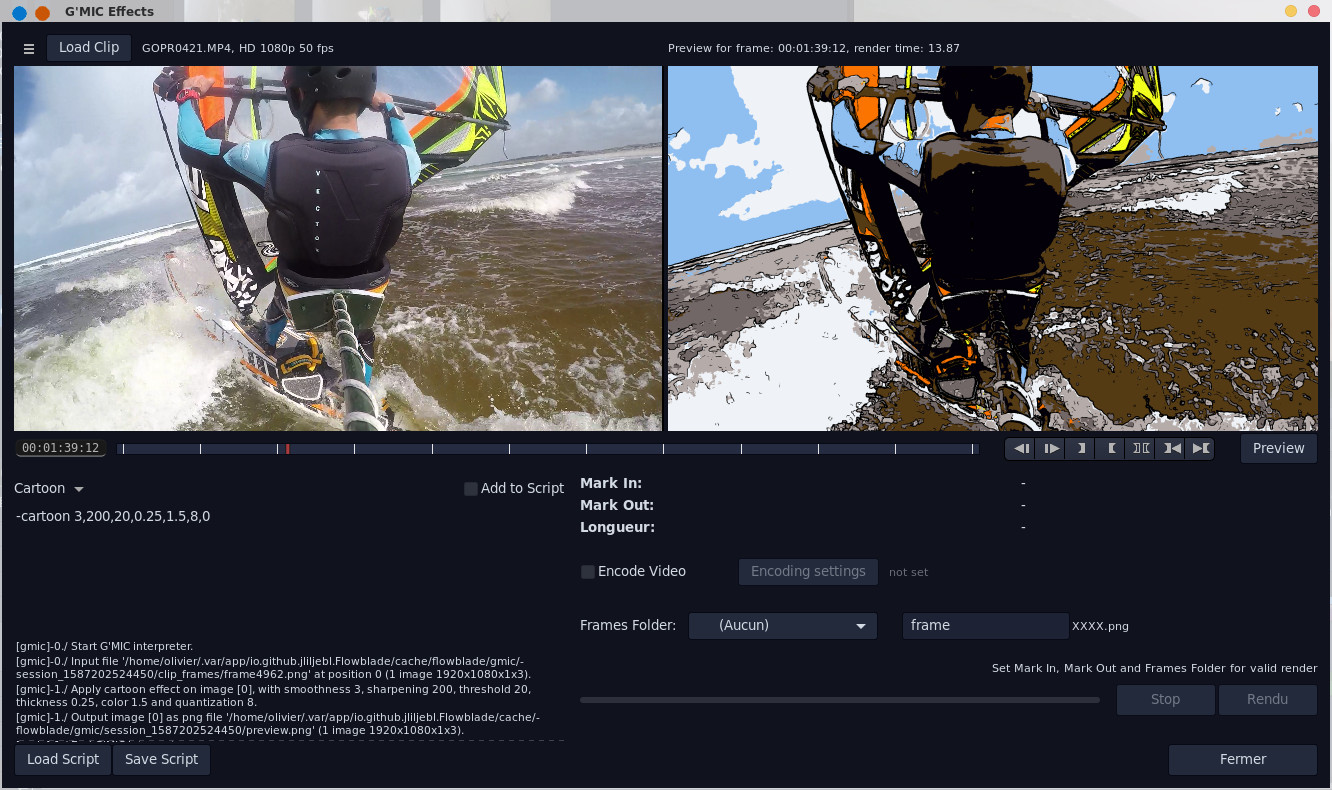
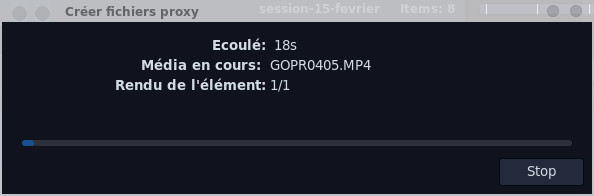
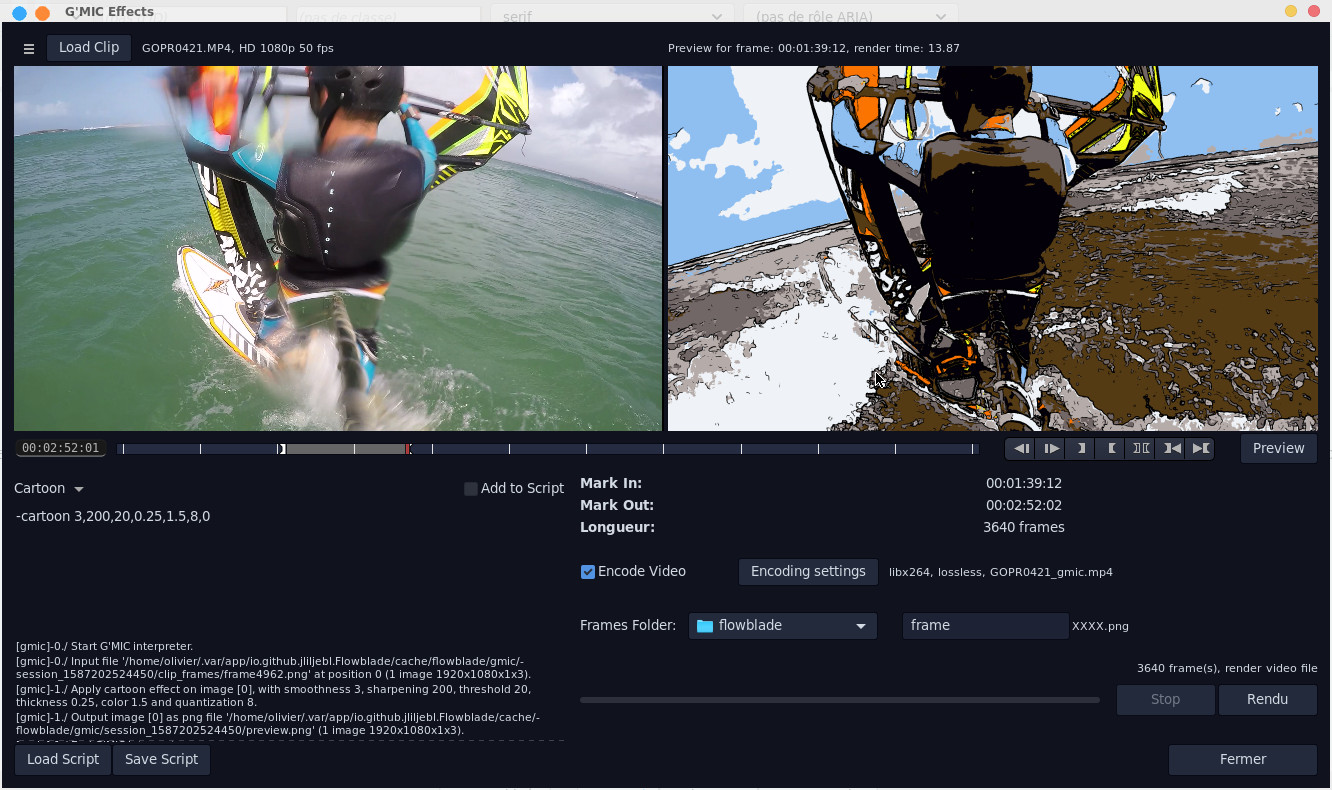
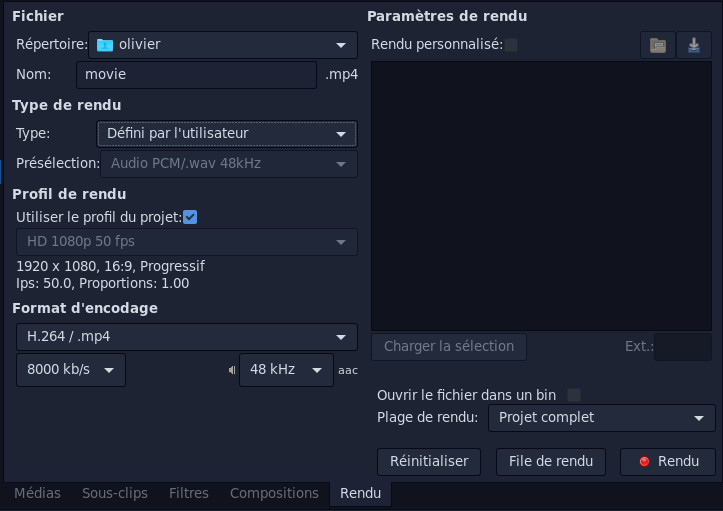
 and Mark Out tools by default it will
generate a series of images that
will have to be reintegrated into
the project, I choose to also
generate a video corresponding to
the selected part of the original
video and with the Cartoon
effect that has been applied. For
this I check Encode
Video, I
enter the destination directory of
the video, the name of the final
video and the rendering parameters
and Mark Out tools by default it will
generate a series of images that
will have to be reintegrated into
the project, I choose to also
generate a video corresponding to
the selected part of the original
video and with the Cartoon
effect that has been applied. For
this I check Encode
Video, I
enter the destination directory of
the video, the name of the final
video and the rendering parameters 
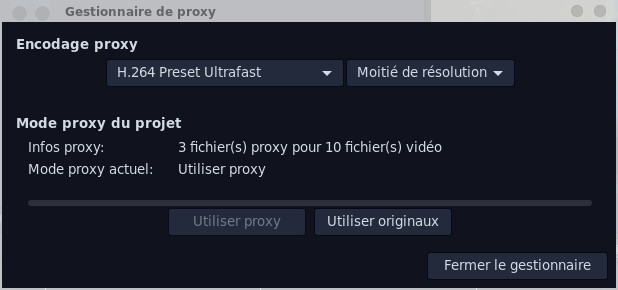
- Slow/fast motion : speed up or slow down a clip
- Reverse : reverse the clip
From the same menu you can add a fade to black when opening or closing.
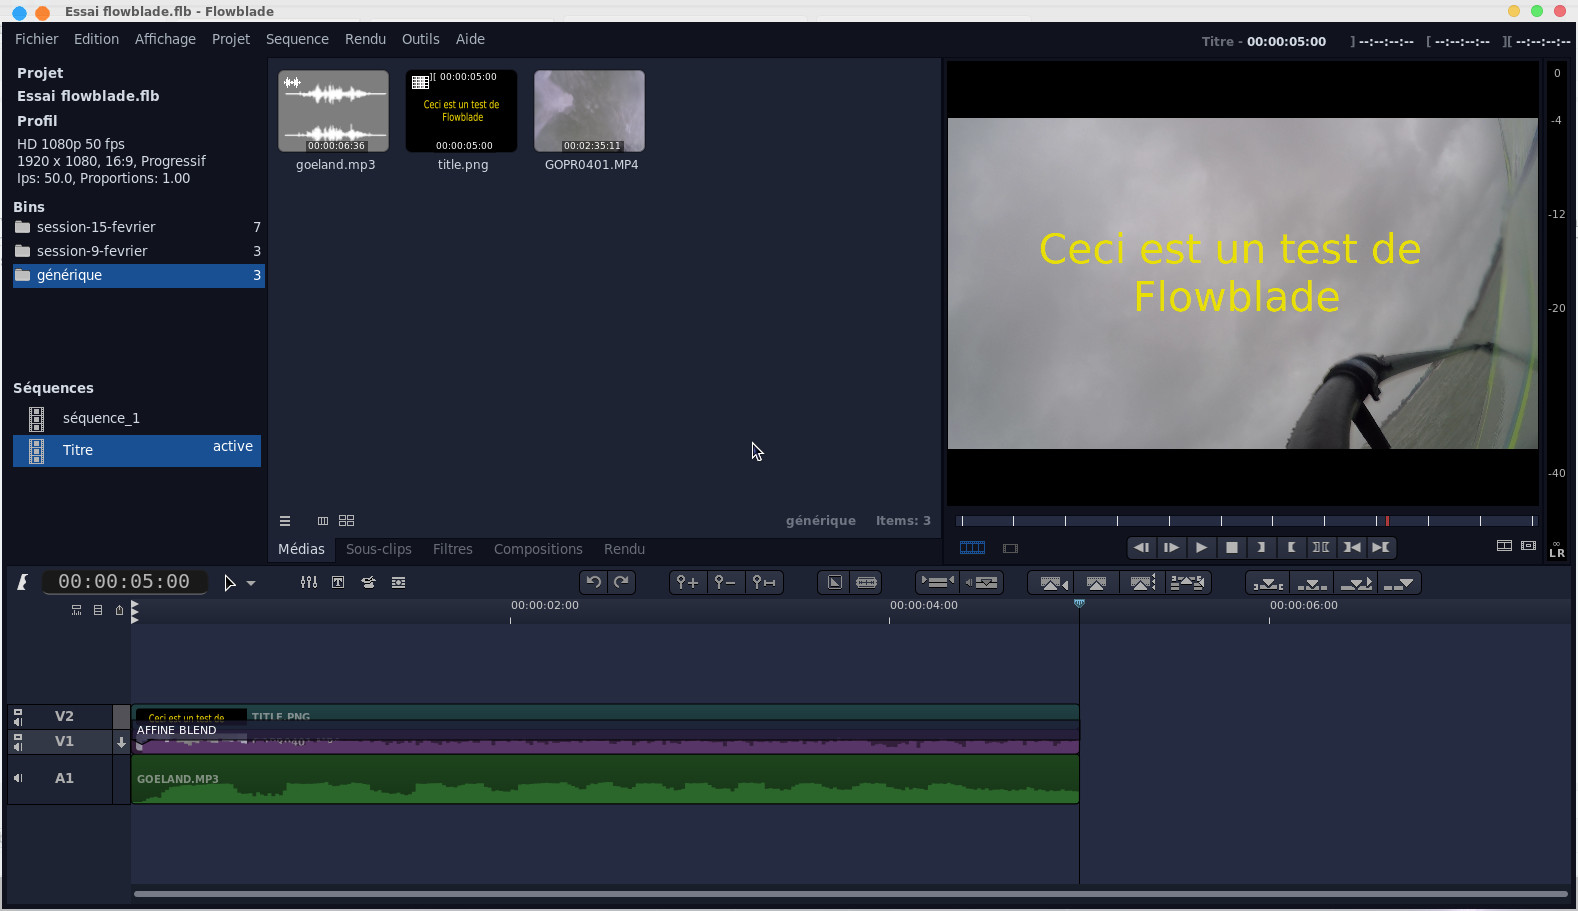
Create a title
 ,
this will also be an opportunity
to illustrate the sequence
functionality with Flowblade.
For now we will therefore create a
really basic intro title with the
titler.
,
this will also be an opportunity
to illustrate the sequence
functionality with Flowblade.
For now we will therefore create a
really basic intro title with the
titler. 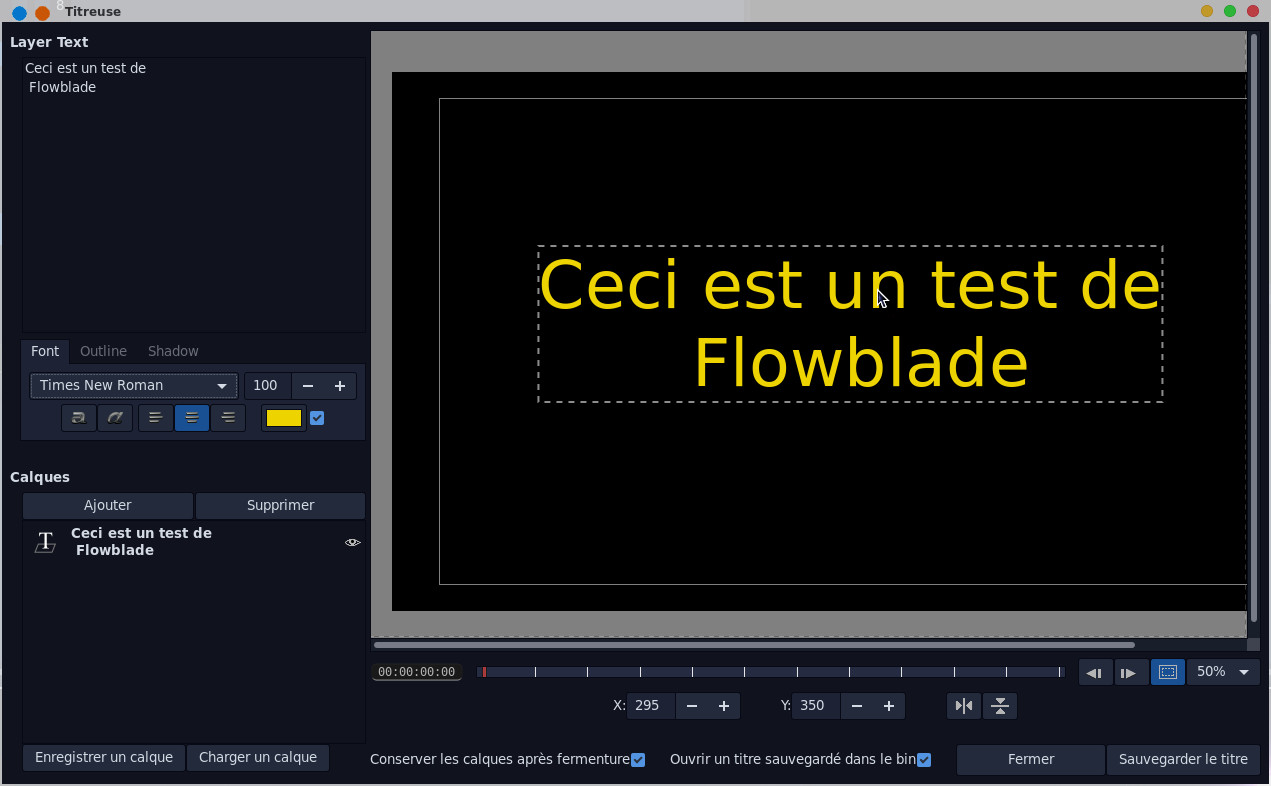
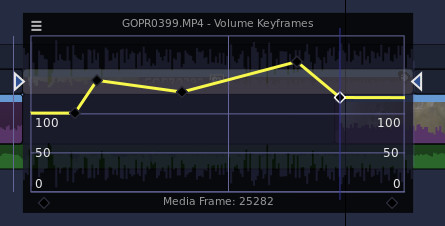
Key images
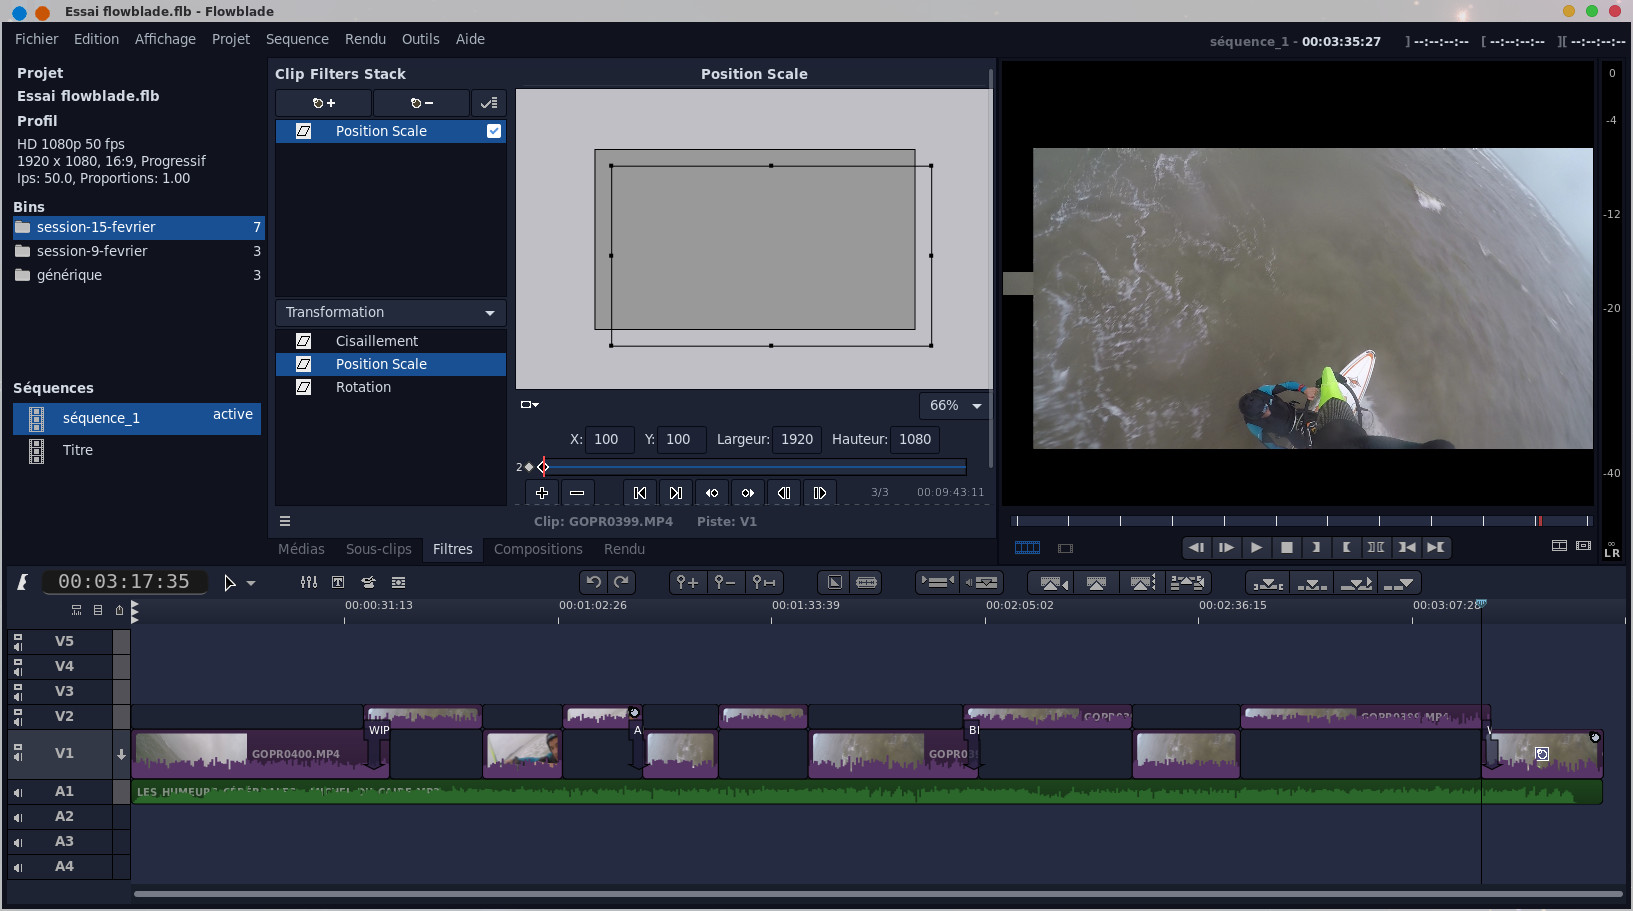

 in
addition to the first one at the
beginning of the clip. The idea is
that between the first and second
keyframe the properties of the
effect do not change, while they
will change between the second and
last keyframe. For the properties
of the last keyframe, I move the
frame in the middle of the Position
Scale
screen completely outside the
monitor. In fact, between the 1st
and 2nd frames, nothing changes
and between the 2nd and last we
will see the image translate
little by little until it
disappears.
in
addition to the first one at the
beginning of the clip. The idea is
that between the first and second
keyframe the properties of the
effect do not change, while they
will change between the second and
last keyframe. For the properties
of the last keyframe, I move the
frame in the middle of the Position
Scale
screen completely outside the
monitor. In fact, between the 1st
and 2nd frames, nothing changes
and between the 2nd and last we
will see the image translate
little by little until it
disappears. 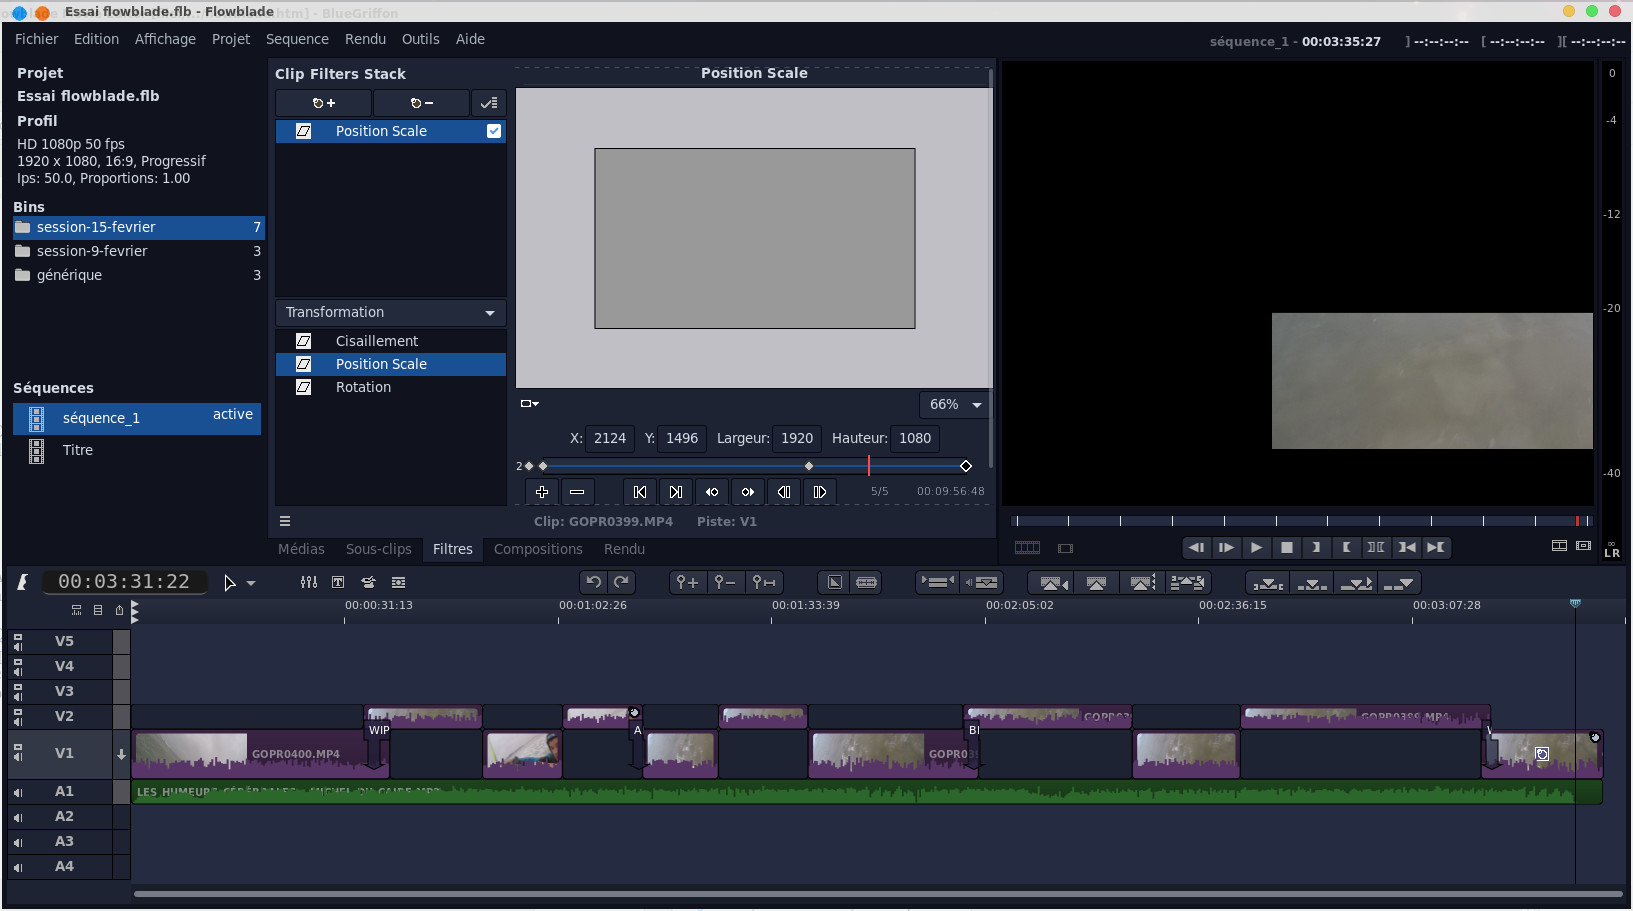
 .
.
 .
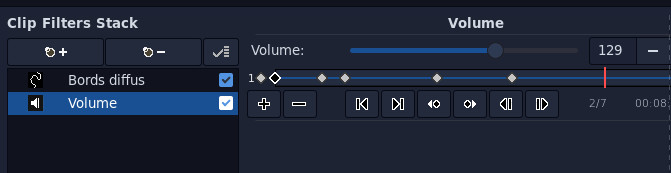
A separate window appears, I
have set the level of the tracks
V1 and V2 to 0.
.
A separate window appears, I
have set the level of the tracks
V1 and V2 to 0. 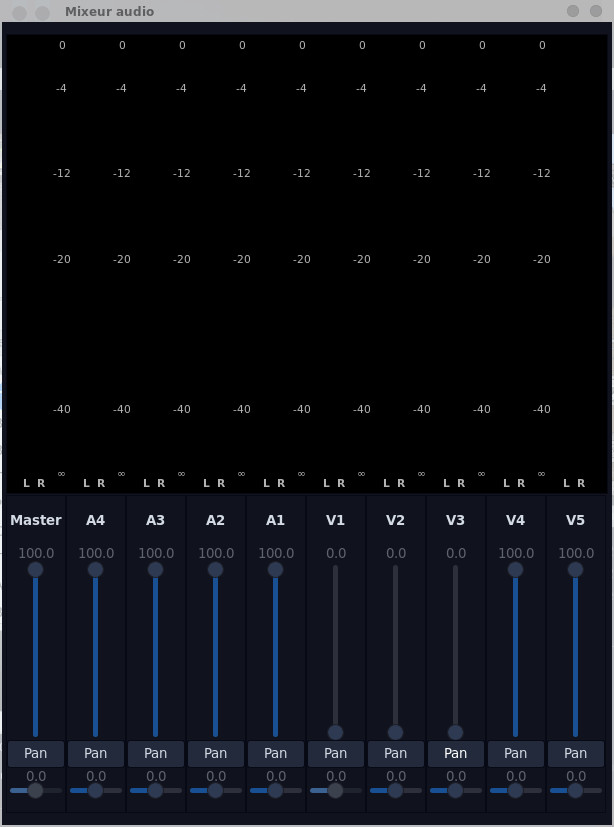
| Back to FUNIX home page ] |