 Welcome
 Linux
Linux Unix
Unix Download
Encourage FUNIX
The consultation of the site is completely free and without advertisements. Donations are nevertheless appreciated to pay for hosting and encourage its author
Multimedia
Video editing
- The basics of video editing
- Installation of video editing software
- Editing your video with Kdenlive
- Editing your video with Cinelerra
- Editing your video with OpenShot Video Editor
- Editing your video with Pitivi Video Editor
- Editing your video with Flowblade Video Editor
- Editing your video with Shotcut
- Installation of video editing software
- Editing your video with Kdenlive
- Editing your video with Cinelerra
- Editing your video with OpenShot Video Editor
- Editing your video with Pitivi Video Editor
- Editing your video with Flowblade Video Editor
- Editing your video with Shotcut
Edit your video with kdenlive
Network and system
Email management
Keyframe Management with Kdenlive
Last modified
August 5, 2024
This site has been automatically translated with Google Translate from this original page written in french, there may be some translation errors
This site has been automatically translated with Google Translate from this original page written in french, there may be some translation errors
Object
This page is
part of a tutorial to explain video editing with kdenlive and which includes the following topics:
Keyframes by example
In the
title of the beginning (or end) that was set up there , we see it appear
suddenly from one frame to another, it would be nicer to
see it appear progressively frame after frame. We will use
keyframes, for that we will place a Composition and
transformation composition under the
title, like this
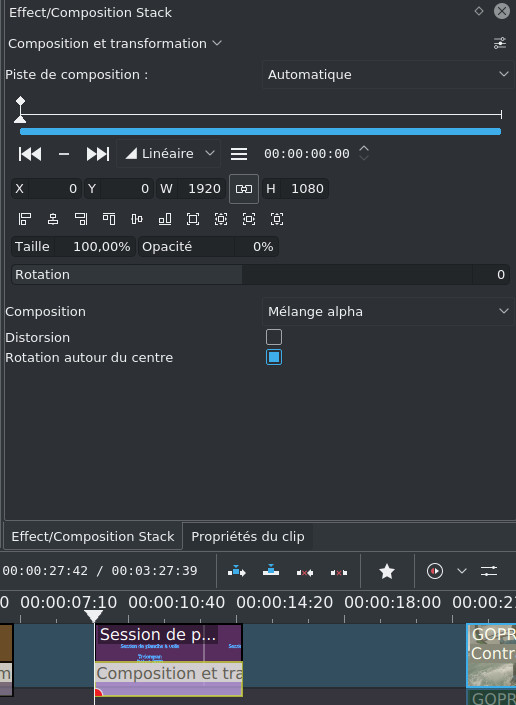
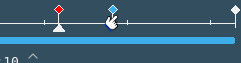
In the
transition properties, we see a cursor on the left, this
position corresponds to the first keyframe which is placed
by default at the beginning of the clip. We will consider
that at this location, the title has not yet appeared, so
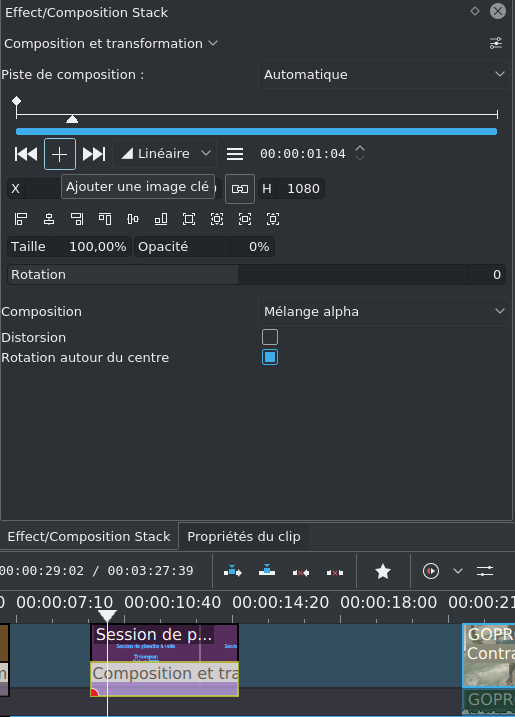
we set an opacity to 0%, we move the cursor a little
further in the transition (from the timeline or at the
transition properties), and we click on the Add a
keyframe cross, at this point the
title will have completely appeared, we put the opacity
back to 100%. The title will appear progressively between
the first and second keyframes.
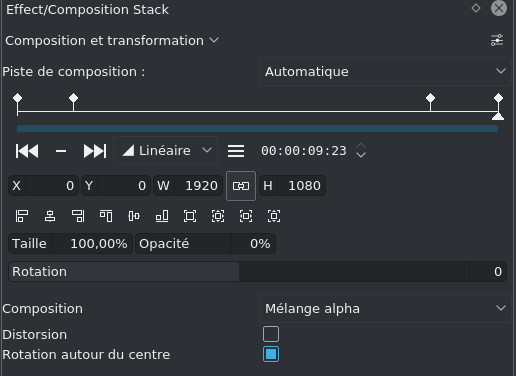
Similarly, we create a 3rd keyframe just before the end
of the title (opacity at 100%) and a keyframe at the
very end of the clip (opacity at 0%), the title will
start to gradually disappear between the 3rd and the
last keyframe. This should give this for the last
keyframe.
You will
notice that you move from one keyframe to another using
the arrows.  With the latest
versions of kdenlive, it could also look
like this
With the latest
versions of kdenlive, it could also look
like this  with the middle icon to
add a keyframe (+) or to delete it (-) and the two side
icons to move respectively to the previous or next
keyframe.
with the middle icon to
add a keyframe (+) or to delete it (-) and the two side
icons to move respectively to the previous or next
keyframe.
With the latest
versions of kdenlive, it could also look
like this with the middle icon to
add a keyframe (+) or to delete it (-) and the two side
icons to move respectively to the previous or next
keyframe. To see
if everything is working, if we place ourselves for
example between the 3rd and the last key frame, we can
see the title gradually fading.

Even more
powerfully, at the timeline level, you can play on
the position of the key frames and even the opacity
value by moving the points that materialize the key
frames. In the image below, for the second key frame
which is now lower, the opacity has thus increased
to 66% instead of 100%.
You can add a
keyframe by double-clicking directly in the
transition in the timeline.
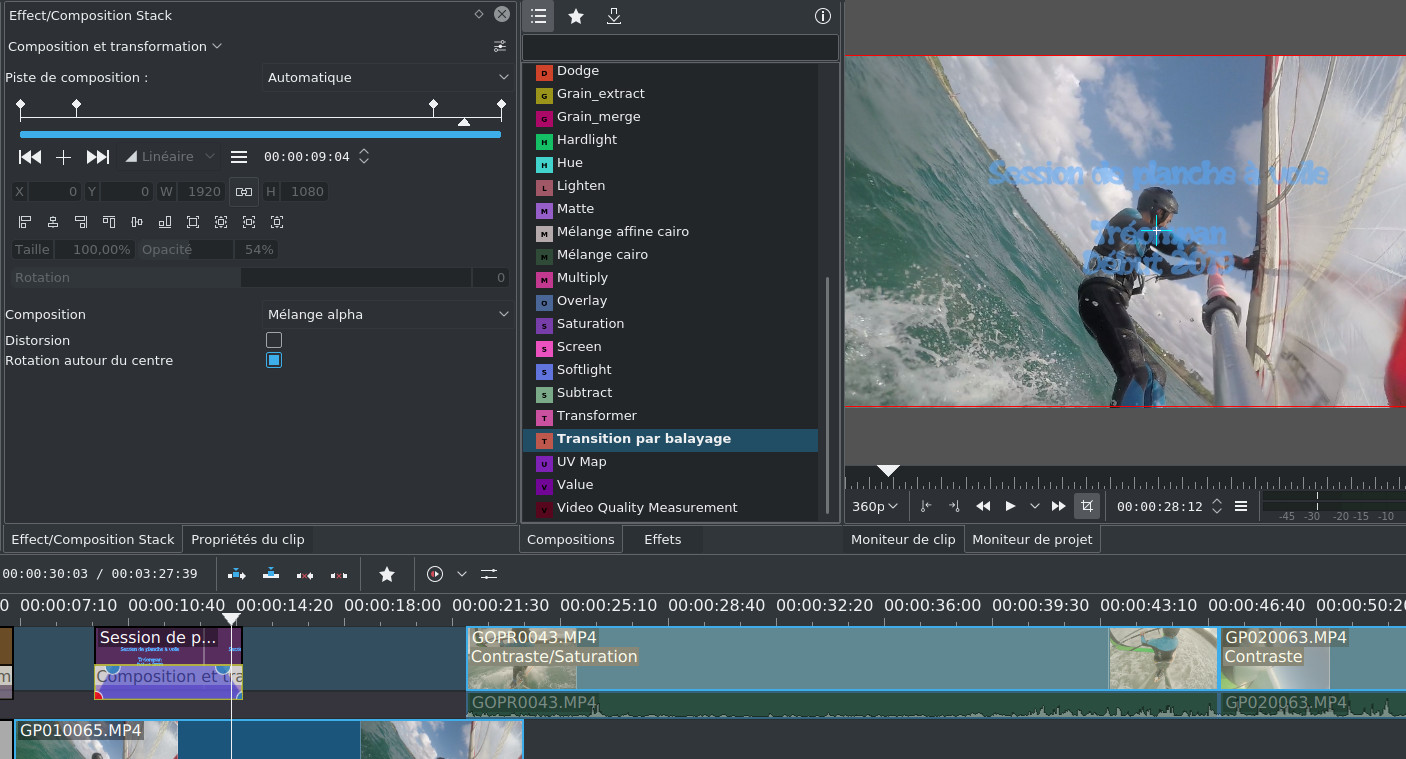
We find the
possibility of creating key frames for many
transitions and certain effects (rotoscoping for
example), it is during the transition to be able to
create stopping points which will lead to an
evolution of the clip. In the example above, we
changed the opacity parameter, but we can also
change the size of the image, make it rotate, or I
don't know what else.
You can select
multiple keyframes at once and move them, just hold
down the SHIFT key and encompass the keyframes to
move
Then we move by drag
and drop the one marked in red
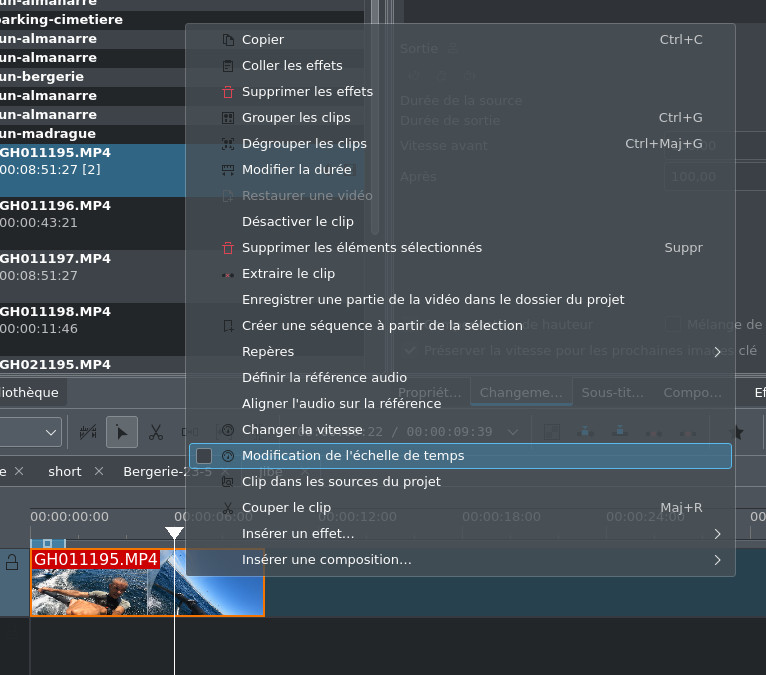
The Time Remap
function mentioned in the effects
section also uses
keyframes. First, we activate its display
To enable it for
a clip in the timeline, check the Change Time
Scale box from the
context menu
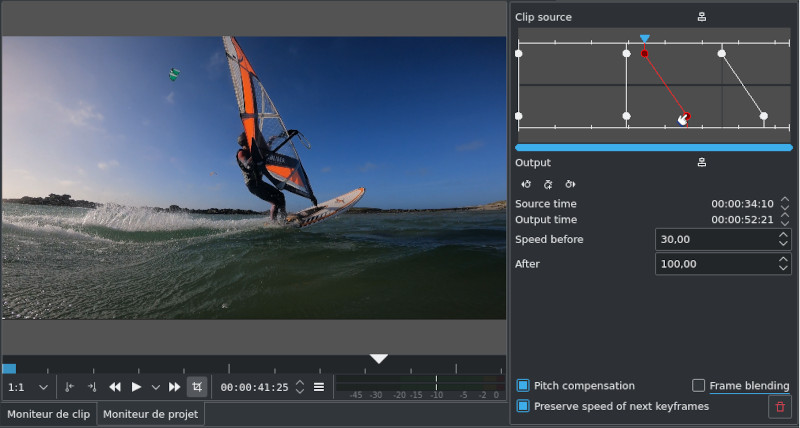
We will simply
slow down a part of the clip to 30%, for this in
the configuration parameters of the effect, we
will place a first key frame at the beginning of
the clip to slow down and a second key frame at
the end of the part to slow down, as a reminder by
clicking on  we create the key
frame, with
we create the key
frame, with  we move to the
previous key frame and with
we move to the
previous key frame and with  we move to the
next key frame. We place ourselves at the second
key of the end of the part to slow down and in the
Speed
before field, we put
30. You see that the last line has taken an angle,
if we now switch to visualization at the timeline
level, the blue line marks the visualization and
it also takes an angle at the time of slowing
down.
we move to the
next key frame. We place ourselves at the second
key of the end of the part to slow down and in the
Speed
before field, we put
30. You see that the last line has taken an angle,
if we now switch to visualization at the timeline
level, the blue line marks the visualization and
it also takes an angle at the time of slowing
down.
we create the key
frame, with we move to the
previous key frame and with we move to the
next key frame. We place ourselves at the second
key of the end of the part to slow down and in the
Speed
before field, we put
30. You see that the last line has taken an angle,
if we now switch to visualization at the timeline
level, the blue line marks the visualization and
it also takes an angle at the time of slowing
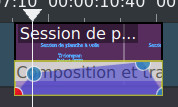
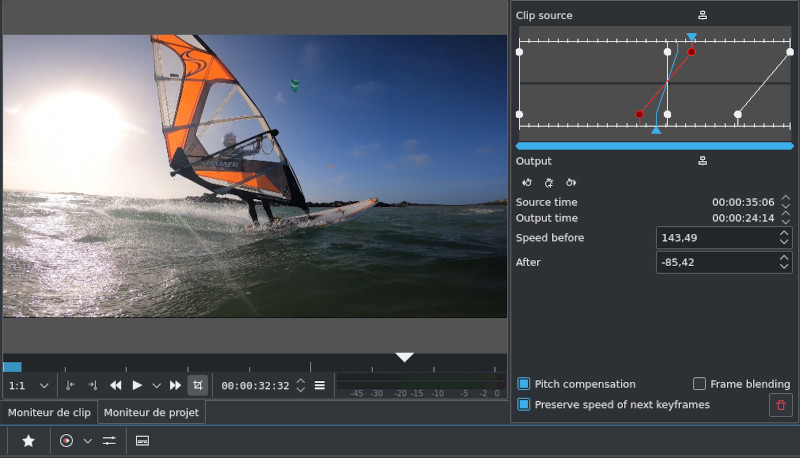
down. You can play on
the slowdown by moving the red button with the mouse
materialized by the hand above. Note a funny little
thing, when we move this red point backwards, before
the first key frame. In this case the clip will play
normally until the second key frame, then the clip
will play in reverse (reverse video) at slow speed
until the first key frame and resume its course at
normal speed.
| Back to FUNIX home page ] |