 Welcome
 Linux
Linux Unix
Unix Download
Encourage FUNIX
The consultation of the site is completely free and without advertisements. Donations are nevertheless appreciated to pay for hosting and encourage its author
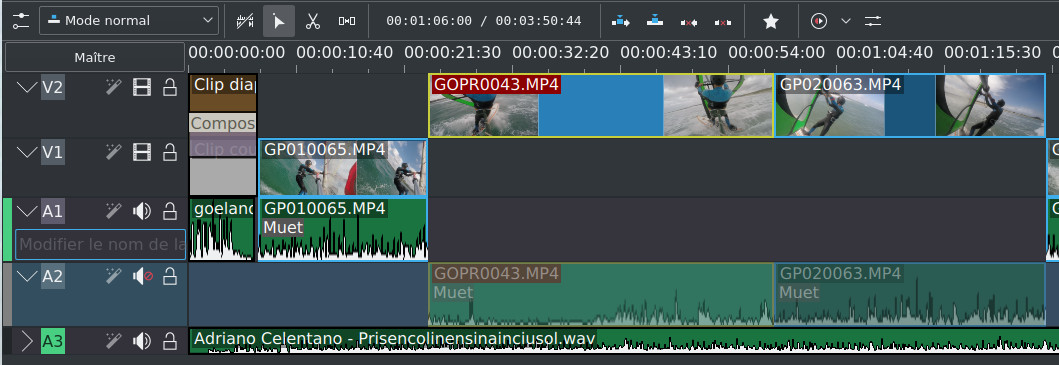
Multimedia
Video editing
- The basics of video editing
- Installation of video editing software
- Editing your video with Kdenlive
- Editing your video with Cinelerra
- Editing your video with OpenShot Video Editor
- Editing your video with Pitivi Video Editor
- Editing your video with Flowblade Video Editor
- Editing your video with Shotcut
- Installation of video editing software
- Editing your video with Kdenlive
- Editing your video with Cinelerra
- Editing your video with OpenShot Video Editor
- Editing your video with Pitivi Video Editor
- Editing your video with Flowblade Video Editor
- Editing your video with Shotcut
Edit your video with kdenlive
Network and system
Email management
[ Object , add an effect , manage your favorite effects , customize your effects , some effects ( slowdown and acceleration effect , effect to adapt to the video format of a phone , motion tracking effect , animation effect with Glaxnimate ]
Applying effects with Kdenlive
Last modified
August 2, 2024
This site has been automatically translated with Google Translate from this original page written in french, there may be some translation errors
This page is part of a tutorial to explain video
editing with kdenlive and which includes the following topics:
This site has been automatically translated with Google Translate from this original page written in french, there may be some translation errors
Object
Add an effect
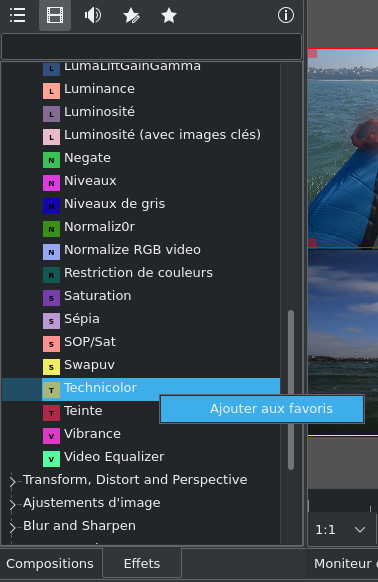
Now we are going to add an effect to a clip, in the top tab Effects you have a whole stock of them sorted by category. By clicking on you have the list of main effects
By
clicking on  you have the exhaustive
list of effects
you have the exhaustive
list of effects
you have the exhaustive
list of effects 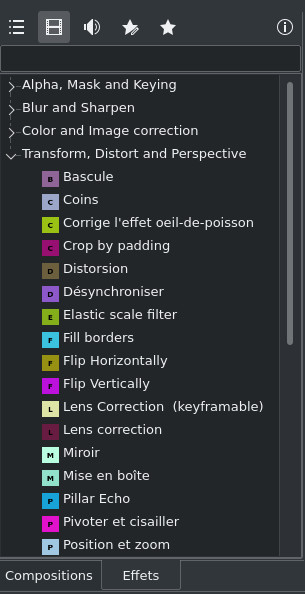
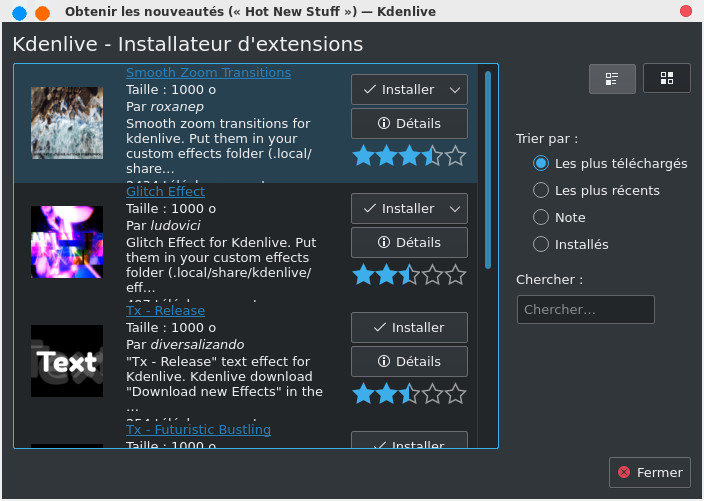
And if
that's still not enough, you can download effects made
available by the community with the download icon that
appears on the far right  and you can then
download the effect that interests you.
and you can then
download the effect that interests you.
and you can then
download the effect that interests you.
You can
also access the full effects set from the Edit->Add Effect menu and this is what
it looks like just for the Equalizers and
Filters effects
.

Note
that you can apply an effect to all clips on all tracks,
just click on the Master button (bottom left,
below), then drag the effects you want into the Master rectangle of the
timeline, here Contrast and Saturation, in the effects stack,
I find my Global
Effects
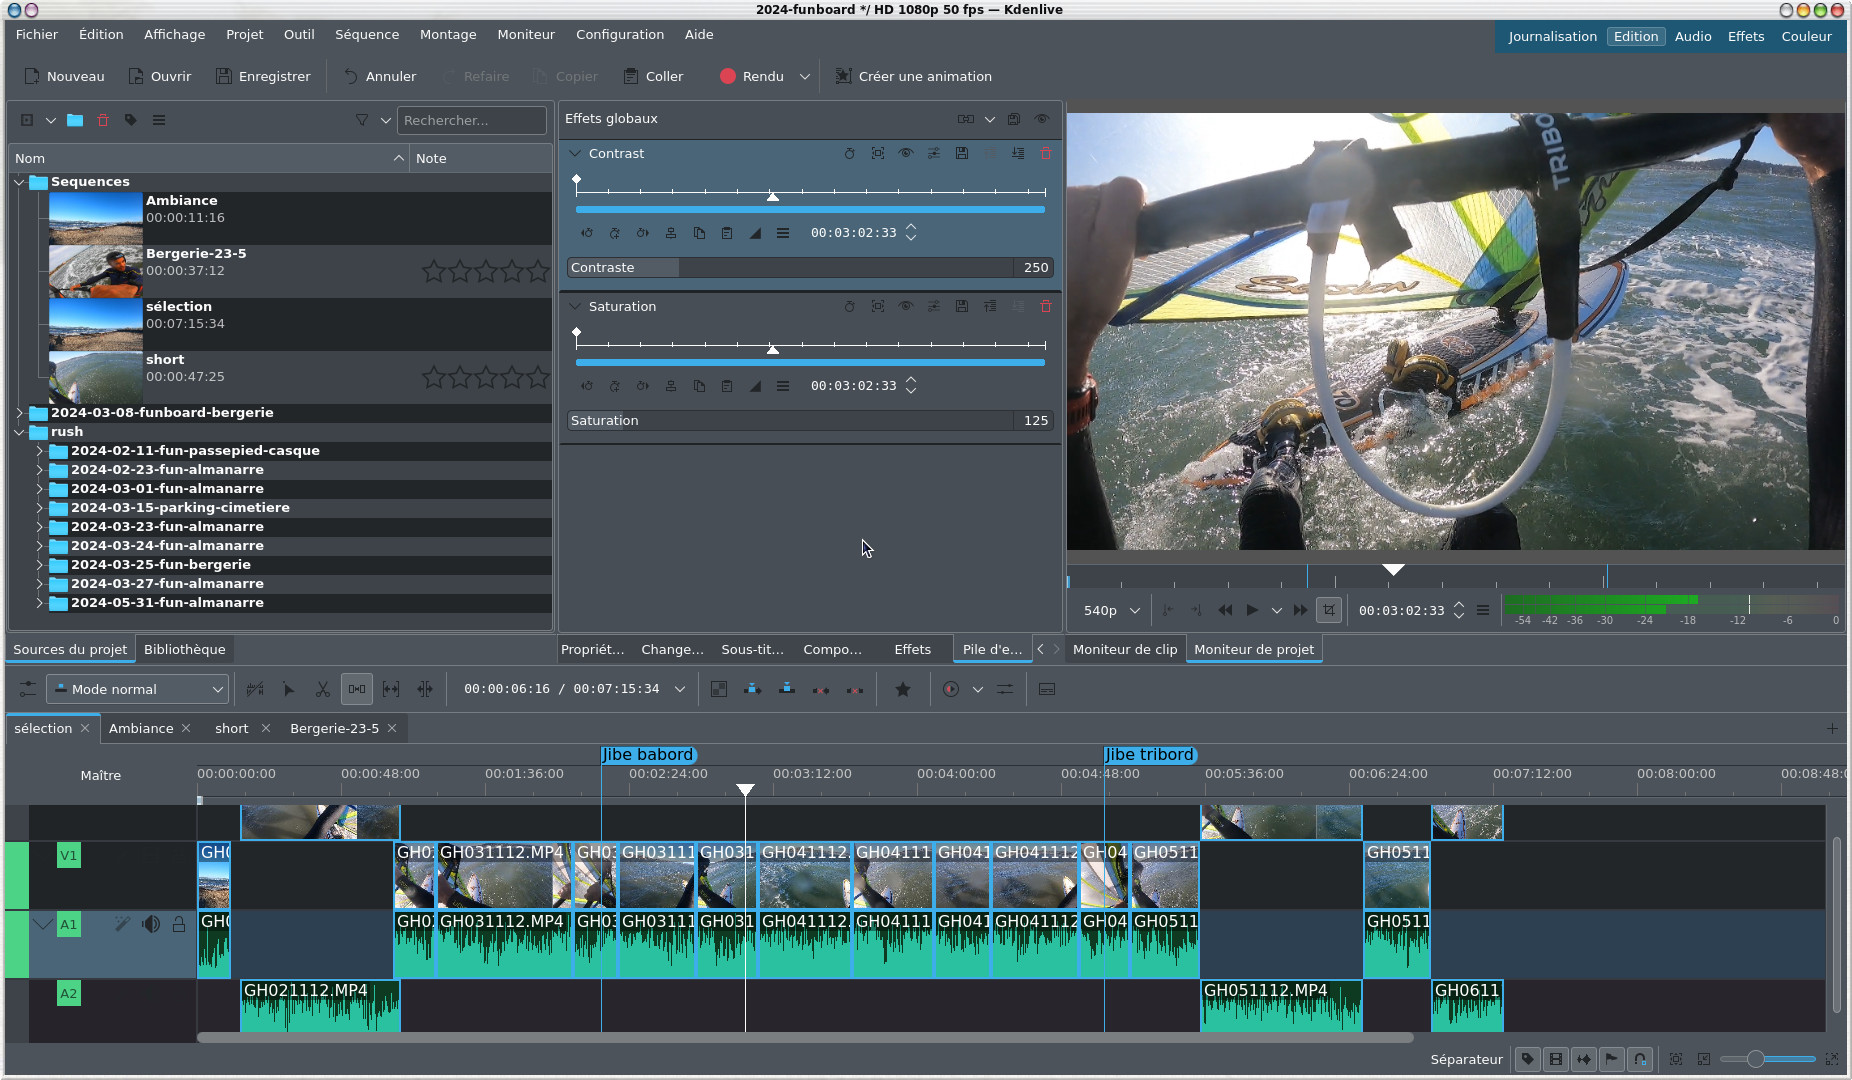
To
return to the display of the Global Effects, you will have to
click on the Master button of the
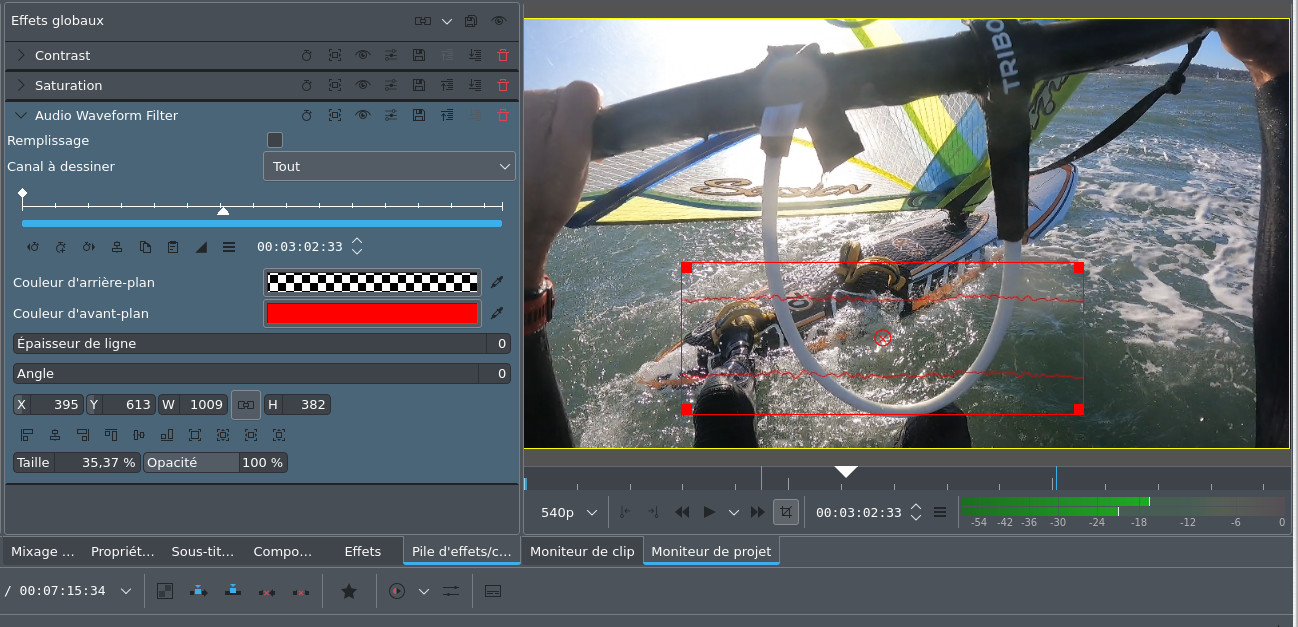
timeline. Another illustration to have fun, we will
choose the audio effect Audio wave filter that we will place in
the Global
Effects, in
practice this allows you to see the waveforms of the
stereo audio band displayed superimposed on the video,
we will just have a few adjustments of position, size
and color to make.
You can
also disable the effect on a clip by clicking on the
name of the effect which appears superimposed on the
clip in the timeline.
Let's go
back to the effects that appear in the Effects tab, we're going to
add a Contrast effect, we're going to
drag it onto the clip that interests us, we're then
going to play on the effect parameters from the effect
properties that appear in the Effects/Compositions
Stack tab.
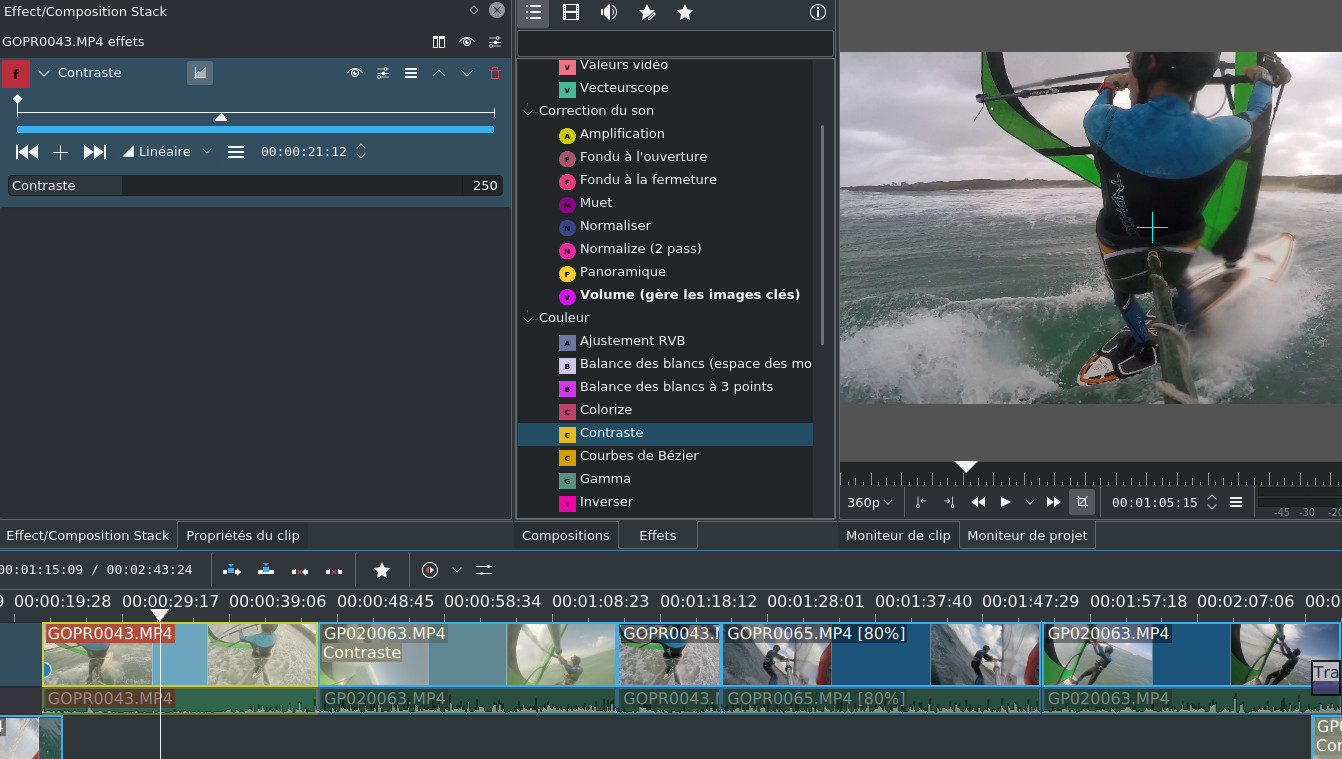
To see
what it looks like, just click on the first button in
the series of icons in the clip properties. Here we will
have chosen the Contrast and Saturation effects. In the project
monitor we can clearly see the difference.
effects. In the project
monitor we can clearly see the difference.
effects. In the project
monitor we can clearly see the difference. 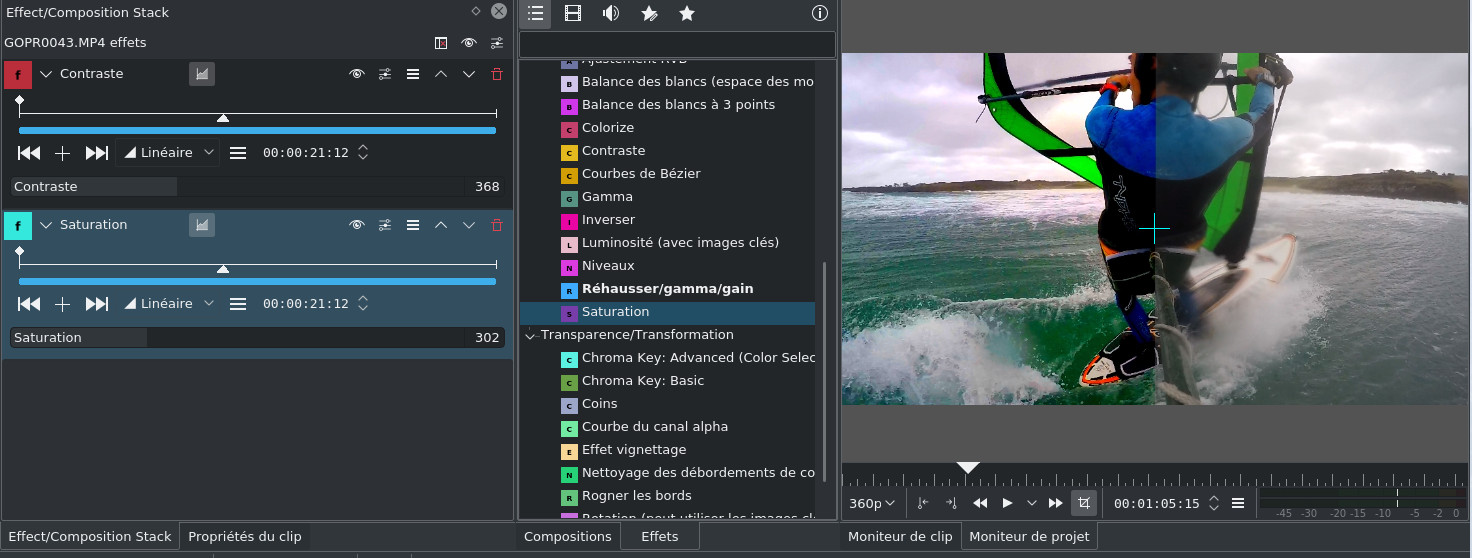
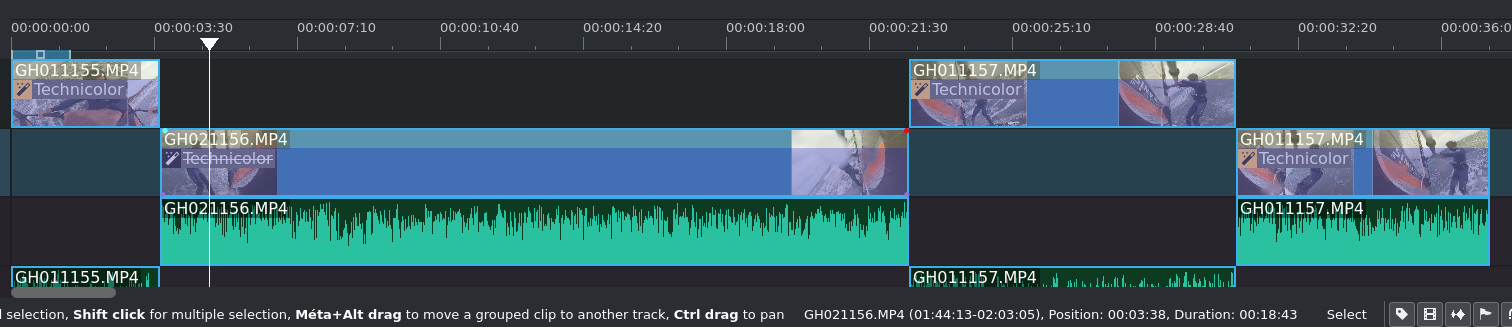
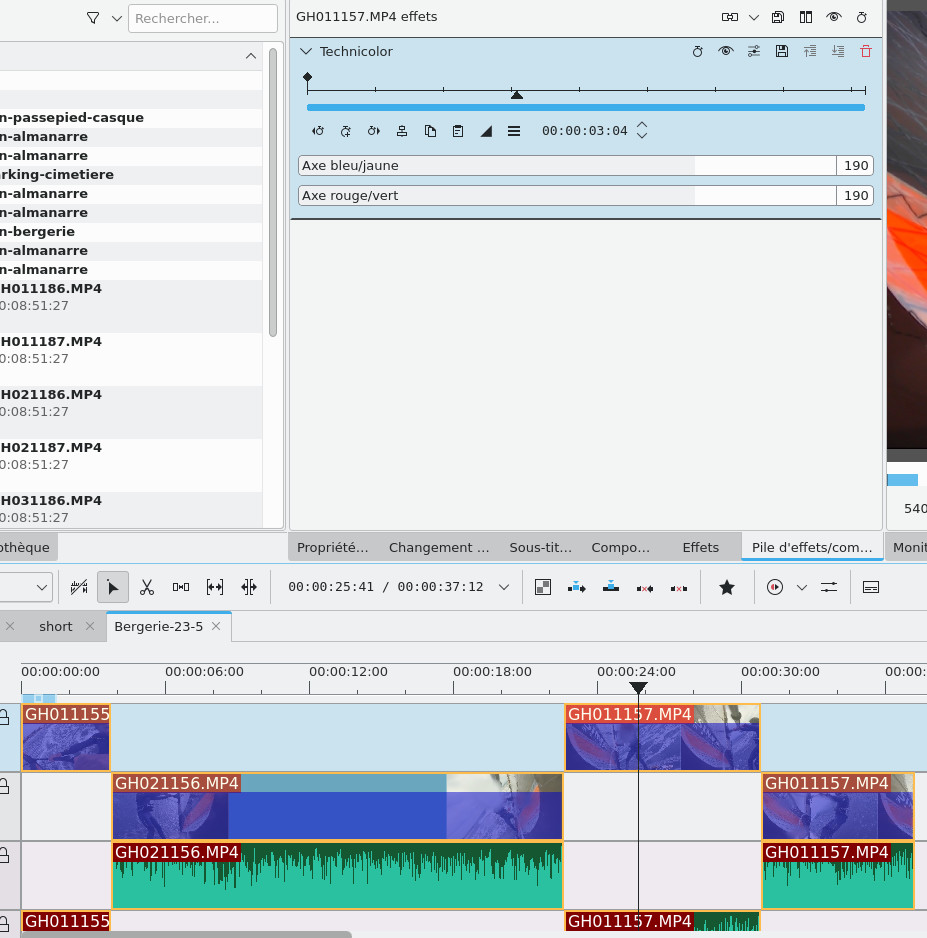
The sound of the
audio tracks may overlap with our soundtrack, we will
choose to deactivate them by clicking on the small
speaker at the audio track level.
On the other hand,
if you do not want to mute all the clips on the track,
you can select the clips to mute on the track (and
only those) by adding an audio effect Volume and
dynamics->Mute. This will give
something like this on the audio track A1, the first clip is
audible and the others have a Mute effect, the audio
track A2 is completely muted.
It's
starting to be a lot of effects, and it's easy to get
lost, so I recommend that you select the effects you use
the most and put them in favorites. To do this, simply
display the complete list, select the desired effect and
add it to your favorites using the context menu.
Now if
we click on  we only access the
audio effects, the button
we only access the
audio effects, the button  allows access to the
custom effects
allows access to the
custom effects
we only access the
audio effects, the button allows access to the
custom effects 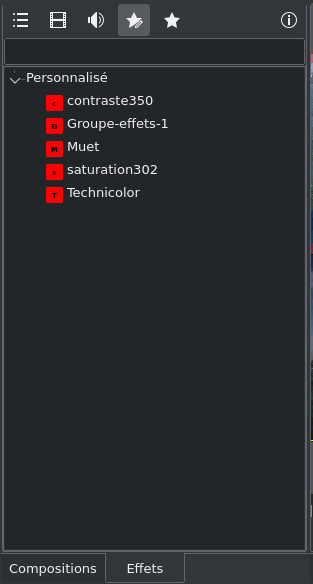
We will
see a little later how to customize the
effects. Finally, the button  allows you to access
your favorite effects
allows you to access
your favorite effects
allows you to access
your favorite effects 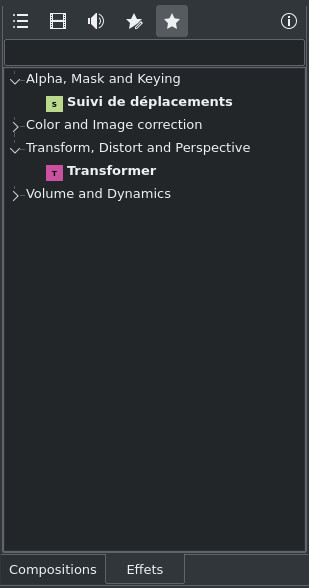
From
version 24.02 onwards, you can apply an effect to
several clips from different tracks. Simply select them
on the timeline and then click on the tool  to select a favorite
effect that you can drag and drop onto the selection,
which will automatically apply to all selected clips.
to select a favorite
effect that you can drag and drop onto the selection,
which will automatically apply to all selected clips.
to select a favorite
effect that you can drag and drop onto the selection,
which will automatically apply to all selected clips. 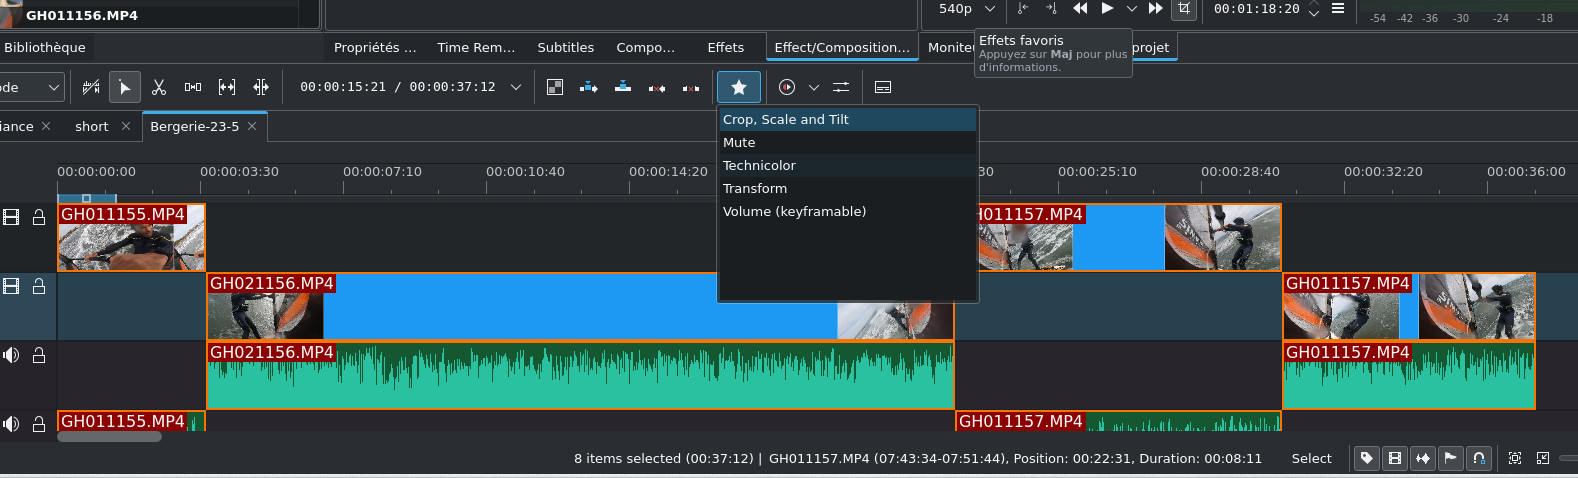
Starting
from version 24.05, you can change the effect parameters
for all selected clips.
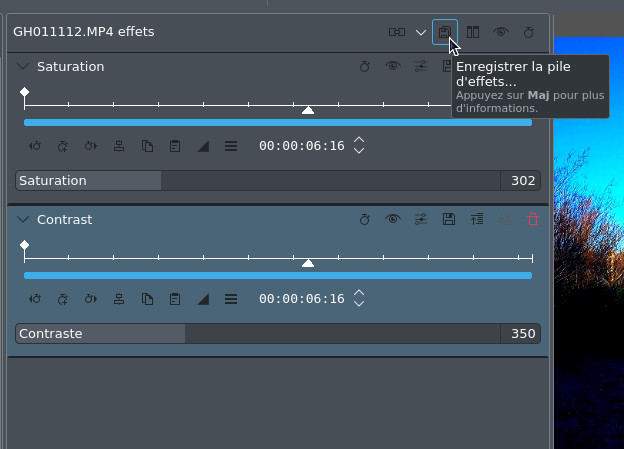
Most of
the time we will use the same effects with the same
settings, it is then useful that they are more easily
accessible, we will already save them with the custom
settings. Example
below with the Saturation effect that we will
save with the value 302 from the floppy disk button
pointed by the mouse
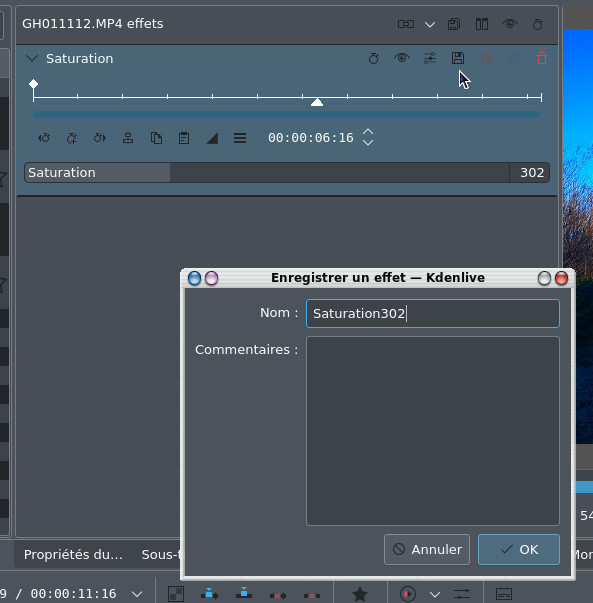
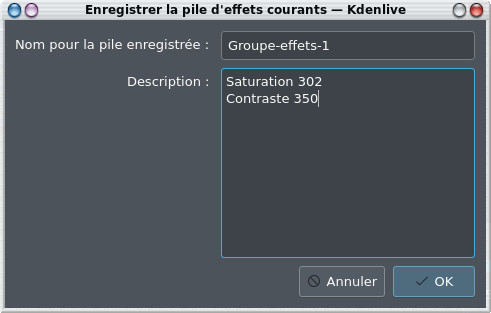
We save
it under a custom name (for me simply Saturation302 ), the custom effects
will then be accessible by clicking on the tool  in the Effects tab.
in the Effects tab. 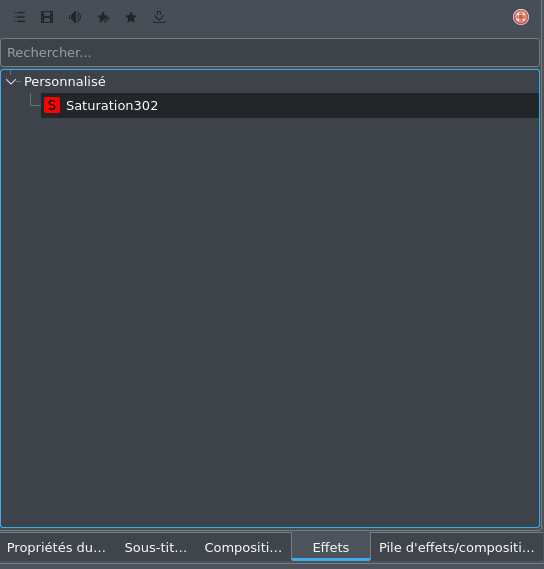
It can
then be added to the favorite effects accessible via the
 timeline button
timeline button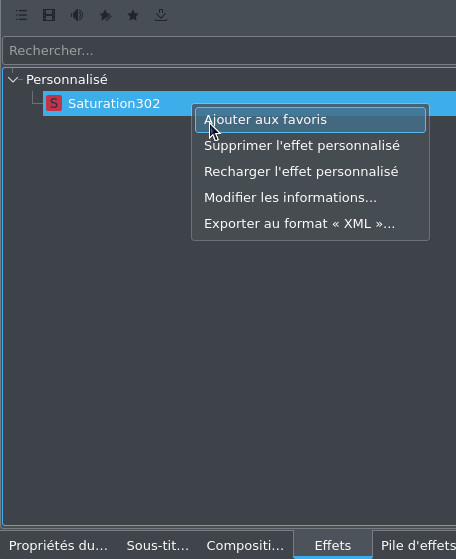
Even
better, you systematically apply the same effects, you
can create groups of effects with custom settings that
you can reuse and apply to other clips at will. For
this, to my Saturation302 effect I add a Contrast350 with custom settings
and we save the stack of effects Save the stack of
effects... I call it Group-effects-1
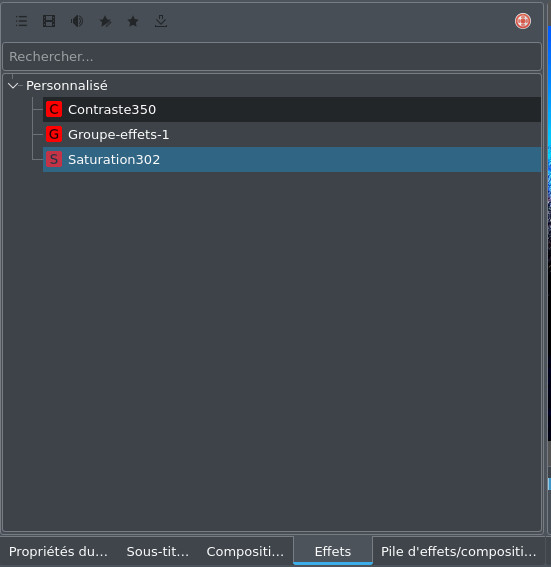
We find
our group of effects in the Effects tab which we can also add
to favorites and apply (by simple drag and drop) to the
clips in the timeline.
To slow
down or speed up an audio or video clip, from the
context menu click on Change speed
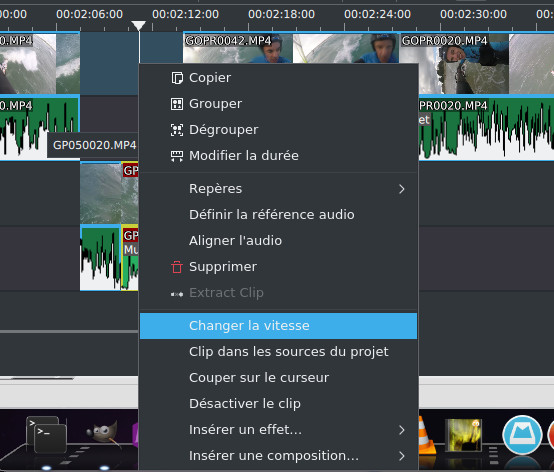
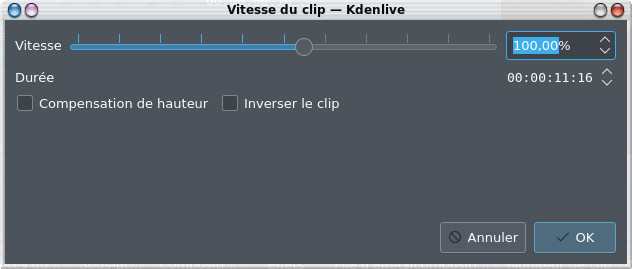
if we choose to slow
down the clip (with a speed lower than 100) will be
longer it will be necessary to make room to the right
of the clip by moving the clips that follow on the
timeline (or by moving them to another track). Also
note the option that allows you to reverse the clip as
mentioned above and the Pitch Compensation option which allows
you to limit sound distortion.
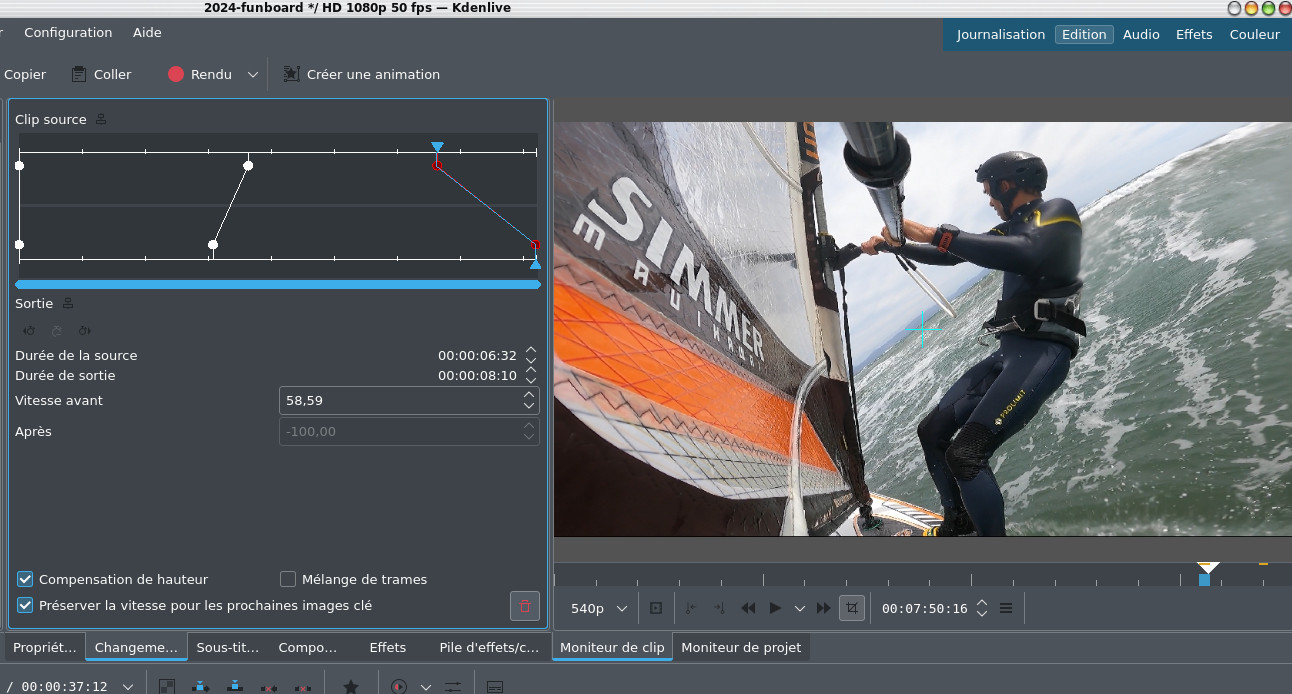
Note the appearance
of the Time
scale modification function ( Time
remap in English)
accessible from the context menu by clicking on a clip
in the timeline, or via the View->Duration
change menu,
which allows much finer management of the clip speed
and which uses the key frames that we will see later.
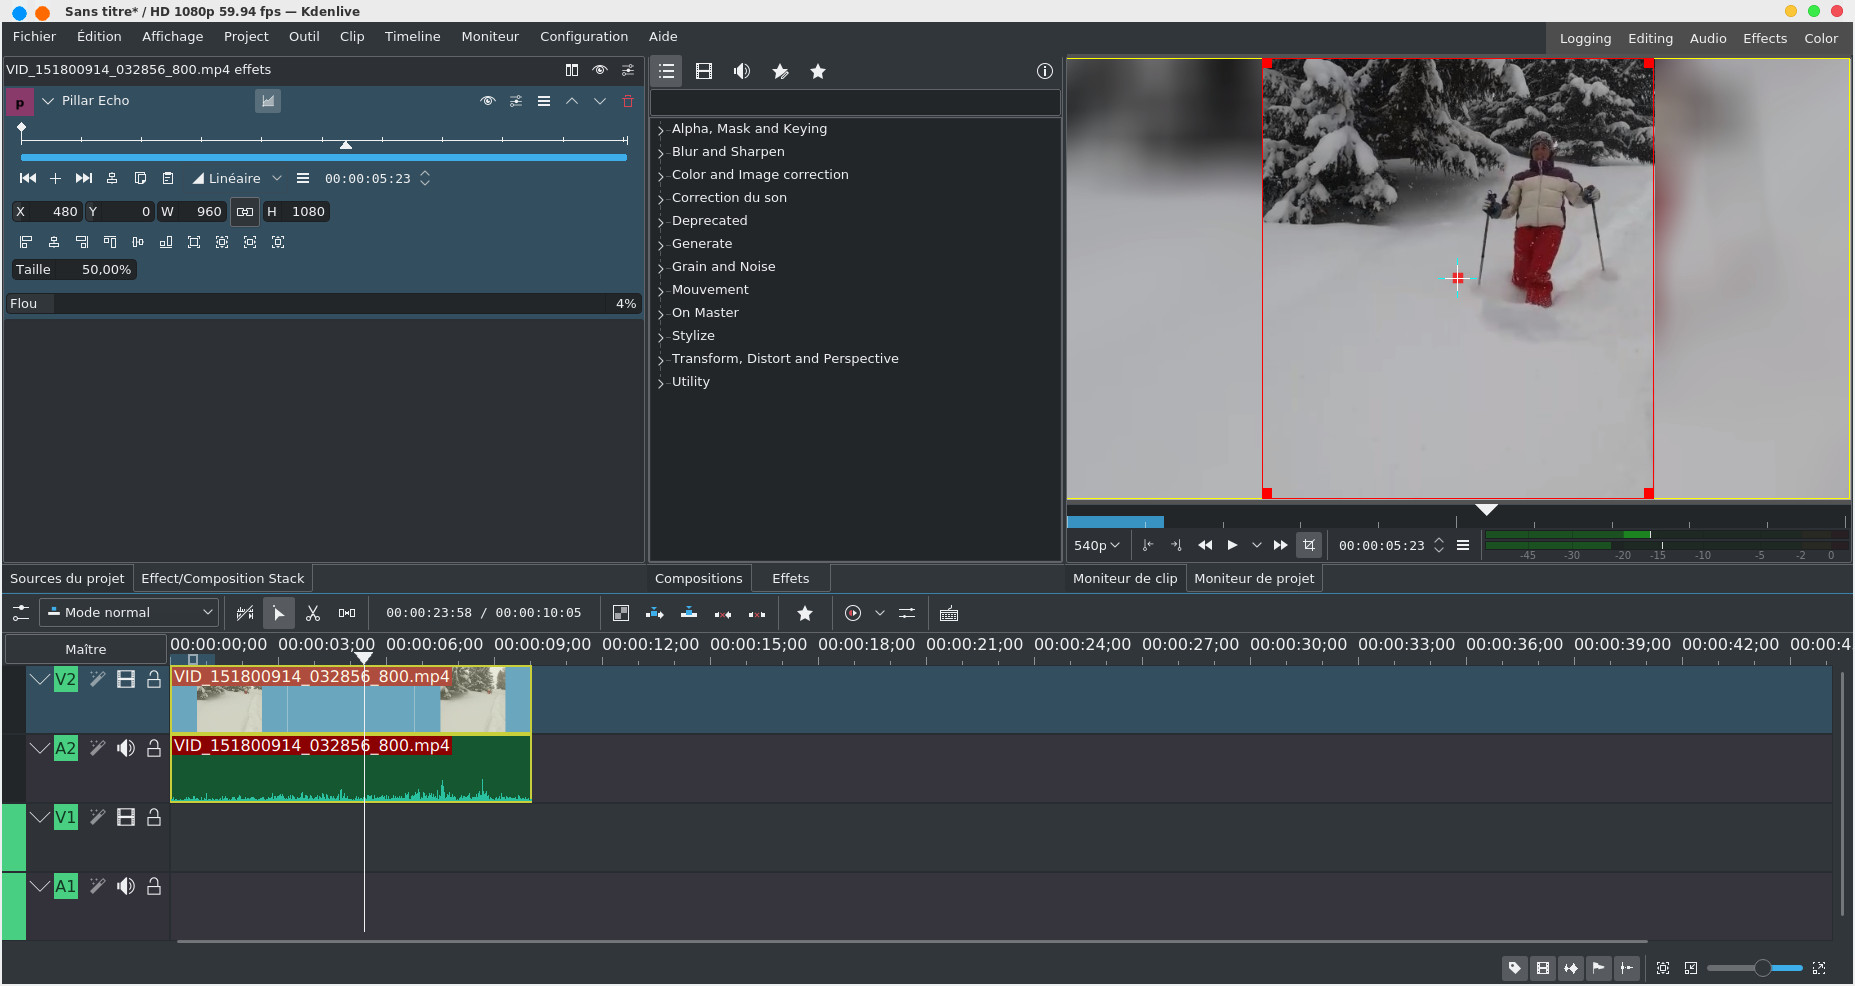
The Pillar Echo effect is interesting for
portrait sized videos from a mobile phone, it will
automatically fill the black bars on the right and
left if your project is landscape sized.
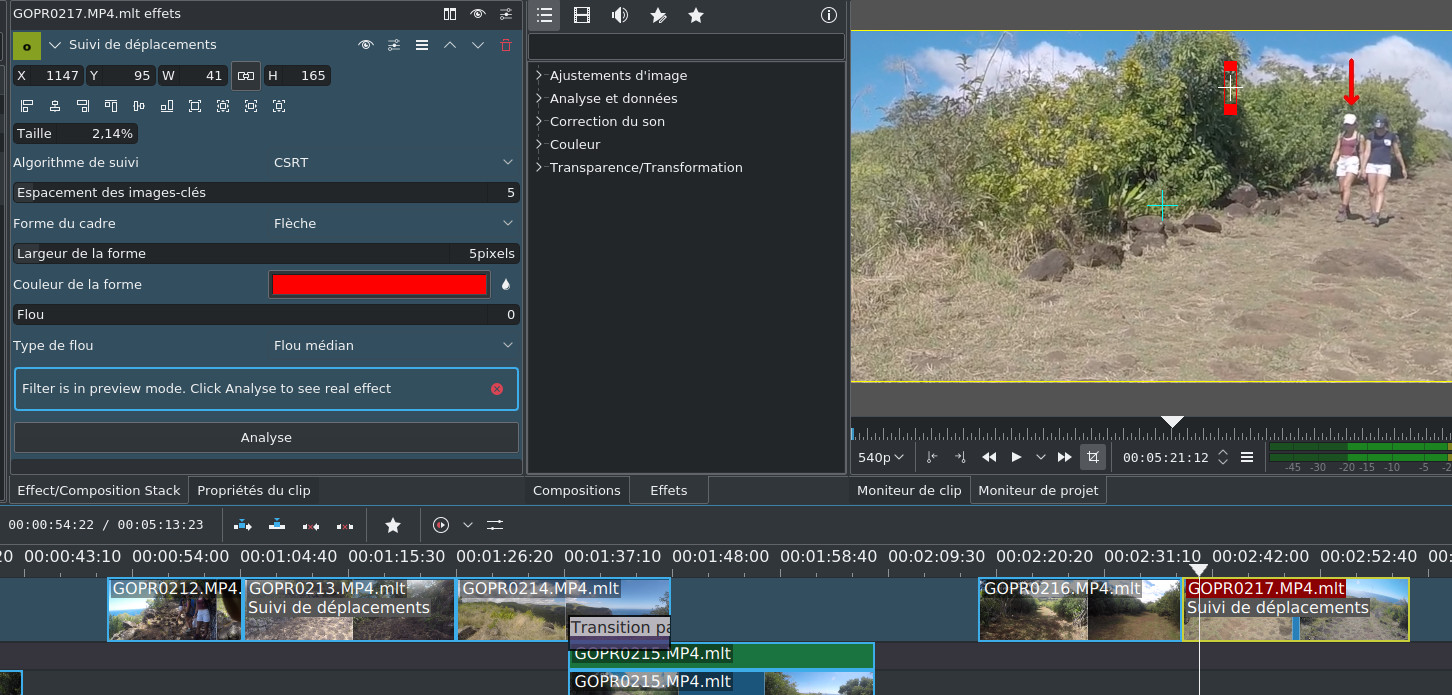
Still
in the category of effects, we can also use the
motion tracking effect . In the example below, we
display a red arrow above a person to follow. At the
beginning of the clip, we must frame the object to
follow, choose an algorithm and see what it gives, then
click on Analysis
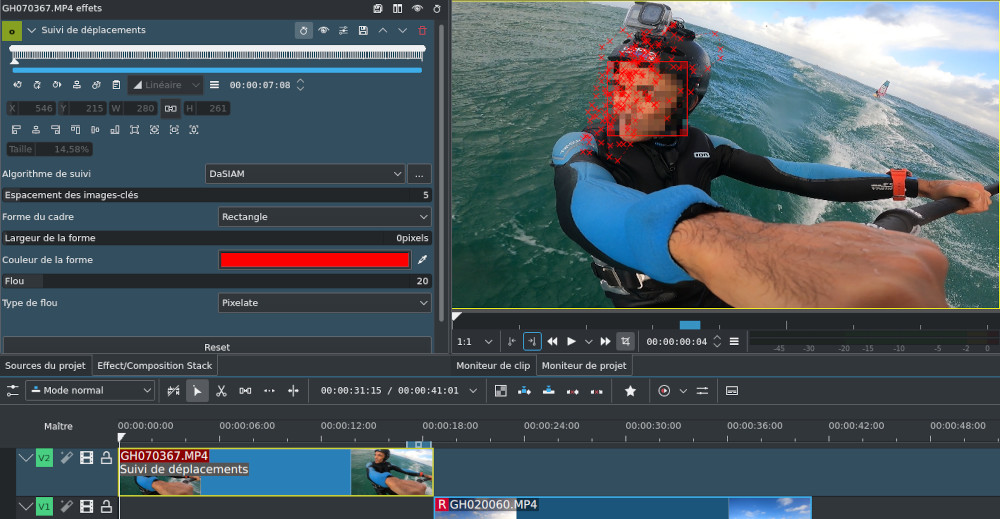
Motion
tracking is notably used to blur a face.
This
effect is enhanced by the DaSiamRPN algorithm or in other
words Distractor-aware Siamese Networks for Visual
Object Tracking. You will need to follow the
instructions given here https://docs.kdenlive.org/en/effects_and_compositions/video_effects/alpha_mask_keying/motion_tracker.html you will first need to
retrieve files with the .onnx extension and then
place them in the homedirectory under ~/.local/share/kdenlive/opencvmodels with an opencvmodels directory that you
will probably need to create beforehand.
When you
click on Analysis , the effect will
generate a large number of key frames that correspond to
the spacing that has been set (here 5), you will have to
manually move from key frame to key frame to check that
the algorithm has worked well because at times it can go
off the rails and not place the shape of the frame (here a
rectangle) properly, in this case you have to help it a
little and replace the shape correctly.
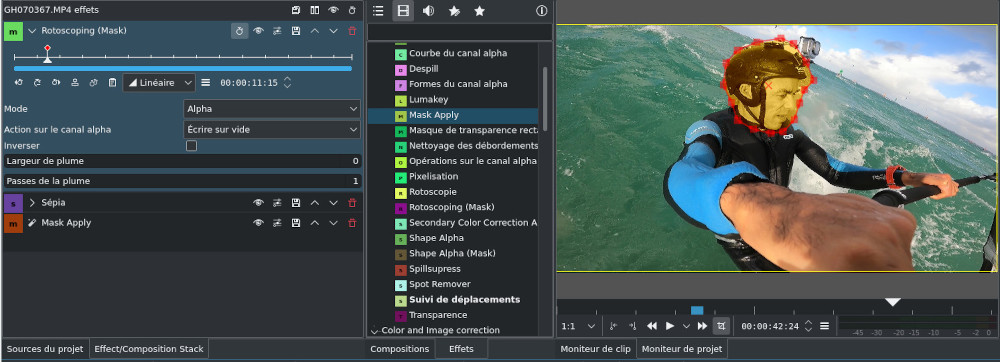
To be
complete in terms of effects, you can apply an effect for
a particular region of a clip. The steps are as follows:
- first
select the Rotoscoping
(Mask) effect and
draw your shape, possibly making it evolve over the course
of the clip by creating several key frames (see below for the use of key
frames)
- select
the effect to apply, here Sepia
- then
select the Mask
Apply effect
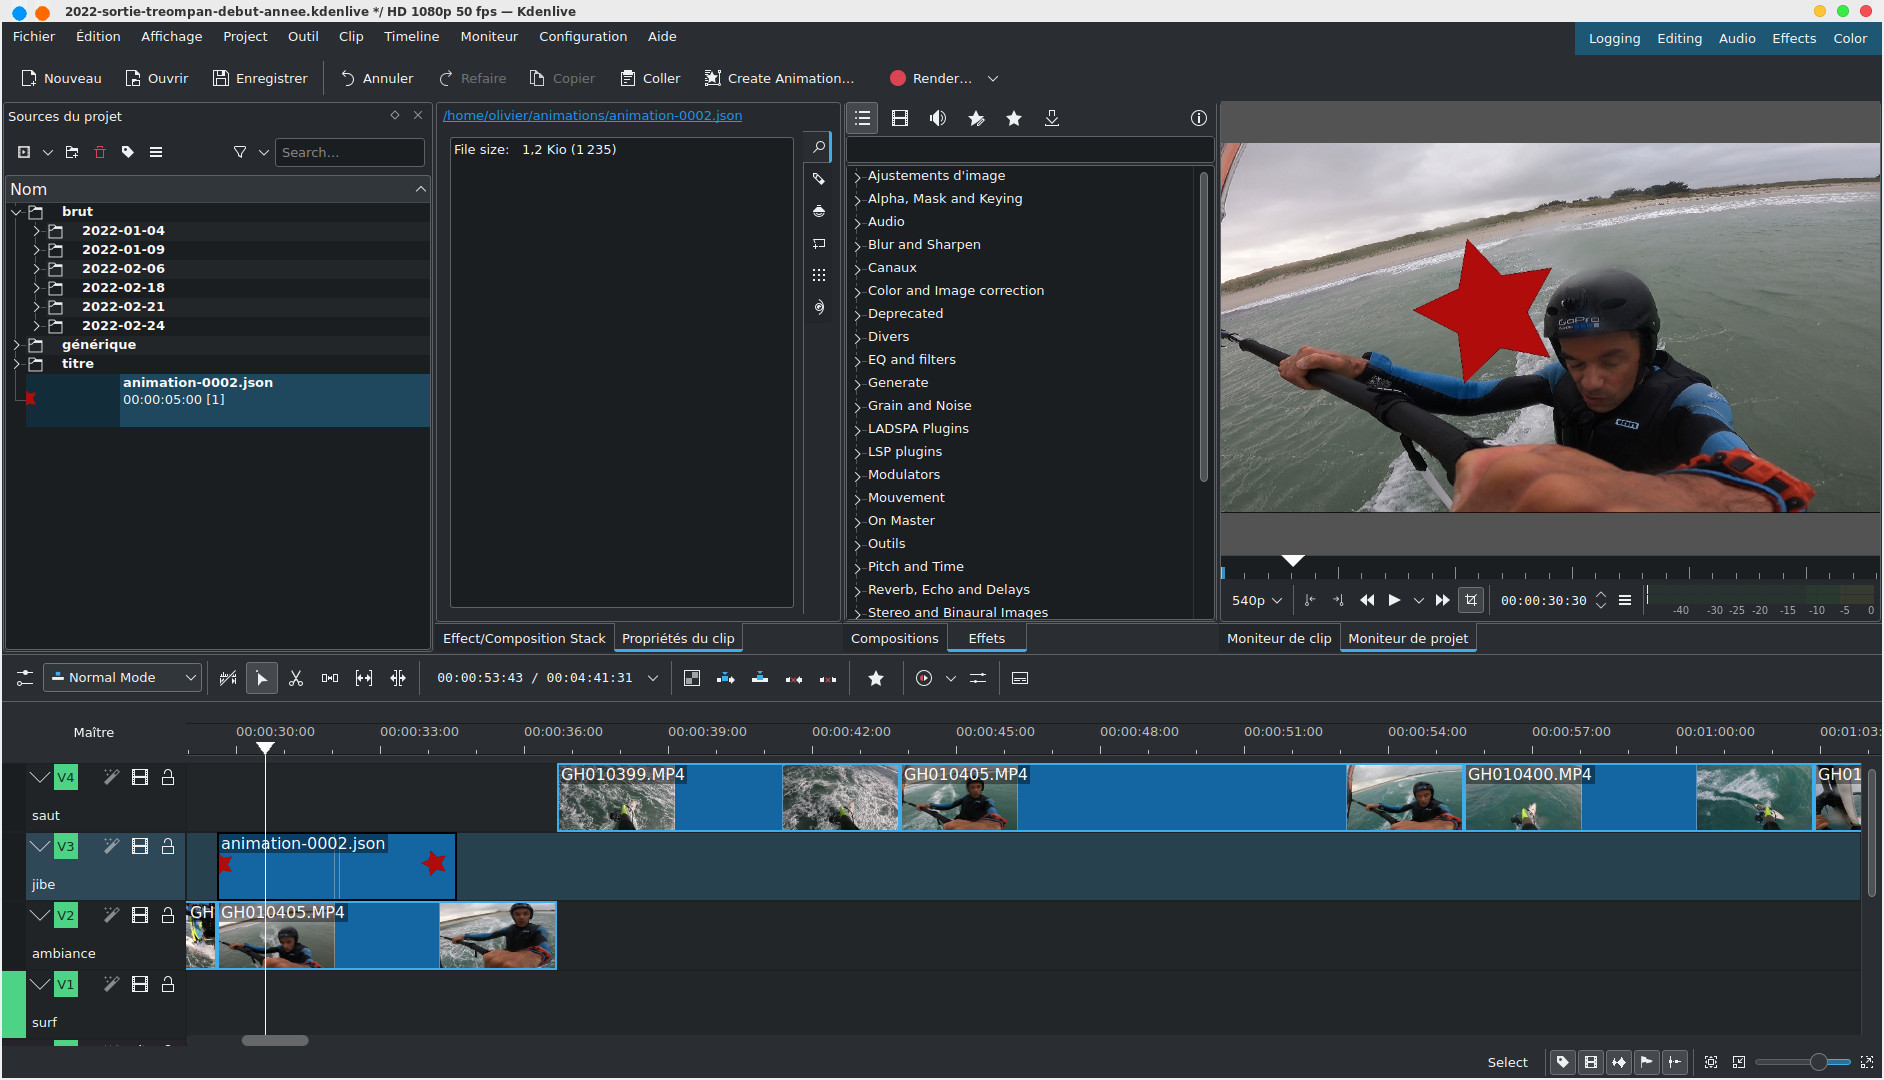
The 2D
animation tool Glaxnimate is now integrated into
kdenlive and accessible via the main window with the
button  .
.
. This will
launch the
Glaxnimate tool , I will not go into the
details of its use here, the documentation is quite poor
on the net.

Once the
animation is saved, the animation appears in the project
files which you just need to drag into the timeline.
I invite
you to browse the list of effects, there are dozens and
dozens of them, not always easy to use and well
documented, but you will only be limited by your
imagination because they really allow you to do everything
that is possible to do on the best video editing software,
including professional ones.
| Back to FUNIX home page ] |