 Welcome
 Linux
Linux Unix
Unix Download
Encourage FUNIX
The consultation of the site is completely free and without advertisements. Donations are nevertheless appreciated to pay for hosting and encourage its author
Multimedia
Video editing
- The basics of video editing
- Installation of video editing software
- Editing your video with Kdenlive
- Editing your video with Cinelerra
- Editing your video with OpenShot Video Editor
- Editing your video with Pitivi Video Editor
- Editing your video with Flowblade Video Editor
- Editing your video with Shotcut
- Installation of video editing software
- Editing your video with Kdenlive
- Editing your video with Cinelerra
- Editing your video with OpenShot Video Editor
- Editing your video with Pitivi Video Editor
- Editing your video with Flowblade Video Editor
- Editing your video with Shotcut
Edit your video with kdenlive
Network and system
Email management
[ Purpose | Quick overview of the interface | Configuration | Importing files | Editing ( The principle , arranging clips on the timeline , creating a title , adding transitions , adding filters ) | Key images | Other refinements | Exporting to the final video ]
Tutorial to edit your video with Shotcut
Last modified
May 9, 2020
This site has
been automatically translated with Google Translate from this
original page written in french, there may be some
translation errors
Object
This page
aims to provide you with the basics to be able to edit
videos with Shotcut. This is not a master class on video editing, but
this page will allow you, by example, to make your first
edits. For the installation of the software you can consult
the page on the installation of video editing software.
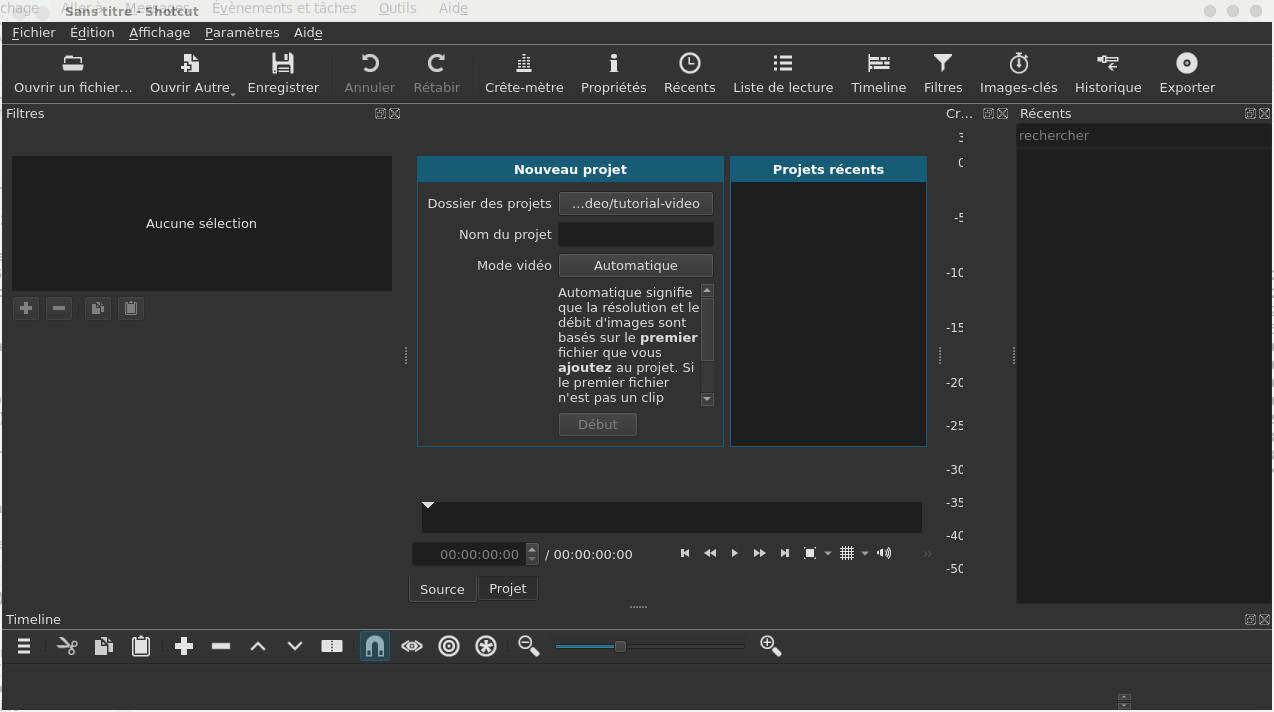
Shotcut is launched from the menu of your favorite distribution or
from a terminal. On first launch, you will need to define a
folder for the project, the name of the project and the
video mode for rendering, note that by leaving it automatic
it will take by default the resolution of the first video
file imported into the project.
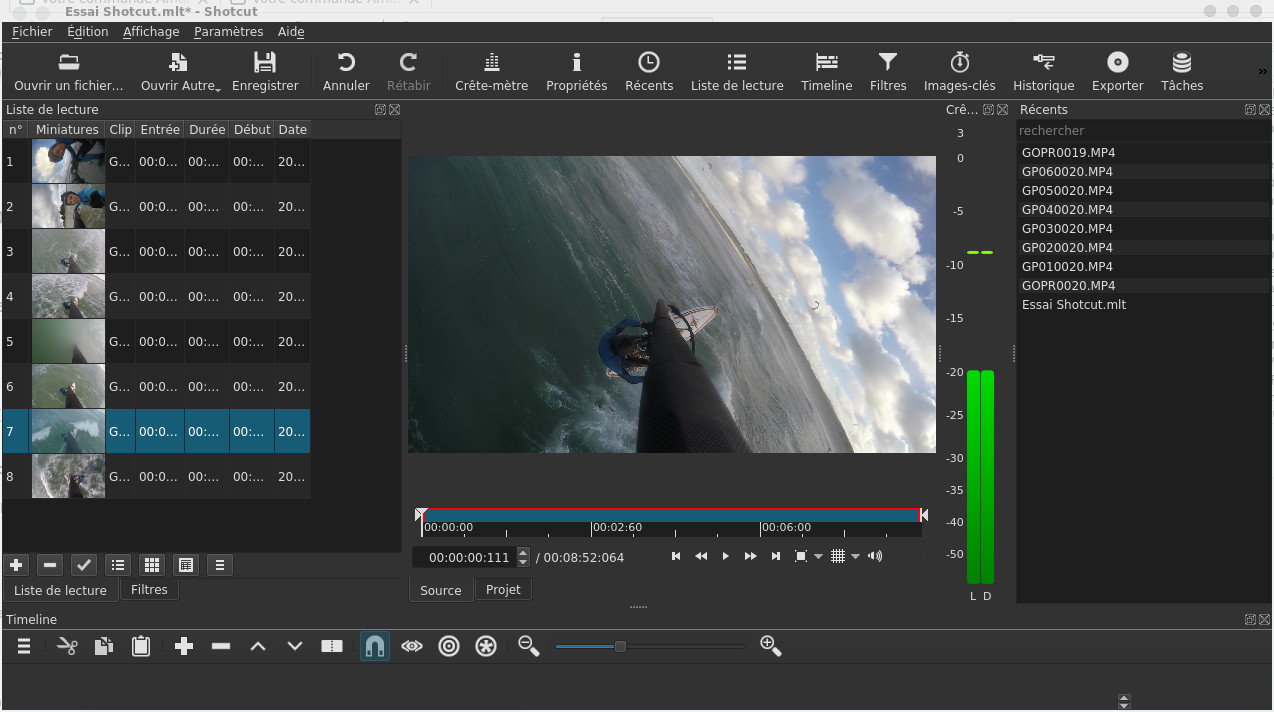
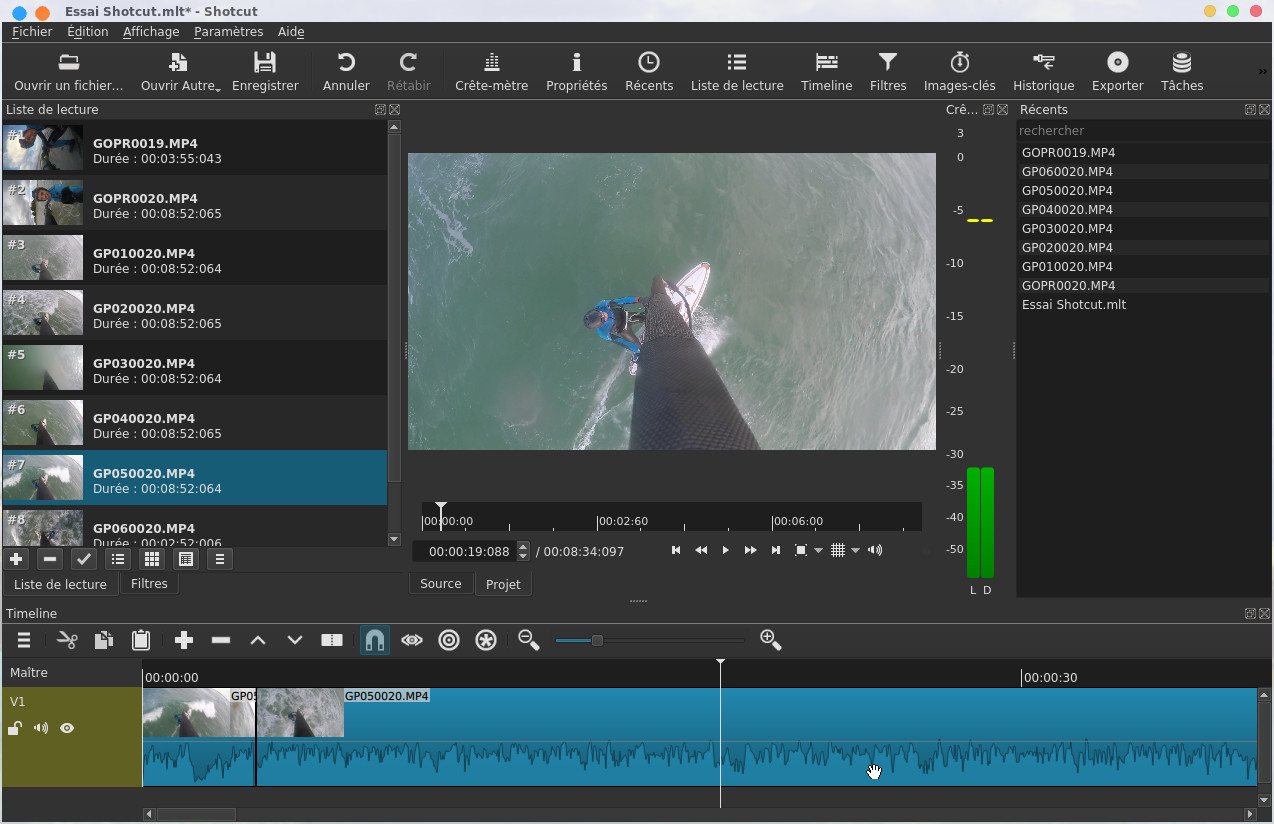
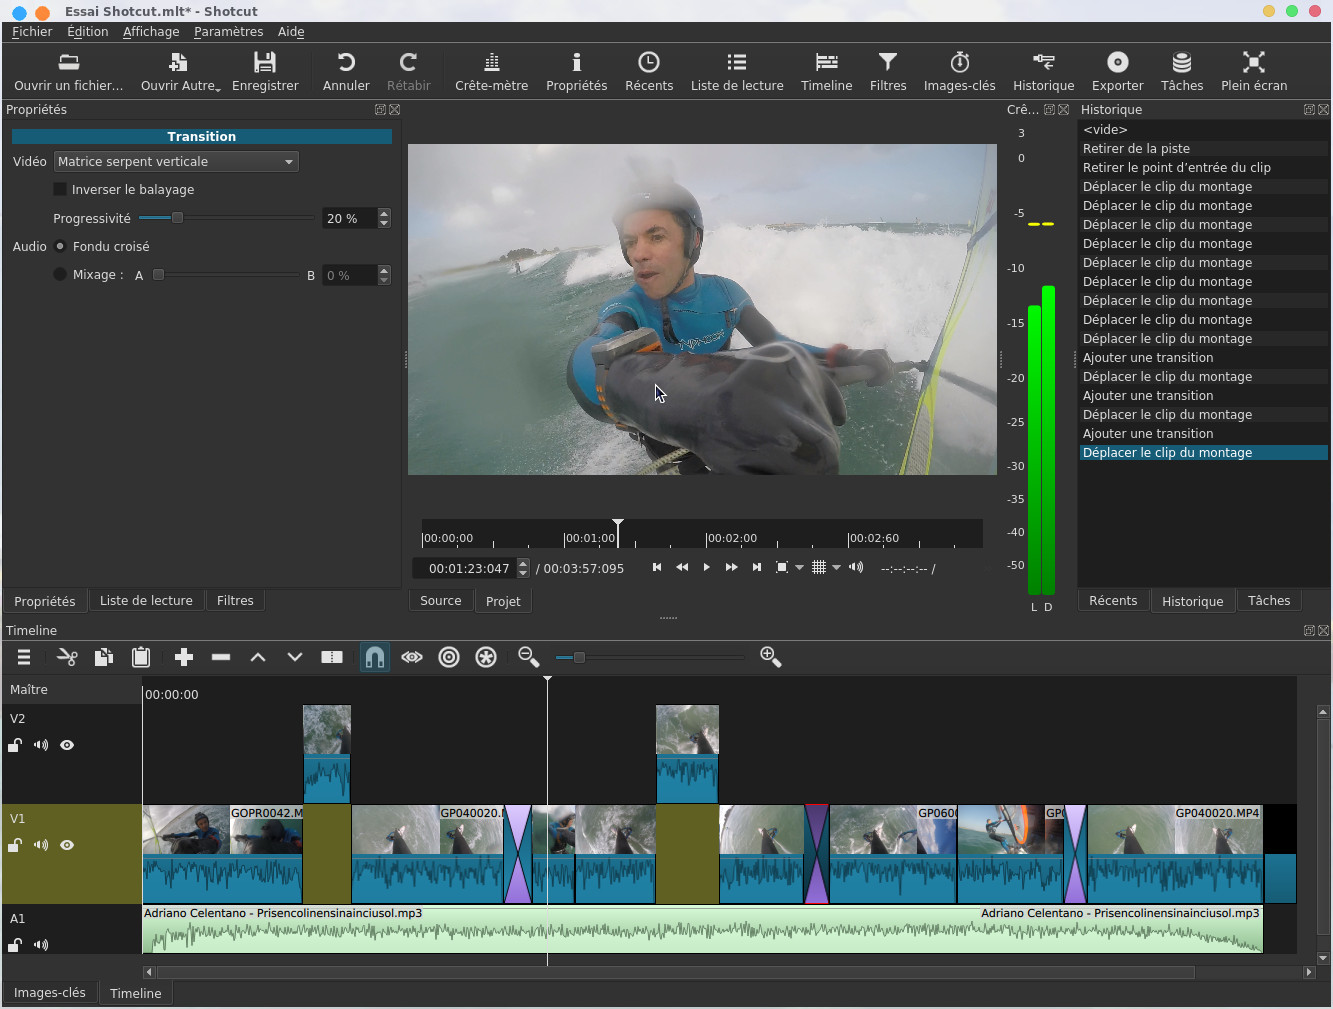
By default Shotcut is divided into several workspaces:
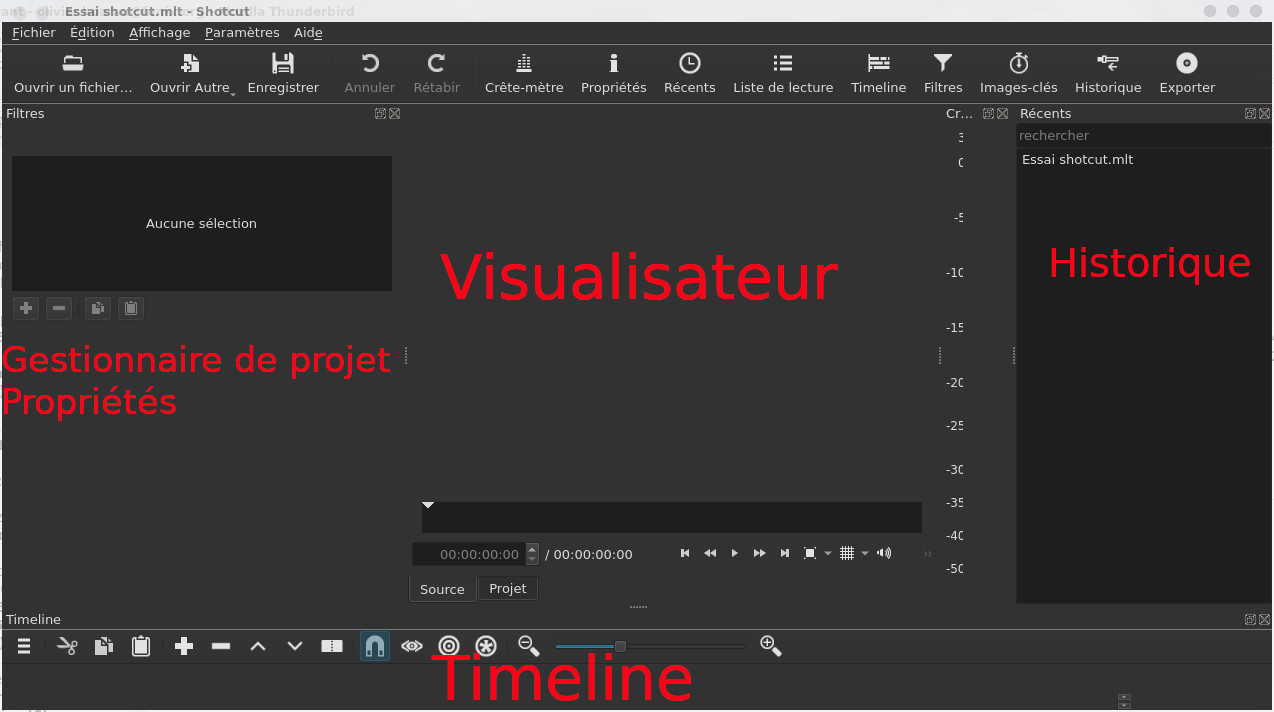
You will
find:
- 1 The timeline at the bottom
- 2 The project file manager, called Playlist , in this area also displays the properties of the selected item
- 3 The file viewer of the project manager (rushes or source) and of the project present on the timeline
- 4 A history of the latest commands, latest imported files and latest tasks
- 5 A menu bar with buttons with quick access to certain functions
- 6 A classic menu bar
You can
resize the spaces, in particular by increasing the timeline,
which by default has a ridiculous size. Be aware that there
is always a way to go back using the Cancel button found at the top left. 
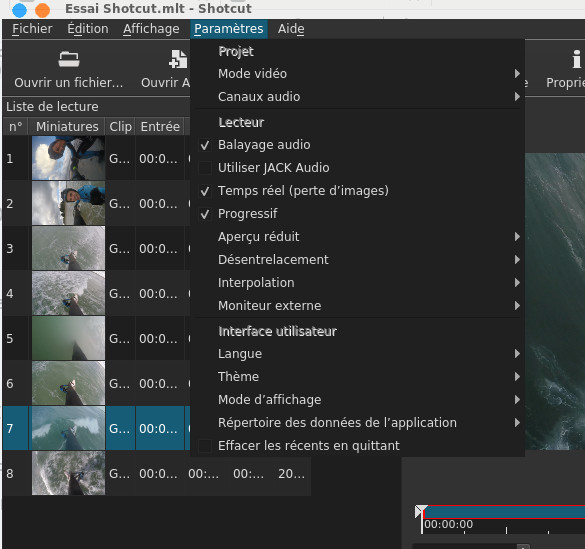
Actually
there is no real Preferences menu, or rather everything is concentrated in the
Settings menu. You can play on the Project, Player and User Interface settings (the 3 appear grayed out and cannot be
selected).
I left the
default settings but we can possibly change the Theme, for example with the System theme
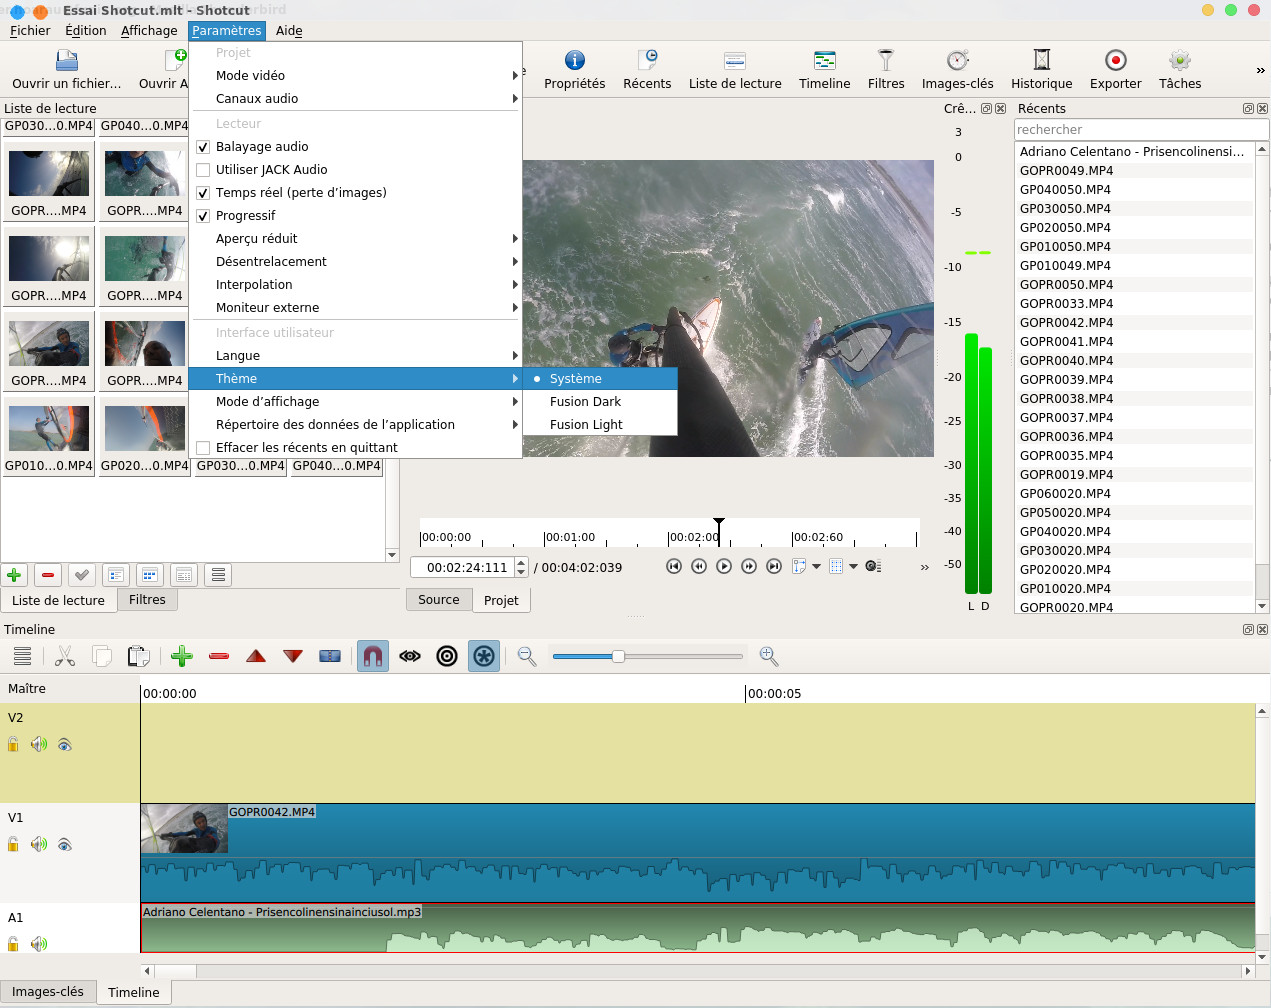
You can also
change the project resolution via the Video Mode button.
Media files
are imported from the Open File menu... and a whole group of files can be selected at
once by holding down the CTRL key.
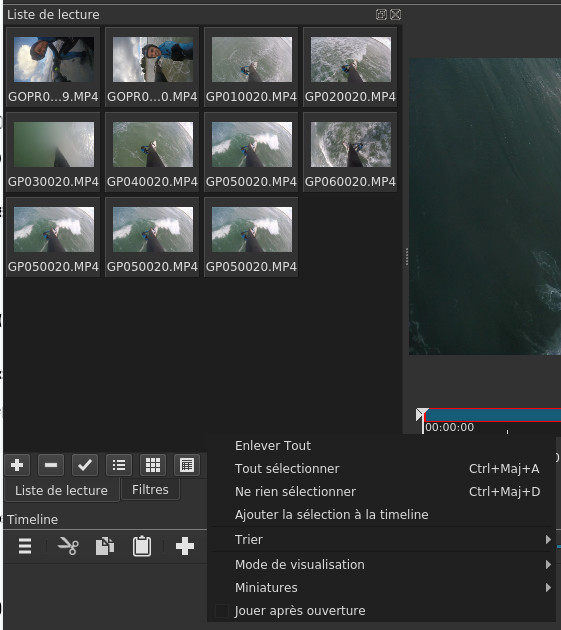
The
imported files will be found in the Playlist, by clicking on
 we have a display
respectively in list mode, in mosaic mode and in
detailed list mode. By clicking on a video it will
automatically launch it in the player, if this automatic
launch bothers you by clicking on the button
we have a display
respectively in list mode, in mosaic mode and in
detailed list mode. By clicking on a video it will
automatically launch it in the player, if this automatic
launch bothers you by clicking on the button  it will bring up a menu
in which you will have to deselect Play after opening.
it will bring up a menu
in which you will have to deselect Play after opening.
we have a display
respectively in list mode, in mosaic mode and in
detailed list mode. By clicking on a video it will
automatically launch it in the player, if this automatic
launch bothers you by clicking on the button it will bring up a menu
in which you will have to deselect Play after opening.
The assembly
The principle of assembly
Please refer to this page to learn the main principles of assembly.
Arrange clips on the timeline
The
first step is to select video sequences in the rushes,
move them on the timeline (they will become clips) and
arrange the clips in a chosen order. We will therefore
start to view the rushes, we select one in the project
manager then we view it with the VCR buttons provided
for this purpose  . You must locate the
sequence that interests you and that you would like to
include in the project, for this you have this tool
. You must locate the
sequence that interests you and that you would like to
include in the project, for this you have this tool  the two ends mark the
beginning and the end of the selected sequence.
the two ends mark the
beginning and the end of the selected sequence.
. You must locate the
sequence that interests you and that you would like to
include in the project, for this you have this tool the two ends mark the
beginning and the end of the selected sequence. 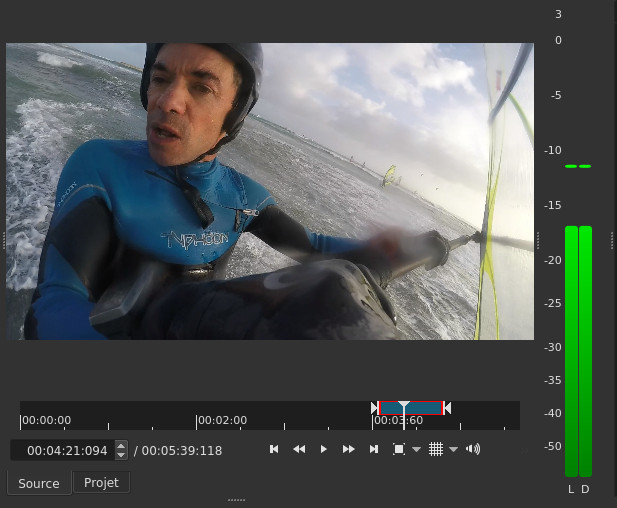
Then by
drag and drop we move the video from the player to the
timeline.
Note
that clicking on the button  will have the same
effect. Little by little you can select several
sequences from the same rush and other sequences from
other rushes, which you put end to end on the same track
in the timeline, it will give something like this:
will have the same
effect. Little by little you can select several
sequences from the same rush and other sequences from
other rushes, which you put end to end on the same track
in the timeline, it will give something like this:
will have the same
effect. Little by little you can select several
sequences from the same rush and other sequences from
other rushes, which you put end to end on the same track
in the timeline, it will give something like this: 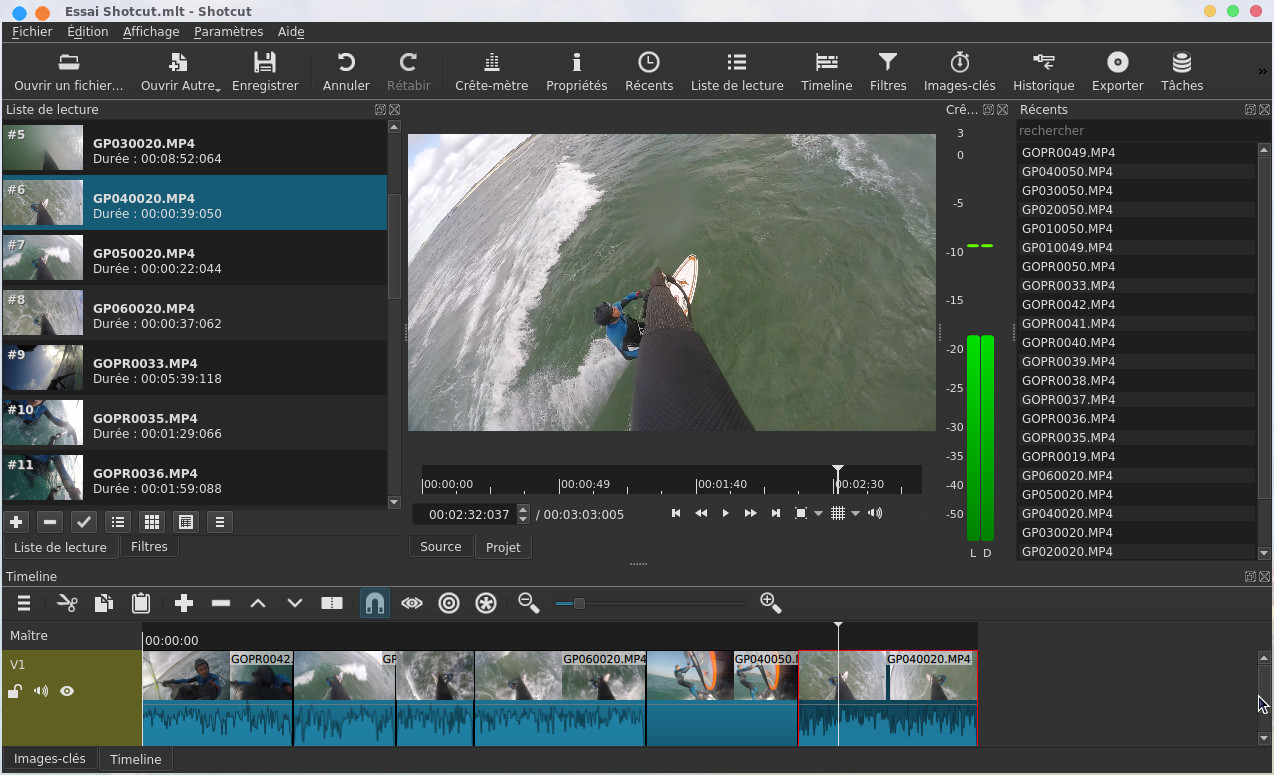
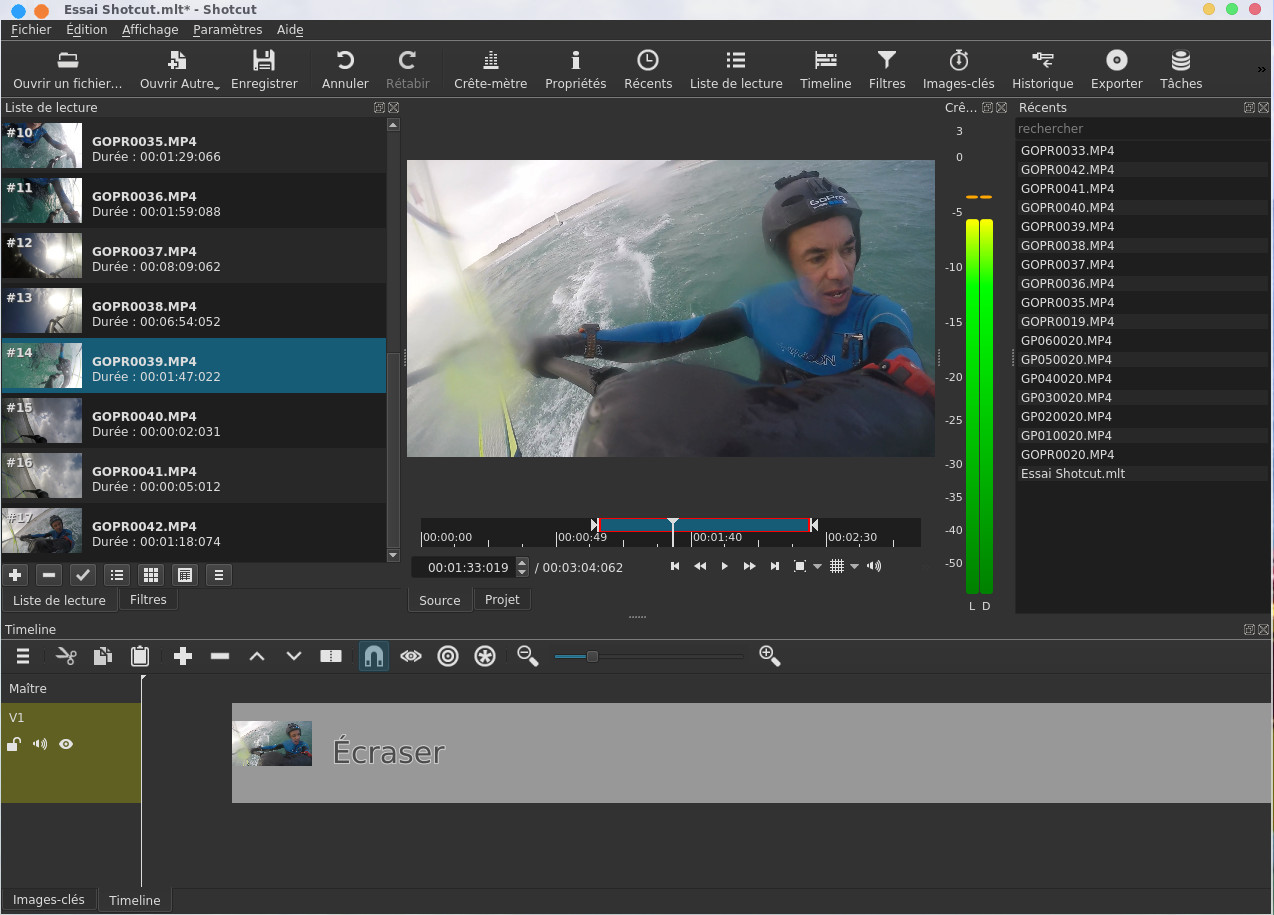
At this stage, for
the moment, we will not necessarily pay attention to
the order in which you place the clips, however if you
consider it useful to insert a clip at a location in
the timeline marked by the cursor, you select the
sequence from the Source player and you click on the
tool
This
will insert your new clip at the exact location of the
cursor by moving the other clips to the right. However,
for ease of editing, I prefer to stagger my clips across
two tracks; I create a second one from the menu
accessible via the  timeline button.
timeline button. 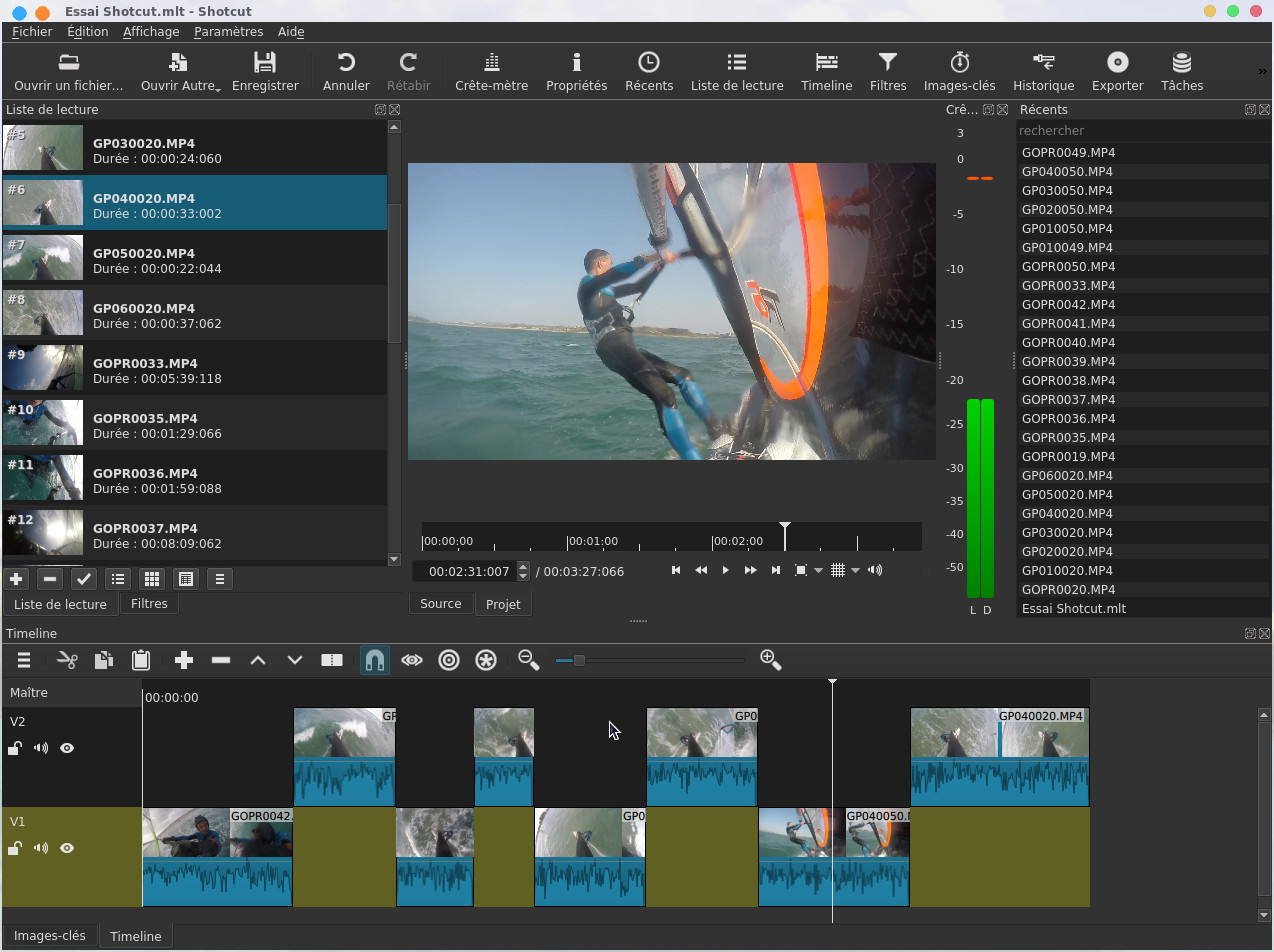
The goal
of the maneuver is now to order the clips by dragging
them onto the timeline.
It may
be useful to shorten some clips that are too long, you
have the Cutting tool materialized by
the  button. You have to
place the cursor at the clip to cut, click on the Cut
button and the clip is cut in two with a white line
separating them.
button. You have to
place the cursor at the clip to cut, click on the Cut
button and the clip is cut in two with a white line
separating them.
button. You have to
place the cursor at the clip to cut, click on the Cut
button and the clip is cut in two with a white line
separating them. 
Now the
excess clip bits can be deleted by cutting them and
clicking the  Illustration button in
the screenshot below, the clip to be deleted is selected
and highlighted in red.
Illustration button in
the screenshot below, the clip to be deleted is selected
and highlighted in red.
Illustration button in
the screenshot below, the clip to be deleted is selected
and highlighted in red. 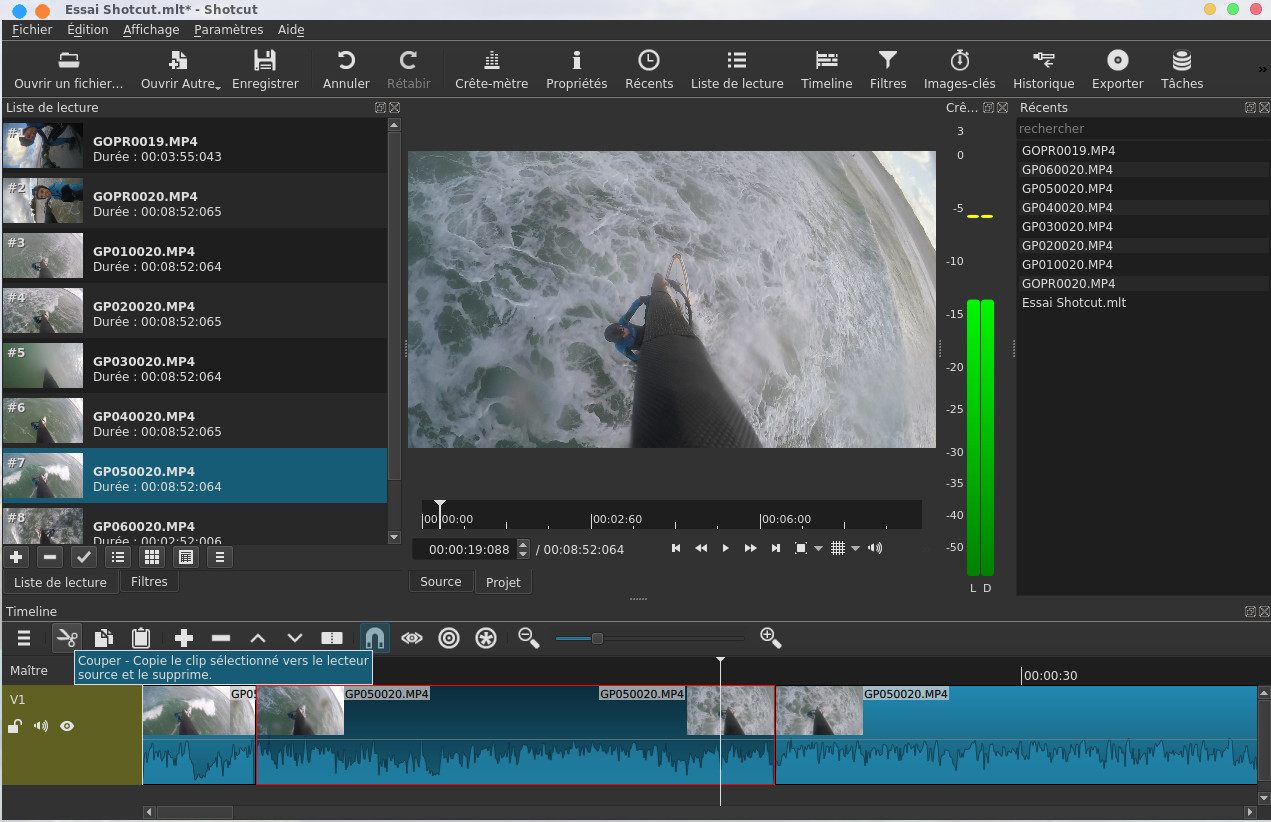
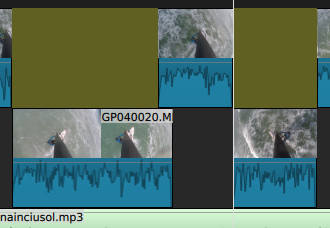
by
default with the scissor tool all clips to the right are
translated to fill the space left empty by the deleted
clip as seen below
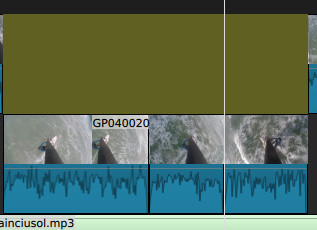
on the
other hand if we click on the button  the space created by
the deletion of the clip is maintained as we can see
below
the space created by
the deletion of the clip is maintained as we can see
below
the space created by
the deletion of the clip is maintained as we can see
below 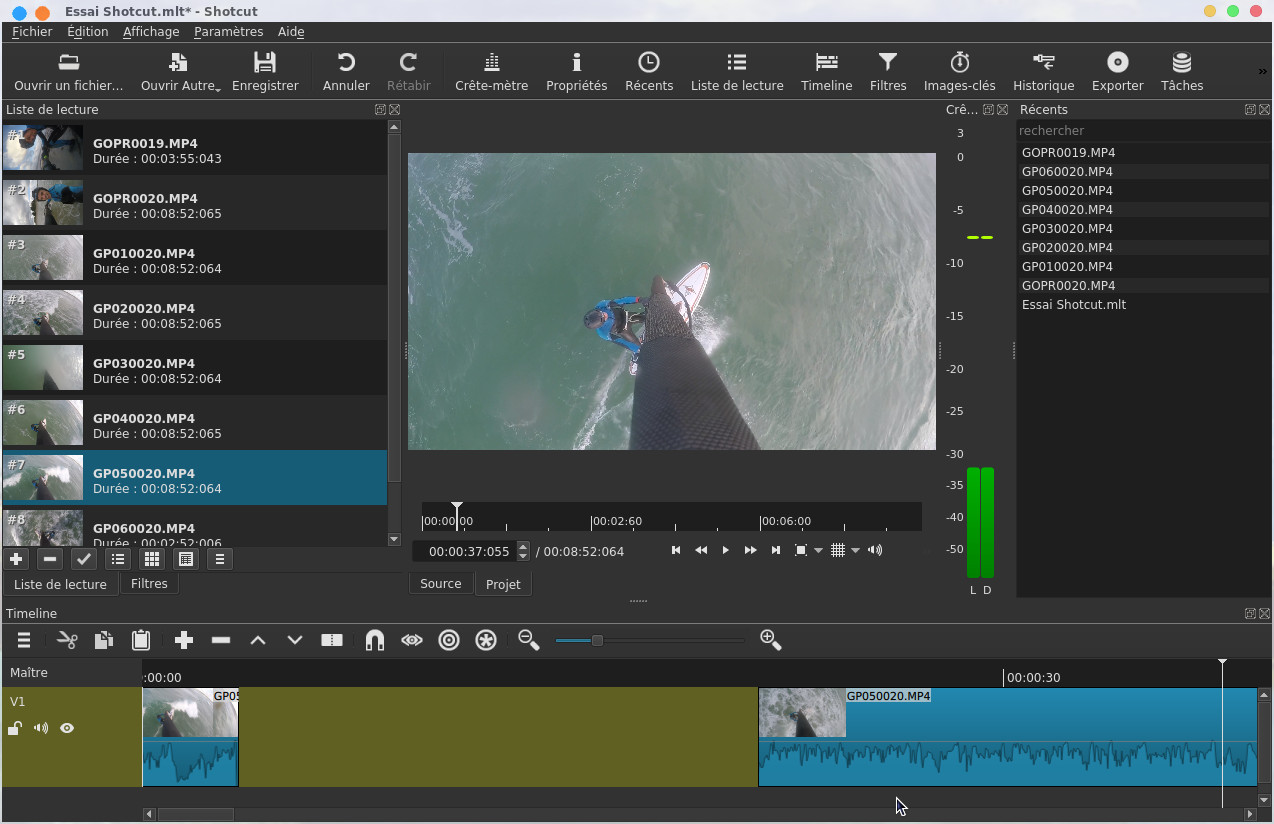
At this
point, you have noticed that you can play on the
zoom  to view the entire
project on the timeline or on the contrary zoom in on a
part. Note the Swipe while moving tool
to view the entire
project on the timeline or on the contrary zoom in on a
part. Note the Swipe while moving tool  when you move, shorten
or lengthen a clip, the timeline cursor will
automatically follow the movement and the video will be
displayed in real time in the project player.
when you move, shorten
or lengthen a clip, the timeline cursor will
automatically follow the movement and the video will be
displayed in real time in the project player.
to view the entire
project on the timeline or on the contrary zoom in on a
part. Note the Swipe while moving tool when you move, shorten
or lengthen a clip, the timeline cursor will
automatically follow the movement and the video will be
displayed in real time in the project player. Note
that it is possible to shorten or lengthen a clip on the
timeline, in case of lengthening the clip Shotcut will start from the
initial rush to lengthen from the initial video. In the
example below we can lengthen or shorten the beginning
of a clip simply by holding down the left button, this
will bring up a green bar that can be moved in one
direction or another.
Likewise, you can lengthen or shorten a clip at the end
of a clip, this time the bar will be red.
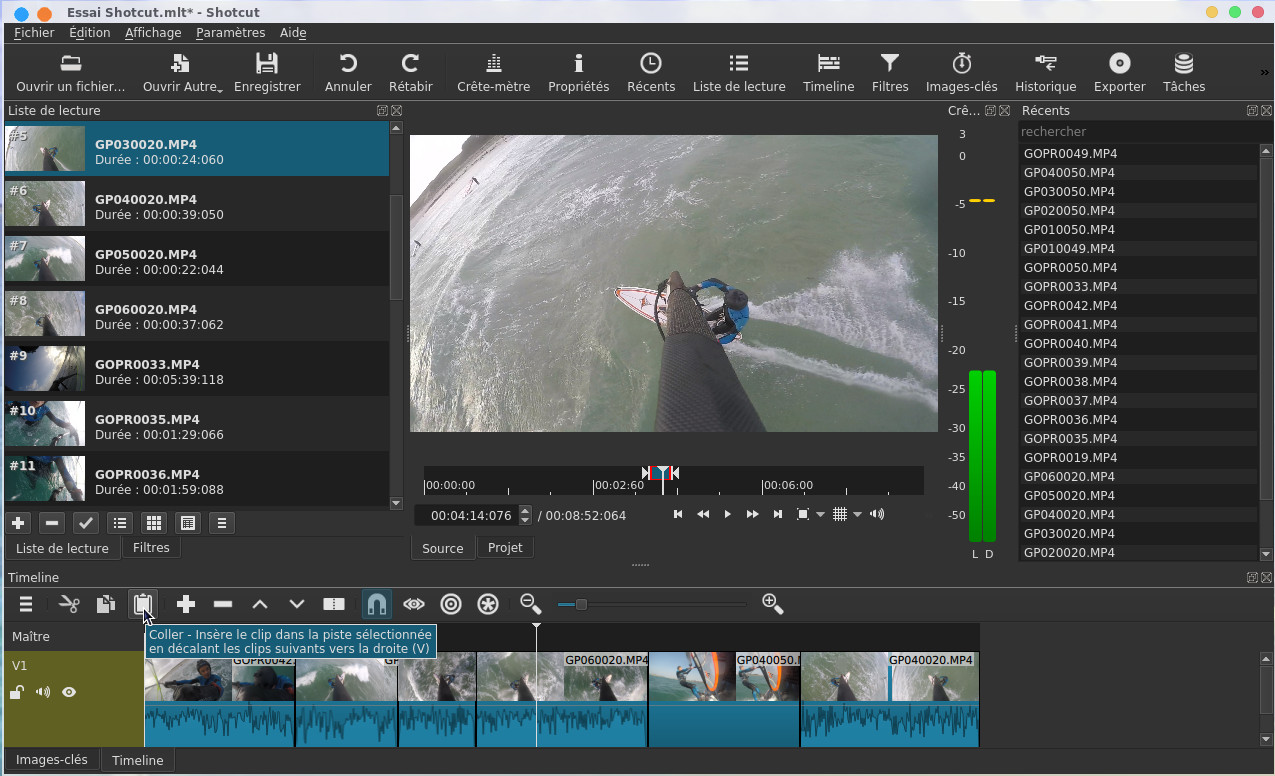
Now
let's say you wanted to move the selected clip
highlighted in red below to the cursor, by clicking the
paste button
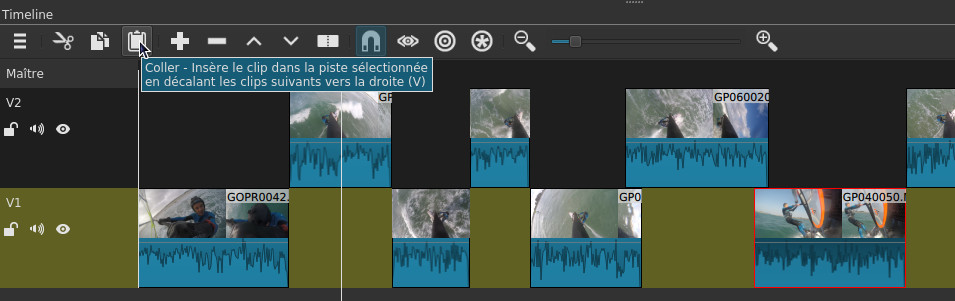
This will
have the effect of inserting it on the same track,
shifting the other clips on the track to the right.
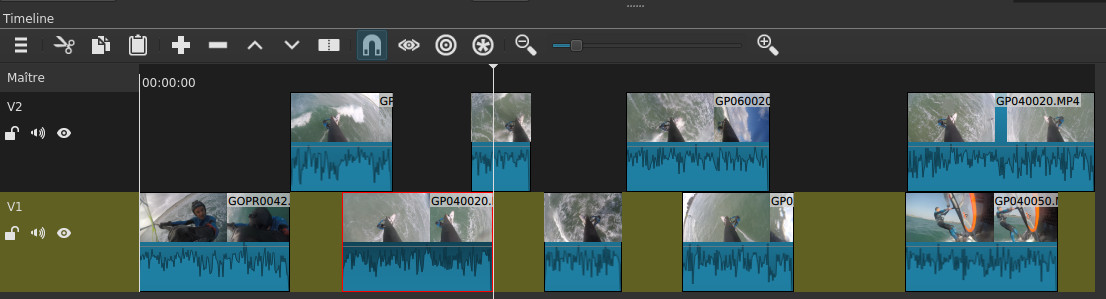
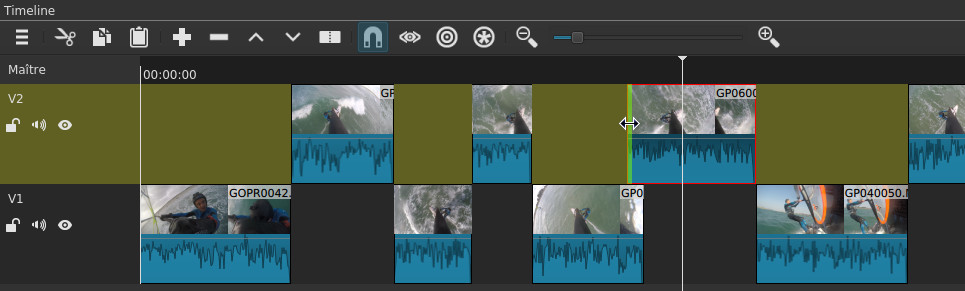
The
downside is that we now find ourselves shifted with the
top V2 track, so that the insertion impacts all the
tracks, we click on the Propagate changes to
all tracks  in the timeline button
or in the menu accessible via the timeline button, we
check Propagate
all tracks
in the timeline button
or in the menu accessible via the timeline button, we
check Propagate
all tracks
in the timeline button
or in the menu accessible via the timeline button, we
check Propagate
all tracks 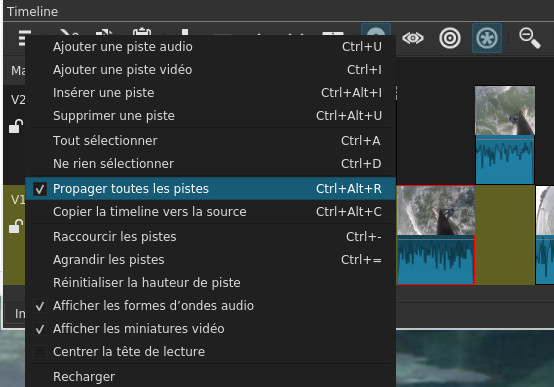
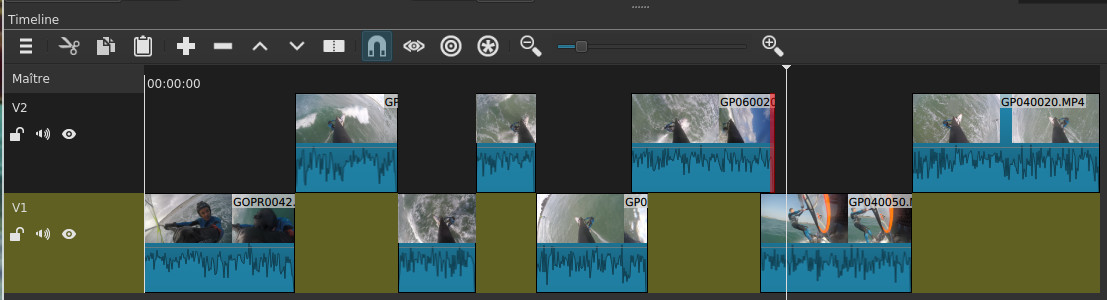
I do the
same thing by clicking on the Paste button, my clip will be
inserted and all the clips on all the tracks will be
shifted accordingly to the right.
my clip will be
inserted and all the clips on all the tracks will be
shifted accordingly to the right. 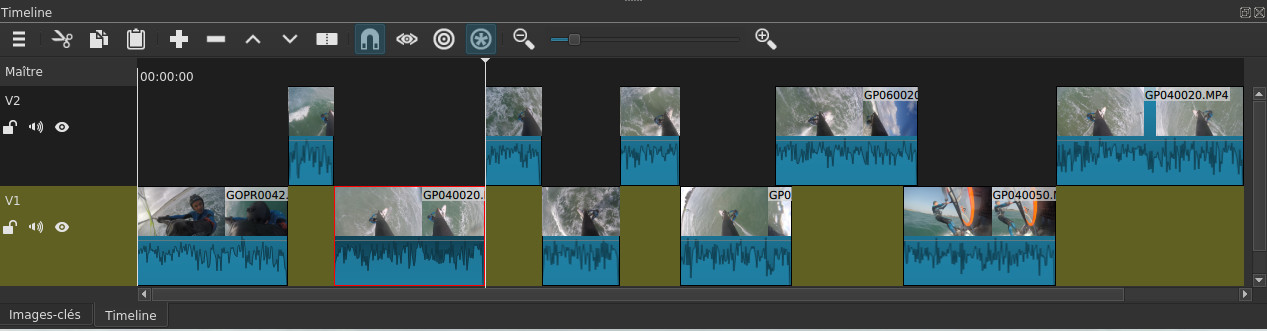
You can
optionally select multiple clips by holding down the
CTRL key and selecting them one after the other, the
selected clips will appear highlighted in red.
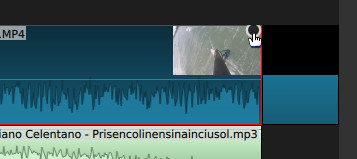
Now I
import an audio file that I drag onto an audio track of
the previously created timeline, this audio track will
act as the soundtrack for the final video.

The general idea is
that the clips of tracks V1 and V2 do not exceed the
duration of the soundtrack, which is not the case
above, in fact we keep a small margin to place
transitions which will in fact shorten the clips.
To be completely
complete you can copy a clip with the Copy button  and paste it in
insert with the button .
and paste it in
insert with the button .
and paste it in
insert with the button . Some other
subtleties of the software, by selecting a clip on the
timeline, from the context menu or by clicking on the
button  you access the clip
property with the video format of the original rush.
you access the clip
property with the video format of the original rush.
you access the clip
property with the video format of the original rush. 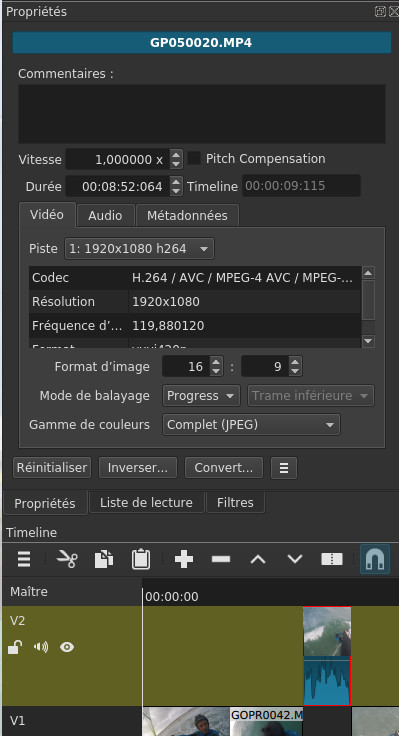
You also get
access to some interesting functions, including Reverse, which as the name
suggests will reverse the clip, by clicking on it
you can leave the default settings
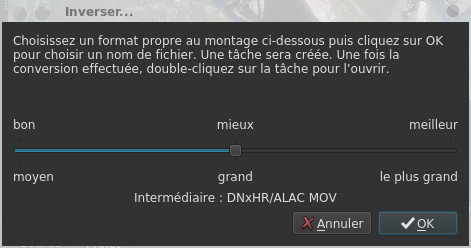
and it will
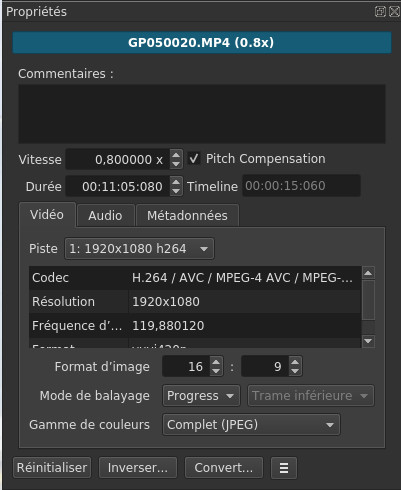
reverse the clip. You can also change the speed of
the clip with the Speed parameter, here
80% of the normal speed, the Pitch
compensation allows to adjust
the sound of the video to the speed.
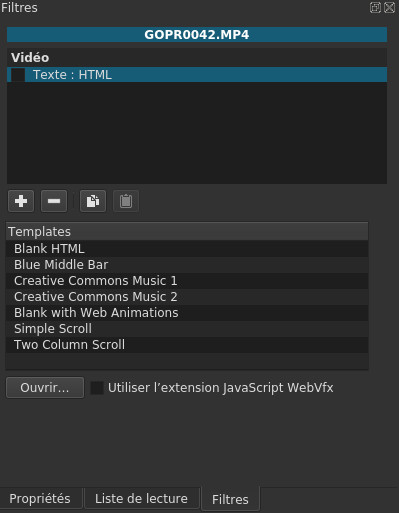
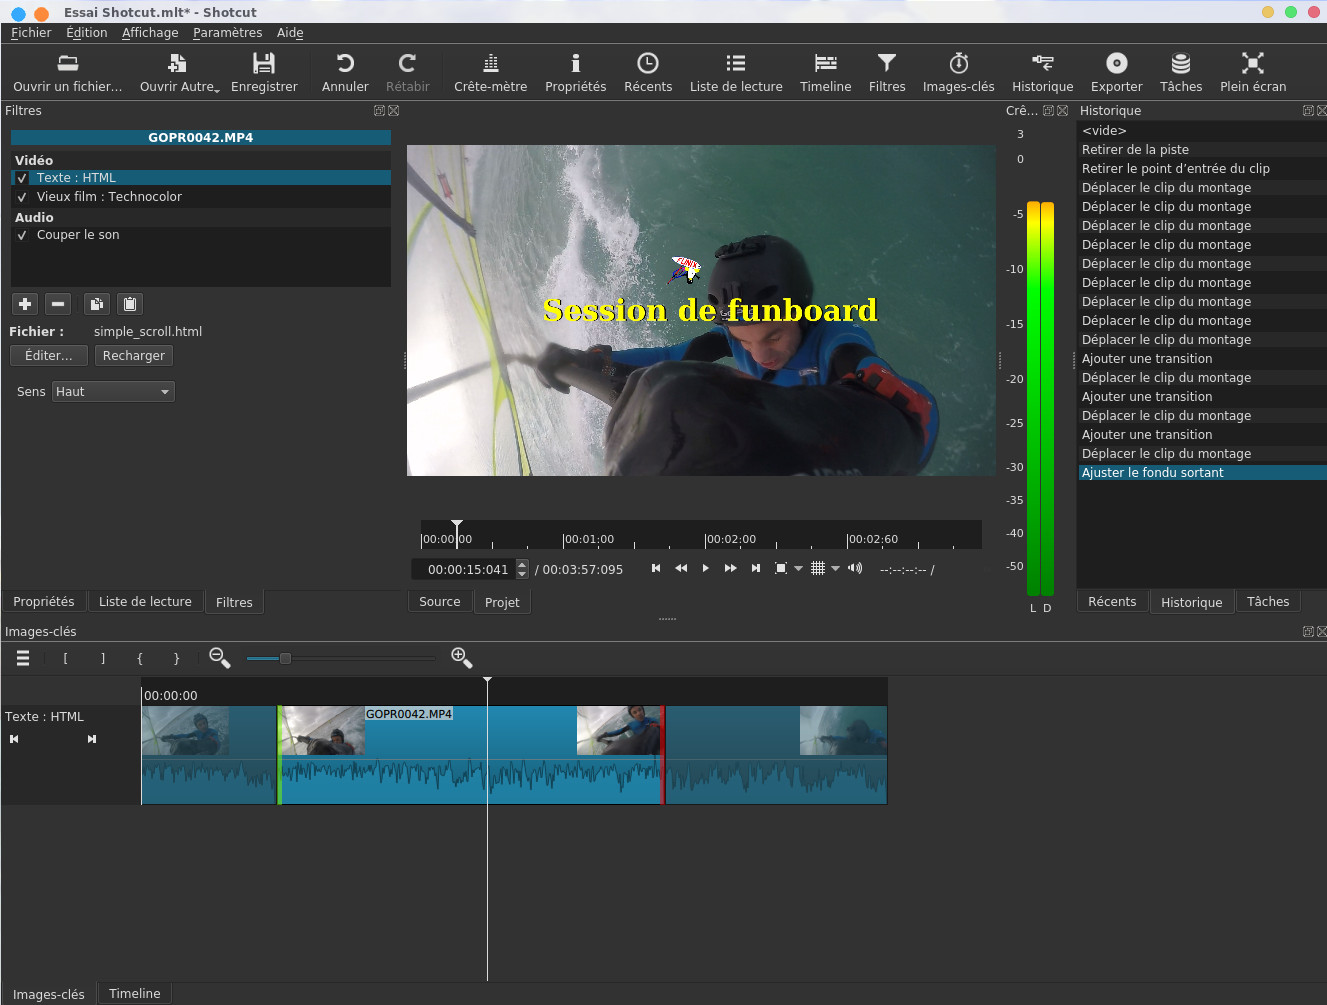
Now we will create a
title clip, we place the cursor at the beginning of
the timeline and select the first clip. We choose the
Filters tab then click on
the Add a filter button  then Text: HTML
then Text: HTML 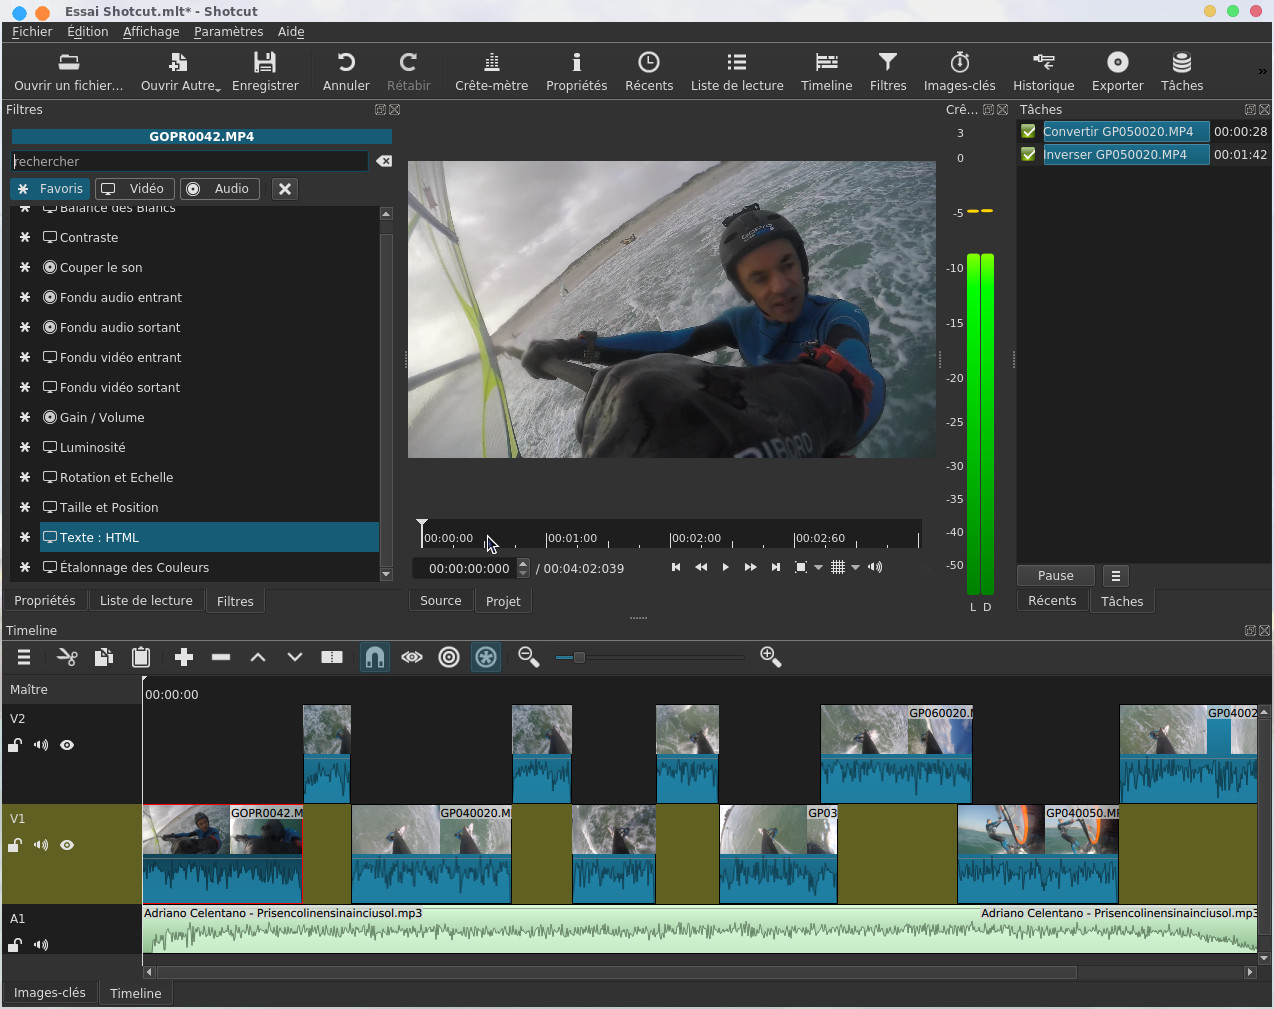
We have the
choice between different and animation, I choose Simple Scroll


Add filters
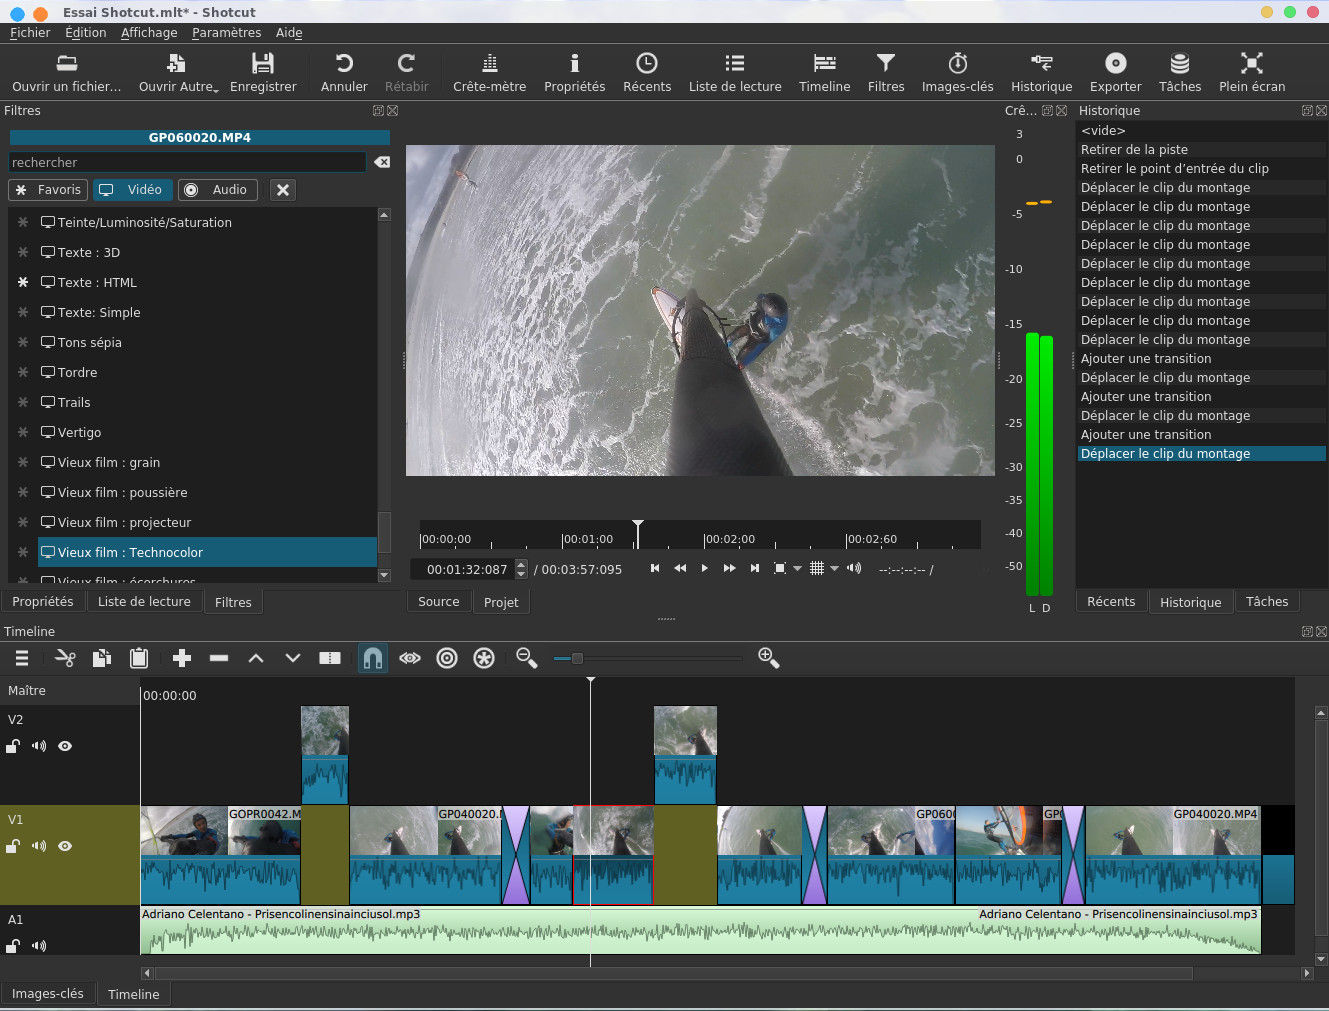
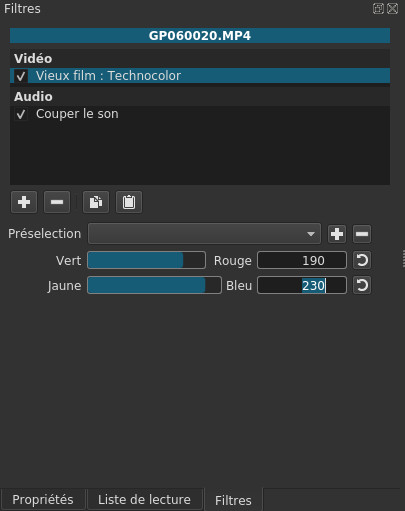
A
filter or effect is a particular
video treatment that modifies
the appearance of a clip, we
will quickly understand what it
is by selecting a filter in the
filter library, they are
classified by audio and video
filters. I start by selecting in
the timeline the clip on which I
want to apply my effect. Then at
the Filters
tab then Video
button I choose an effect, in
the example below Old film:
Technocolor

 button ,
in the format I chose the YouTube
format,
at the Source level, you
will have to make sure that Timeline is
selected, I chose to launch the rendering
with hardware acceleration, we can see in
the screenshot below the hardware encoding
configuration window. Then click on the Export
file button
button ,
in the format I chose the YouTube
format,
at the Source level, you
will have to make sure that Timeline is
selected, I chose to launch the rendering
with hardware acceleration, we can see in
the screenshot below the hardware encoding
configuration window. Then click on the Export
file button
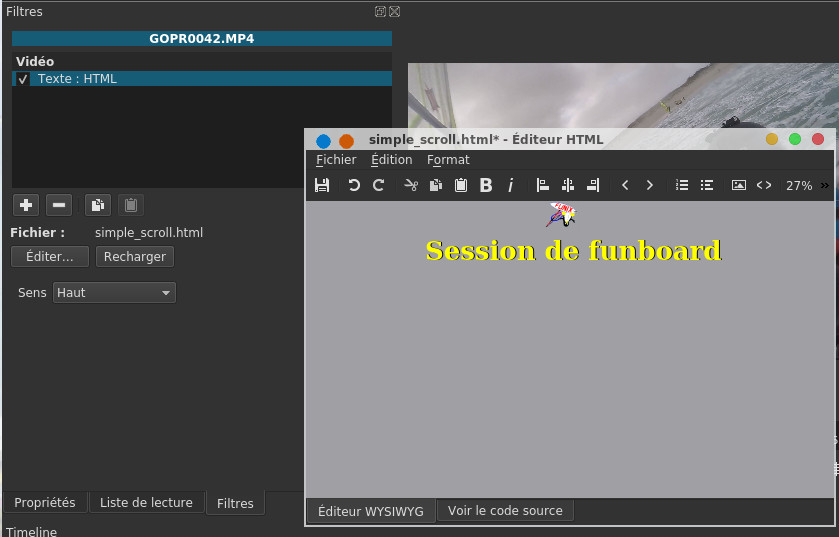
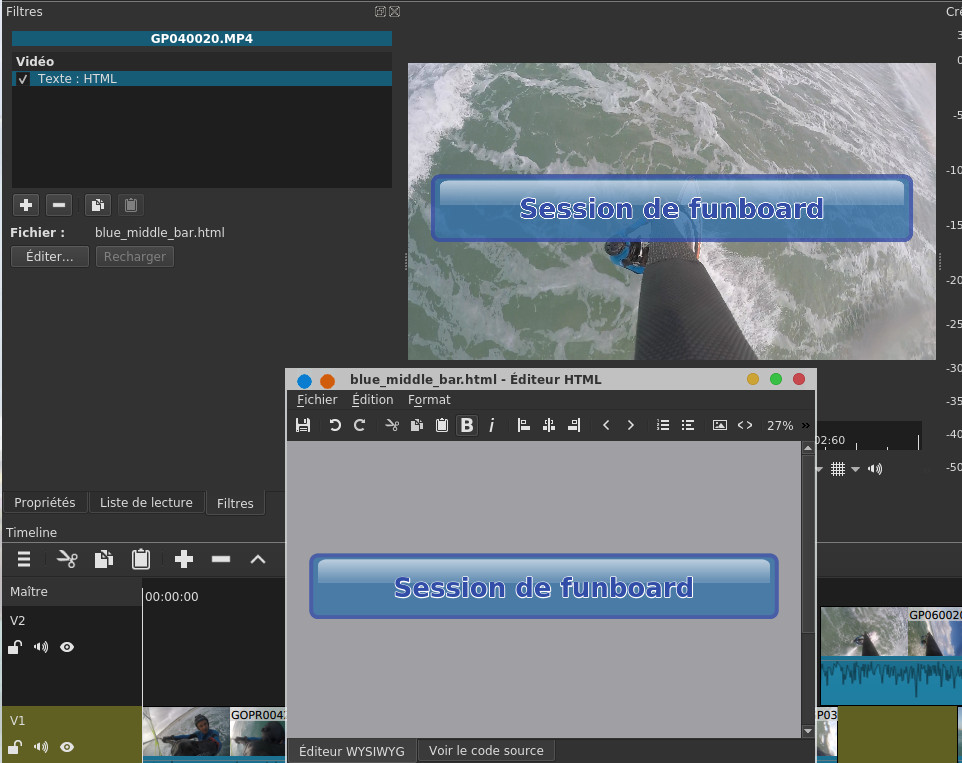
A
WYSIWIG editor appears where you can
type text and arrange it as you want
(color, font, size, position, etc.),
but also add images as you can see
below, you can possibly directly
modify the HTML code.
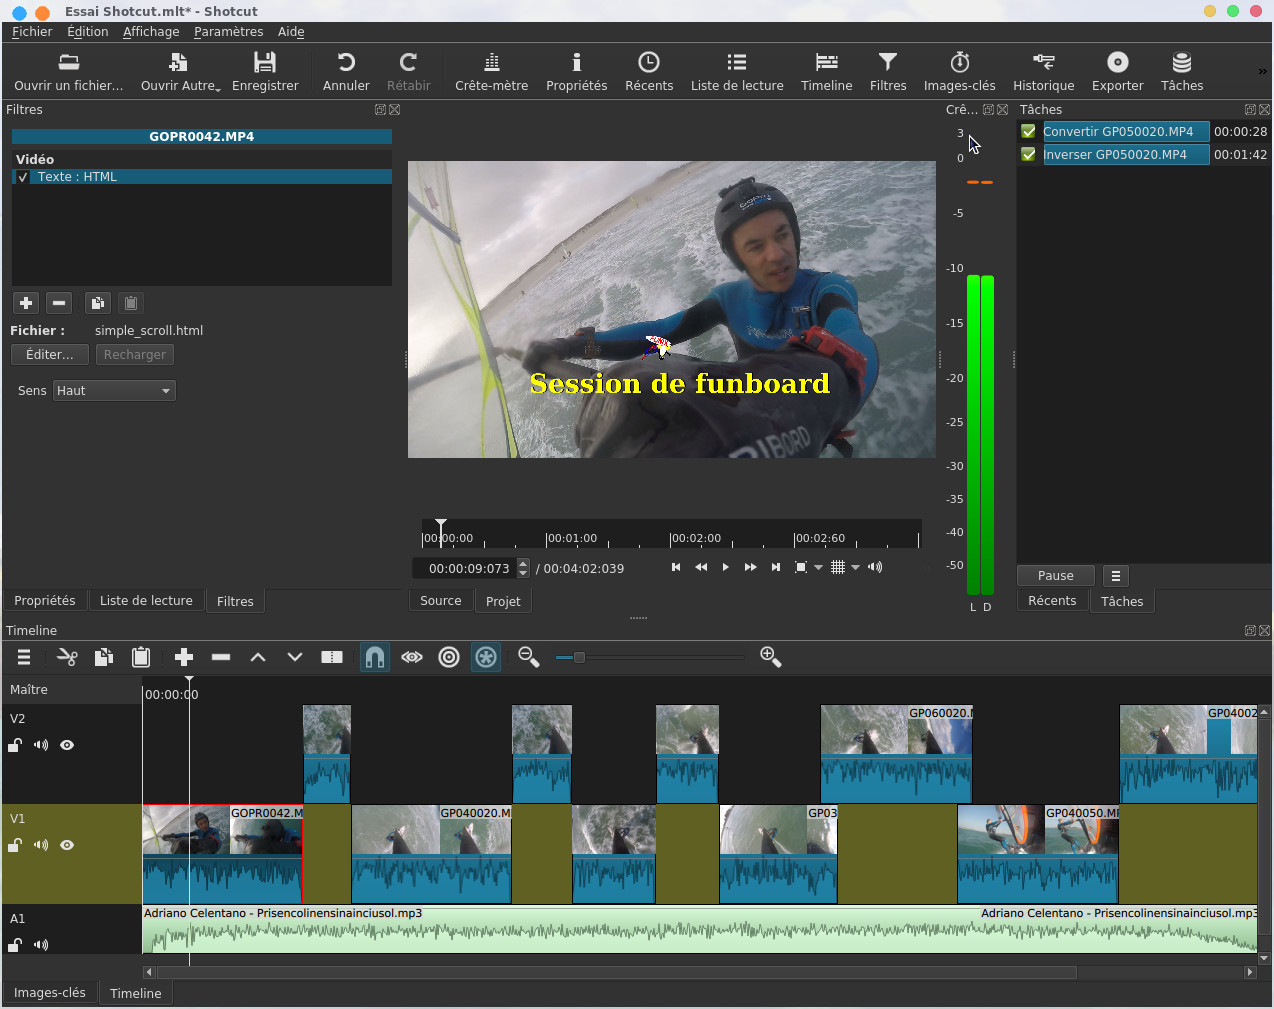
In
practice the text and its image will
scroll from bottom to top (modifiable
with the Direction
parameter above) for the duration of the
selected clip.
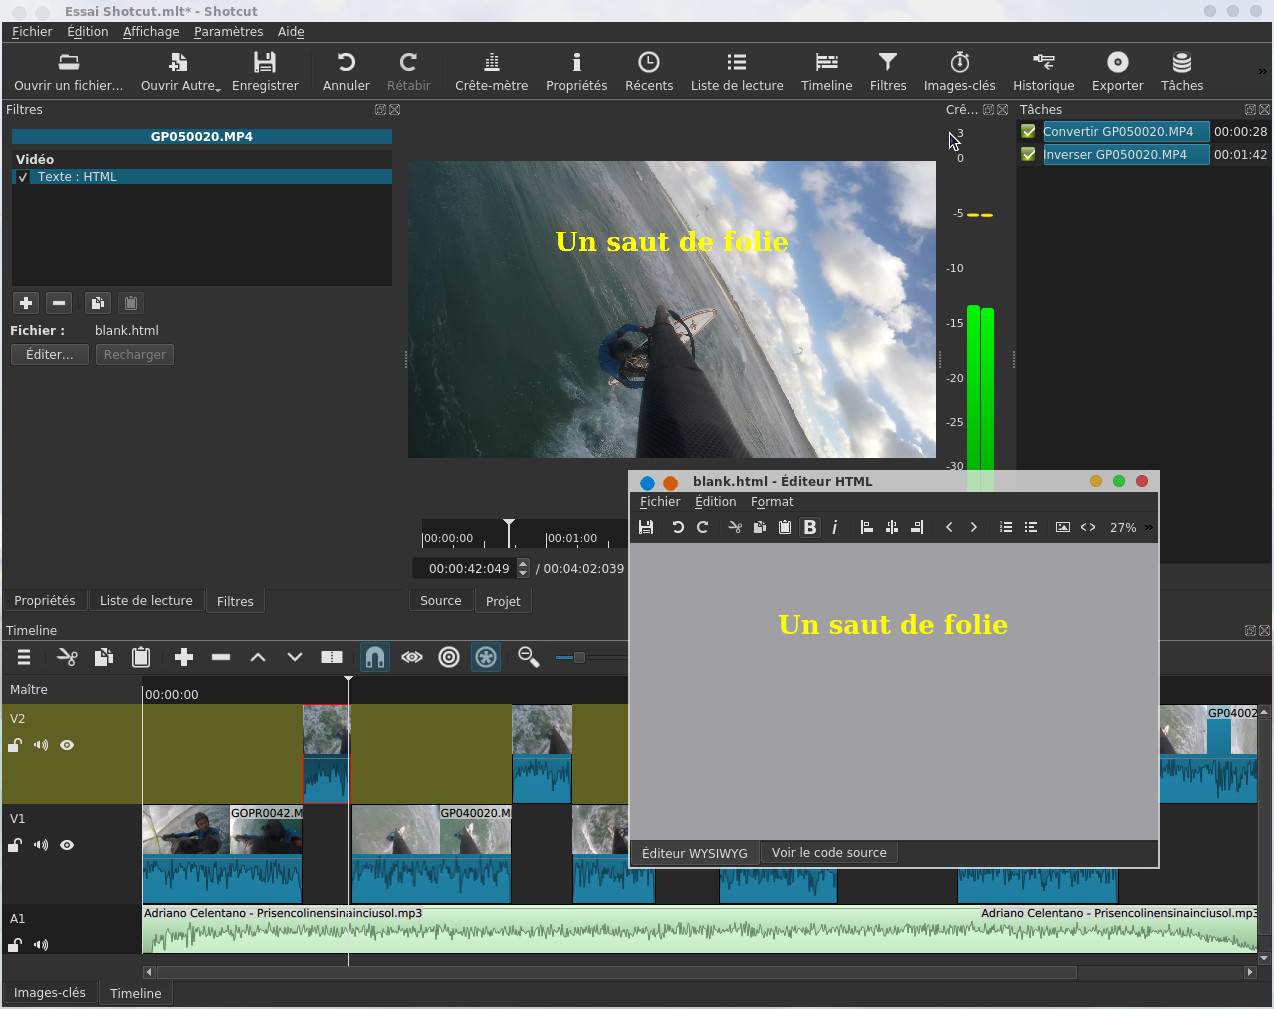
We
can also add a simple subtitle on a
clip, just select it and in the same
way we add a Text
filter, I choose blank.html
which is a simple text to position
without animation, it will be
displayed for the duration of the
clip. And here is the result:
Note that the display of the title
in the project player is done in
real time of the modification in
the HTML editor, which is quite
practical for positioning the text
well. Otherwise there are other
title formats including this one
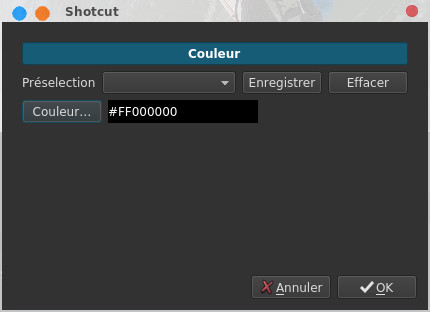
For the end credits I will just
add text on a black background, I
first select the video track
(which must go black) on which the
rightmost clip is located. We will
already create the black
background from Open
Others->Color,
I select the color black.
Now in the filters it is my black
background which is selected by
default, I add my text and I click
on the timeline button, in fact
my black background with the text
will be displayed to the right of
the rightmost clip as we can see
below.
timeline button, in fact
my black background with the text
will be displayed to the right of
the rightmost clip as we can see
below.
For the duration of the credits
clip, you can pull at the end to
lengthen (or shorten) it.
Transitions are video effects to
go from one clip to another, we
can obviously do without them in
this case we will abruptly go from
one clip to another. We start from
this situation
We're going to place a
transition between the bottom
left clip and the top one, to do
this we're going to slide the
top clip down so that it
overlaps with the bottom left
clip, like this
In practice the
clip inserted downwards has
overwritten the end of the
previous clip and for the
moment we have no transition.
We will then lengthen the
first clip by making it
overflow onto the one we have
just inserted, like this
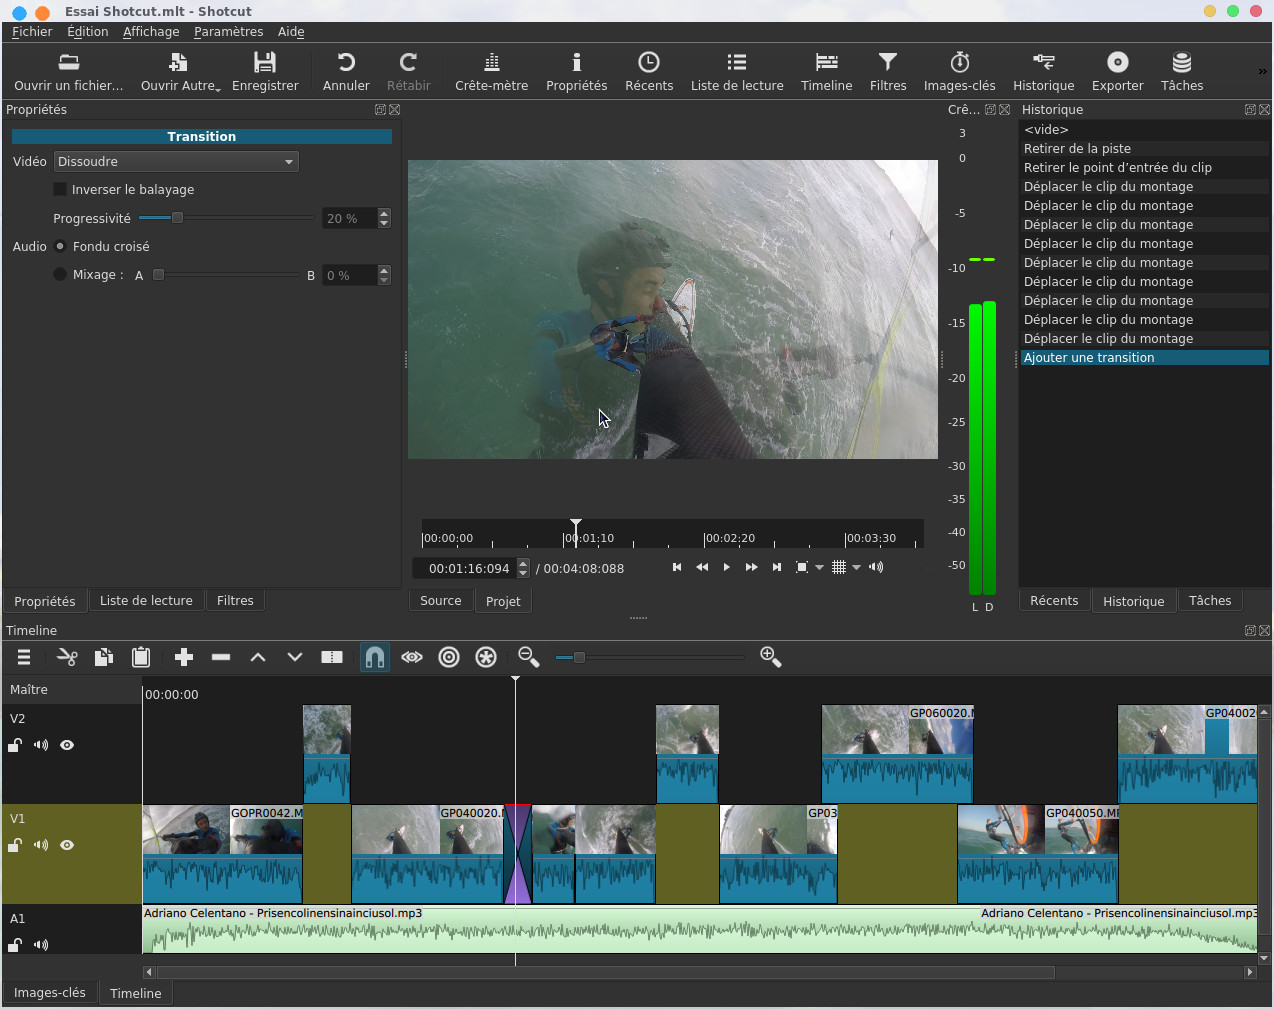
Our transition appears and we
adjust its duration with the
mouse. By default it is a Dissolve
type transition, in project player
mode we see the videos merged with
the first clip tending to
disappear and the other to appear.
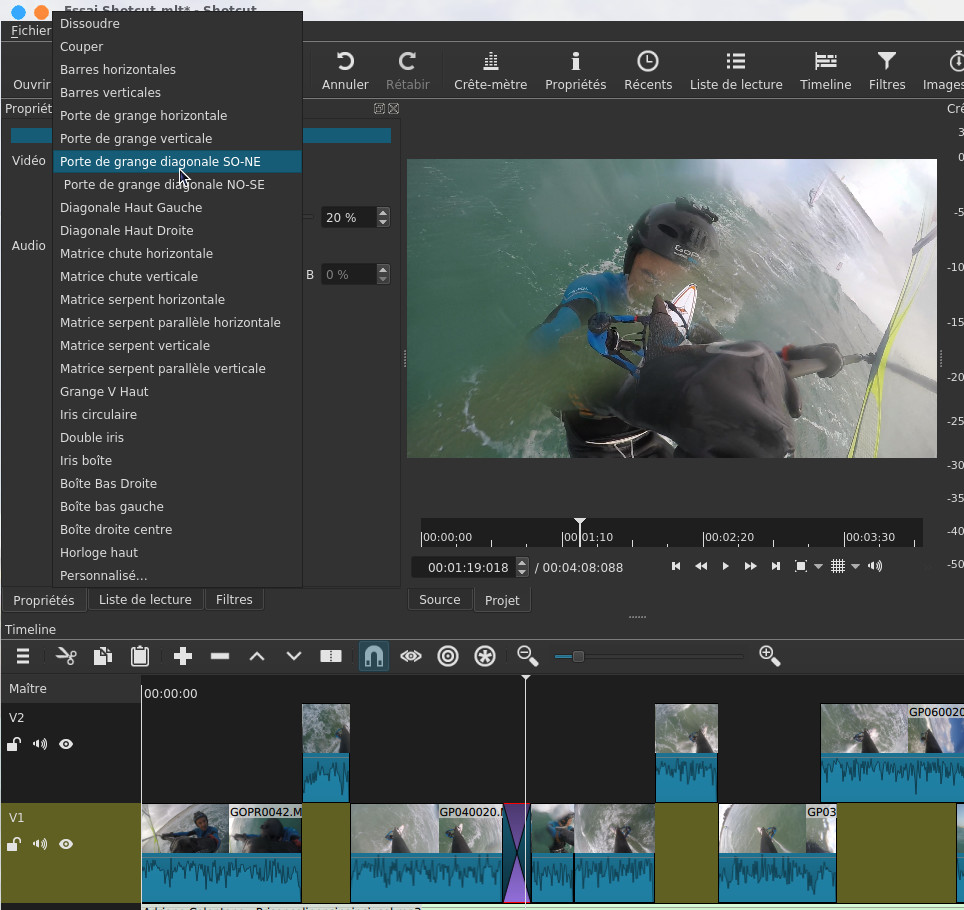
There are a bunch of other
transition types just click on the
Video
setting of the Transition Properties
to choose, example below with the
SW-NE
Diagonal Barn Door transition
you will notice that we will not
put them everywhere because the
excess of transition can make
the video heavy to watch. It is
possible that the transition is
reversed, in this case you will
have to check the Reverse
box. For the audio part, you
have no choice it is an audio
fade transition with a mix of
the two audio tracks, decreasing
for the first clip and
increasing for the second.
We finish placing some other
transitions without excess and
we must arrive at a project
almost finalized in its
structure the duration of all
the tracks that correspond to
the soundtrack, the end credits
will not have a soundtrack.
Add filters
A
filter or effect is a particular
video treatment that modifies
the appearance of a clip, we
will quickly understand what it
is by selecting a filter in the
filter library, they are
classified by audio and video
filters. I start by selecting in
the timeline the clip on which I
want to apply my effect. Then at
the Filters
tab then Video
button I choose an effect, in
the example below Old film:
Technocolor
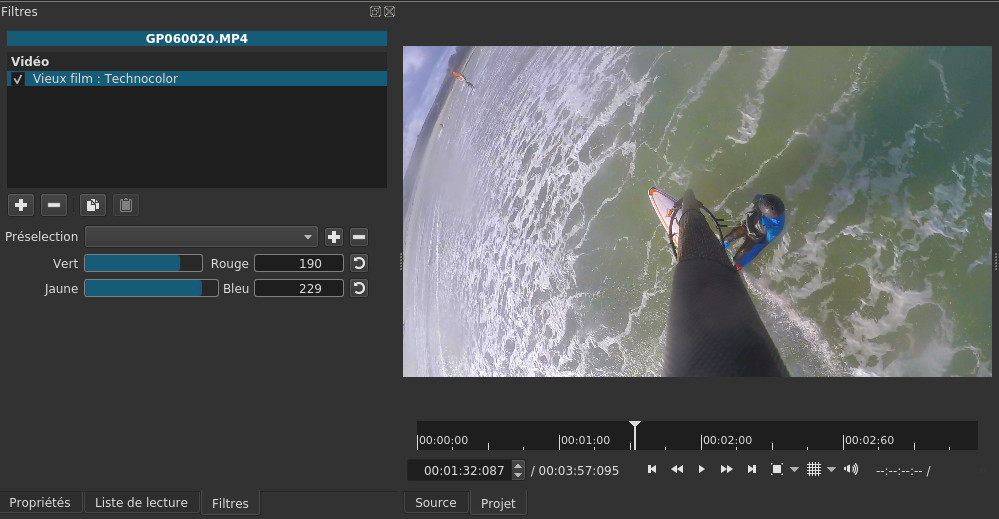
This should have an
immediate effect when viewing
the clip, you can experiment
by changing the effect
settings
In the
same place you can remove the effect by
clicking on the Remove
selected filter button.

Now we
will remove the sound from the clips so
that it does not overlap with the
soundtrack, in other words we will mute
the clips. To do this for each of the
video clips we will add the Audio
Mute effect
It can
be quite laborious to add the same filters
with their same parameters to all the
clips, we can first apply filters to a
first clip, below we have a Mute filter
and an Old
Film: Technocolor filter
with custom parameters.
We will
click on the Copy
Filters  button. Now we will select
another clip and in the Filters
tab we will click on the Paste
Filters button,
button. Now we will select
another clip and in the Filters
tab we will click on the Paste
Filters button,
 this will apply the filters of
the first clip to this clip with the same
parameters.
this will apply the filters of
the first clip to this clip with the same
parameters.
button. Now we will select
another clip and in the Filters
tab we will click on the Paste
Filters button,
this will apply the filters of
the first clip to this clip with the same
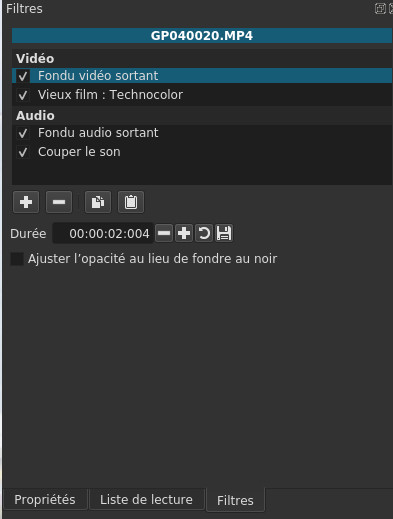
parameters. For the
last clip we will set up a fade to black
effect before switching to the end credits
on a black background, in the top right
corner of the clip we see a flashing black
dot, click on it and slide it slightly to
the left.
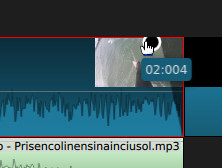
This
will give something like this, we will
slide the black point which materializes
the start of the fade, the duration
appears in superimposition (here 2
seconds)
In terms
of filter properties, two filters have
appeared in addition to the filters
already present, these are the Video
Fade Out and Audio
Fade Out filters for
which the duration can be varied.
To
disable a filter, simply deselect it or
click the Remove
Selected Filter button.
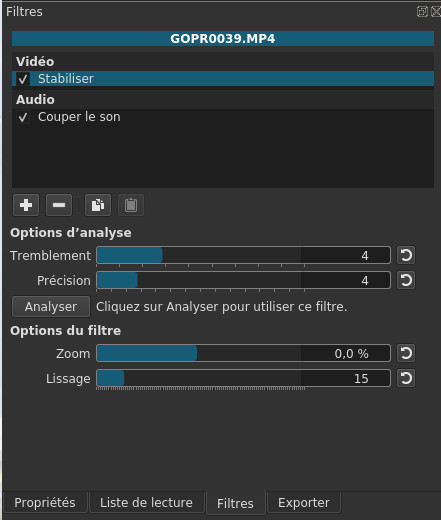
Now some
interesting filters, a filter to stabilize
a video, especially for action cameras, we
can leave the default settings and click
on the Analyze button.
Key images
Shotcut has
the keyframe feature, this function is
interesting when you want to do a bit of
advanced editing. They allow you to
sequence a clip by stopping points that
mark a particular event. To illustrate
the interest and the functioning of
keyframes, we will return to the first
clip with the credits title, we will
select the Keyframes tab at the bottom,
we will select the Text:
HTML filter
and with the buttons  we will define the activity
area of the filter, the first symbol
represents the first keyframe and the
second the last keyframe. In this case
the text will not scroll during the
entire clip but only in the duration
defined by the two keyframes.
we will define the activity
area of the filter, the first symbol
represents the first keyframe and the
second the last keyframe. In this case
the text will not scroll during the
entire clip but only in the duration
defined by the two keyframes.
we will define the activity
area of the filter, the first symbol
represents the first keyframe and the
second the last keyframe. In this case
the text will not scroll during the
entire clip but only in the duration
defined by the two keyframes. The
principle is the same for other filters,
you can set activation timings in the
same way.
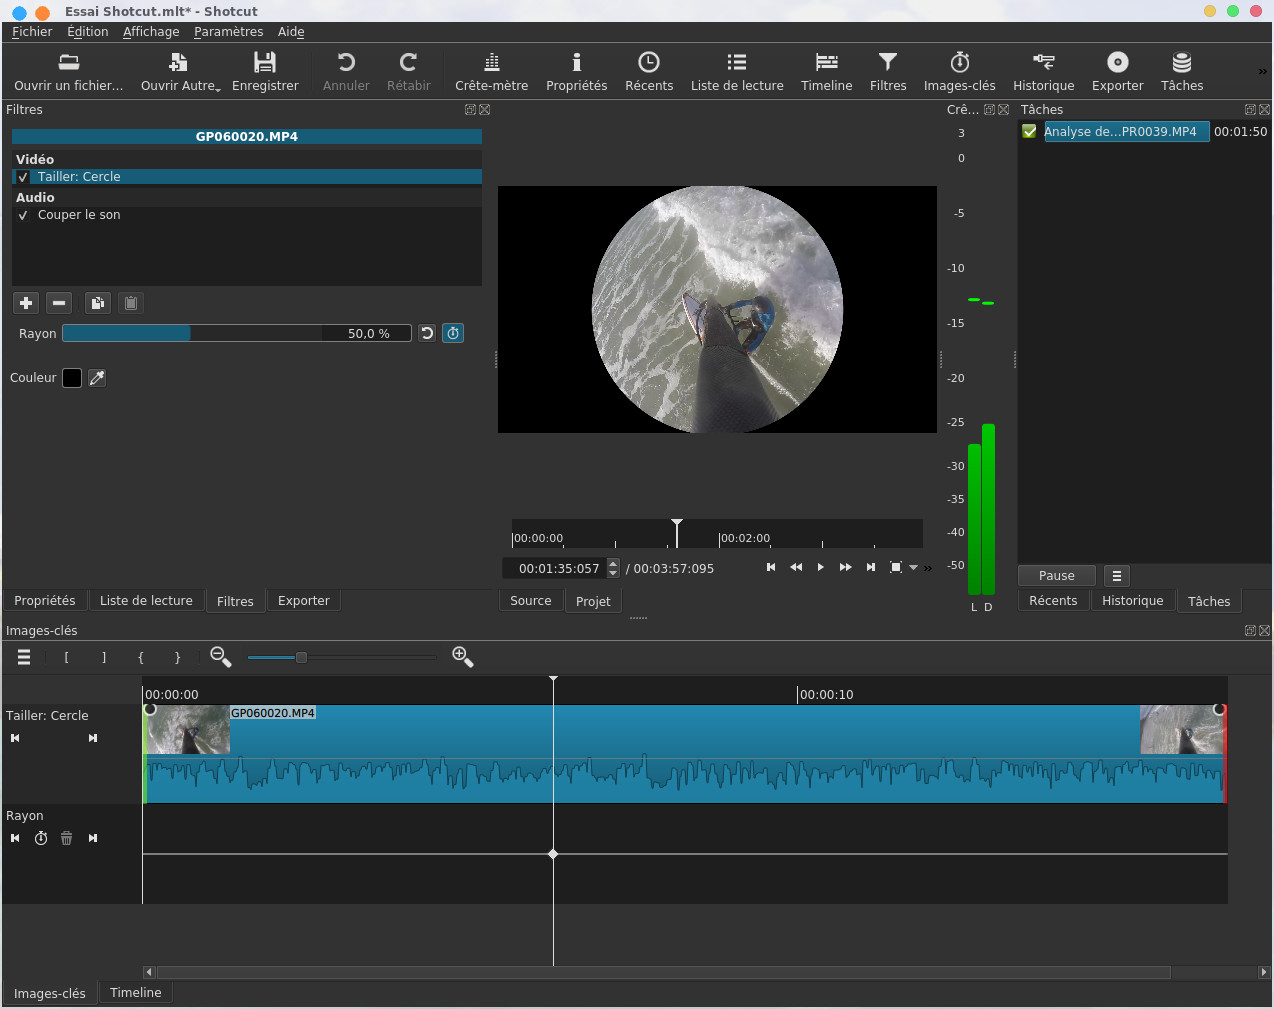
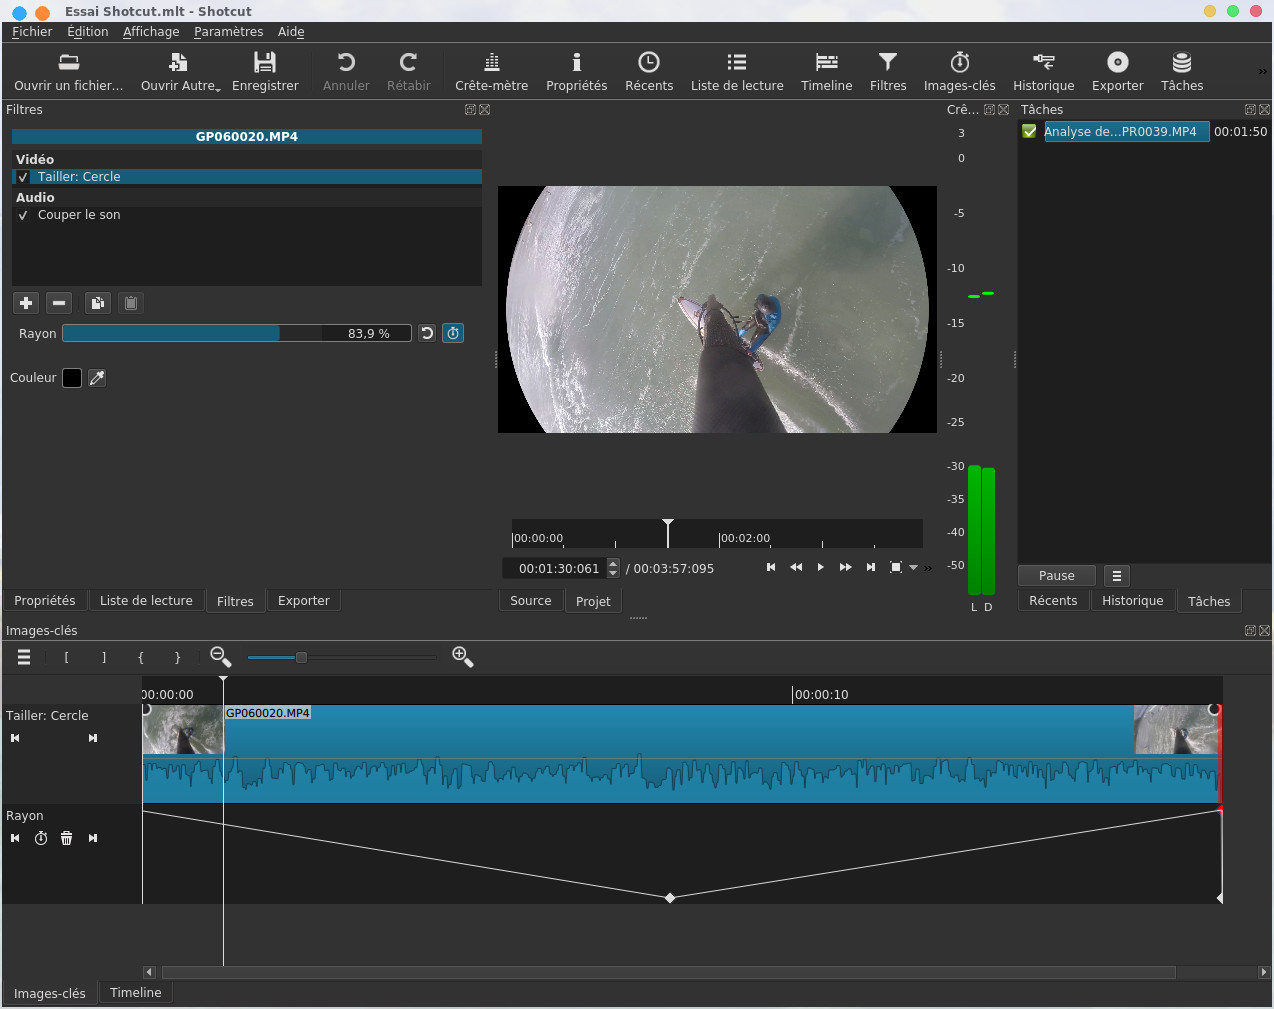
Now
some filters can work with images, this
is the case for example with the Cut:
Circle filter, we can see that in the
filter properties there is a kind of
stopwatch,  you have to click on it and it
will make two lines appear in the
Keyframes tab. The first Cut: Circle
allows you to play on the duration of
the filter, by default it occupies the
entire duration of the clip, and the
second line Radius allows you to play on
the value of the radius, by default the
radius is at 50% for the entire duration
of the filter.
you have to click on it and it
will make two lines appear in the
Keyframes tab. The first Cut: Circle
allows you to play on the duration of
the filter, by default it occupies the
entire duration of the clip, and the
second line Radius allows you to play on
the value of the radius, by default the
radius is at 50% for the entire duration
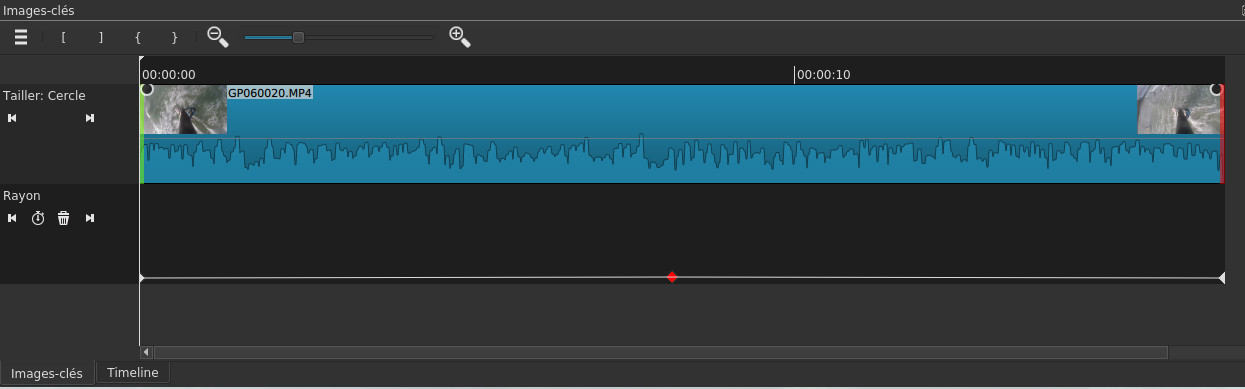
of the filter. Now
the idea is that we start with 100% of
the image, then it ends up in a circle
whose radius will reduce until the image
disappears completely, leaving a black
background, then the circle will widen
again until the image returns completely
in its entirety. To do this, we will
place ourselves at the beginning of the
clip and click on the button at the Radius line , this
will create the first key image
materialized by a diamond on the bottom
line, I create a second one in the
middle and a last one at the very end of
the clip.
line , this
will create the first key image
materialized by a diamond on the bottom
line, I create a second one in the
middle and a last one at the very end of
the clip.
line , this
will create the first key image
materialized by a diamond on the bottom
line, I create a second one in the
middle and a last one at the very end of
the clip. We
will move from keyframe to keyframe with
the tools  and
and  and we return to the first
keyframe which switches to red, at the
filter properties level. We set the
radius to 100% for the first keyframe,
to 0% for the second and again 100% for
the last keyframe. Now when we launch
the visualization we can clearly see the
radius of the circle evolve, the
software will calculate all the
intermediate points between the
keyframes.
and we return to the first
keyframe which switches to red, at the
filter properties level. We set the
radius to 100% for the first keyframe,
to 0% for the second and again 100% for
the last keyframe. Now when we launch
the visualization we can clearly see the
radius of the circle evolve, the
software will calculate all the
intermediate points between the
keyframes.
and and we return to the first
keyframe which switches to red, at the
filter properties level. We set the
radius to 100% for the first keyframe,
to 0% for the second and again 100% for
the last keyframe. Now when we launch
the visualization we can clearly see the
radius of the circle evolve, the
software will calculate all the
intermediate points between the
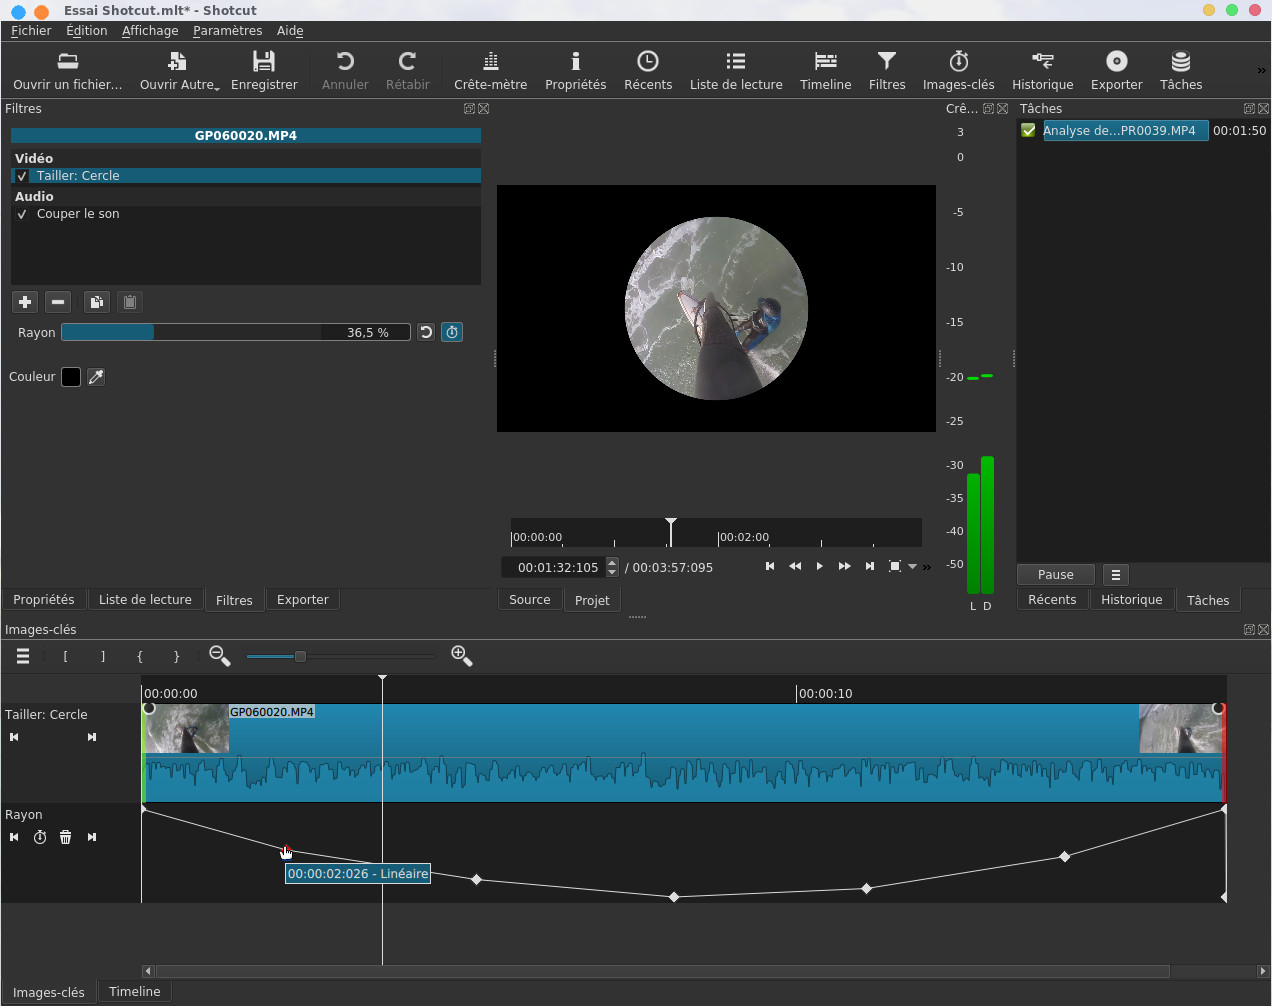
keyframes. Now if
the interpolation you have performed
seems too linear, you are free to add
other key images. You will note that
once created with the button you can move the key images on
the graph with the mouse by drag and
drop, this will modify the value of the
radius which is represented by the
ordinate of the graph (100% at the top
and 0% at the bottom).
you can move the key images on
the graph with the mouse by drag and
drop, this will modify the value of the
radius which is represented by the
ordinate of the graph (100% at the top
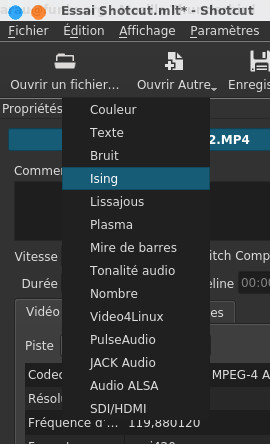
and 0% at the bottom). In the
Open
Others menu you
will find other refinements, for example
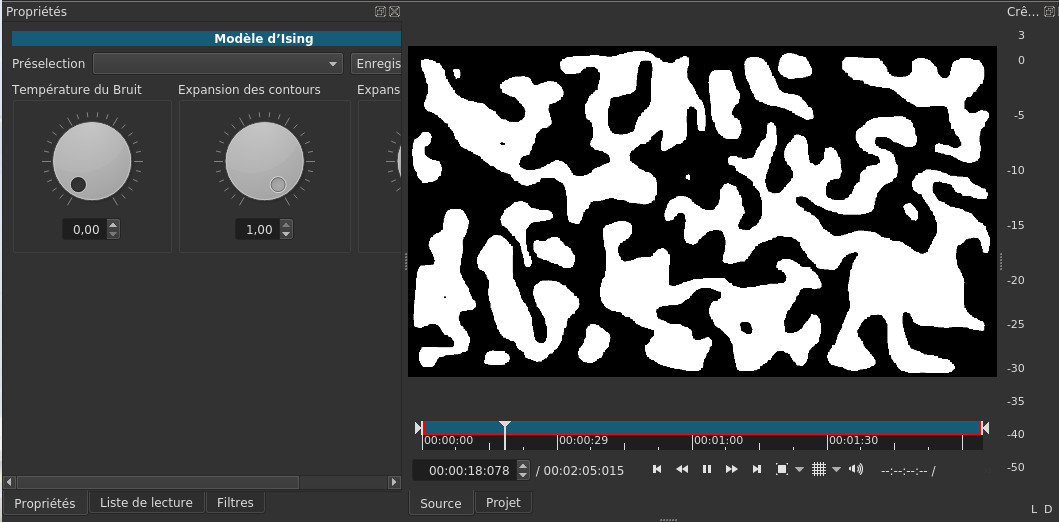
with a noise target
The
parameters of this target can be changed
in the properties
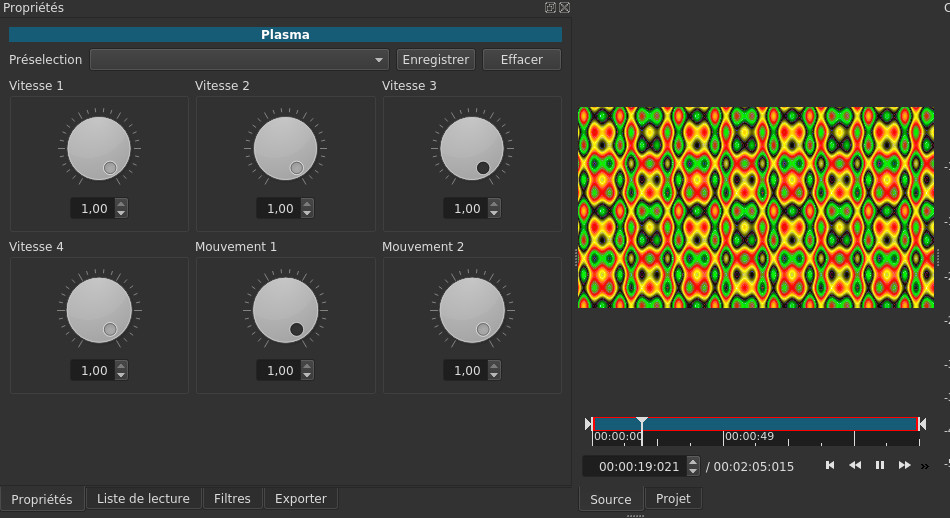
in the
same style we also have the psychedelic
sight with Plasma
we
then integrate it into the timeline via
the button to put it to the right of the
last clip of the selected track or the
button to insert it where the cursor
is on the selected track.
to put it to the right of the
last clip of the selected track or the
button to insert it where the cursor
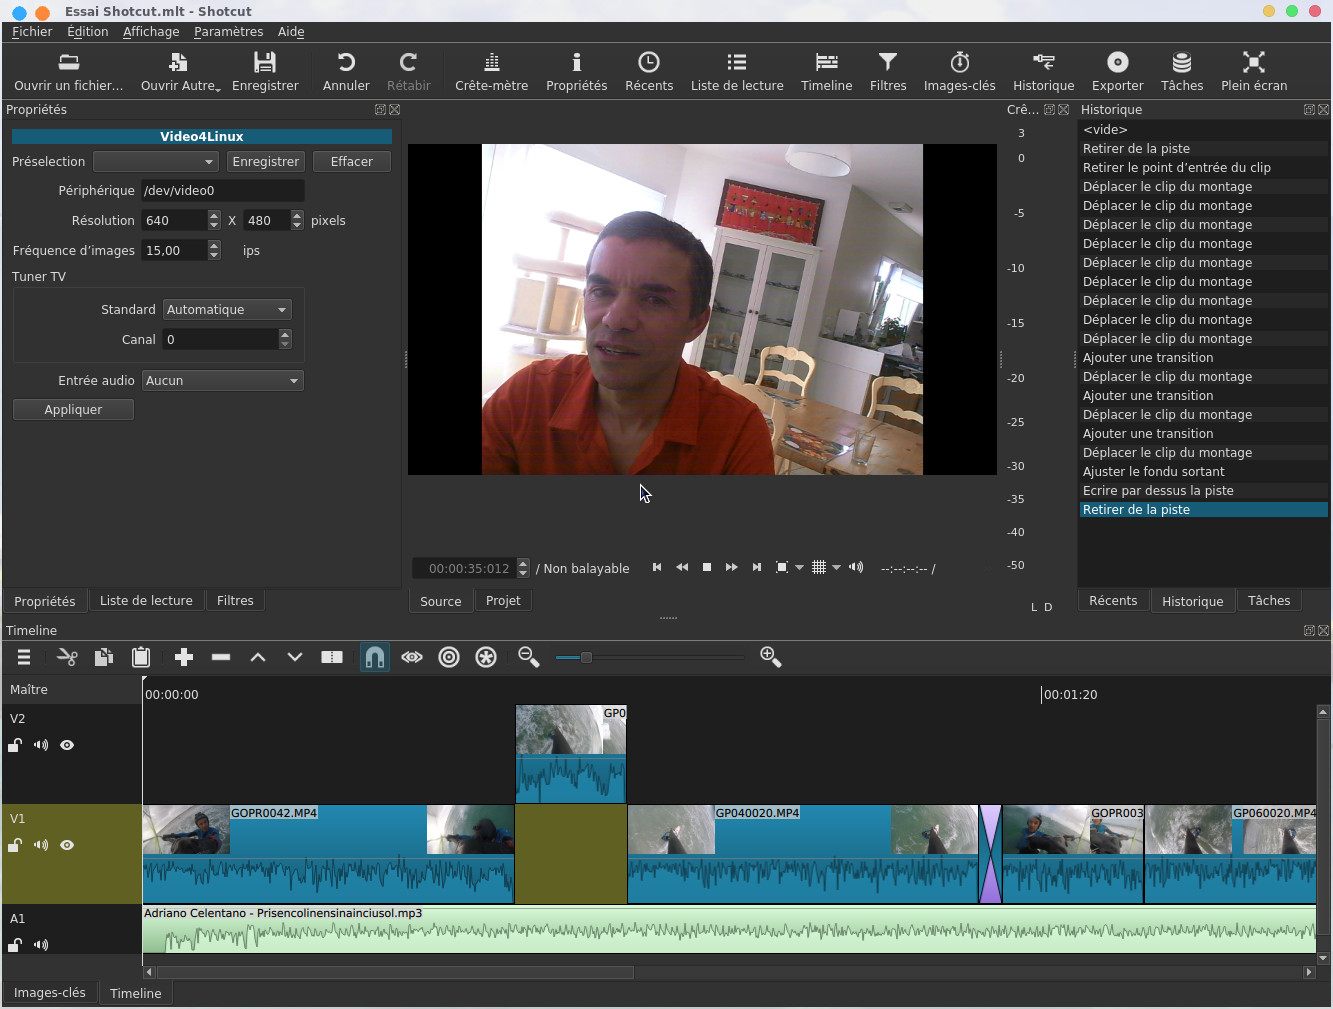
is on the selected track. In the
same way, you can add the video from the
webcam, you will have to choose Video4Linux then
click on the Export button
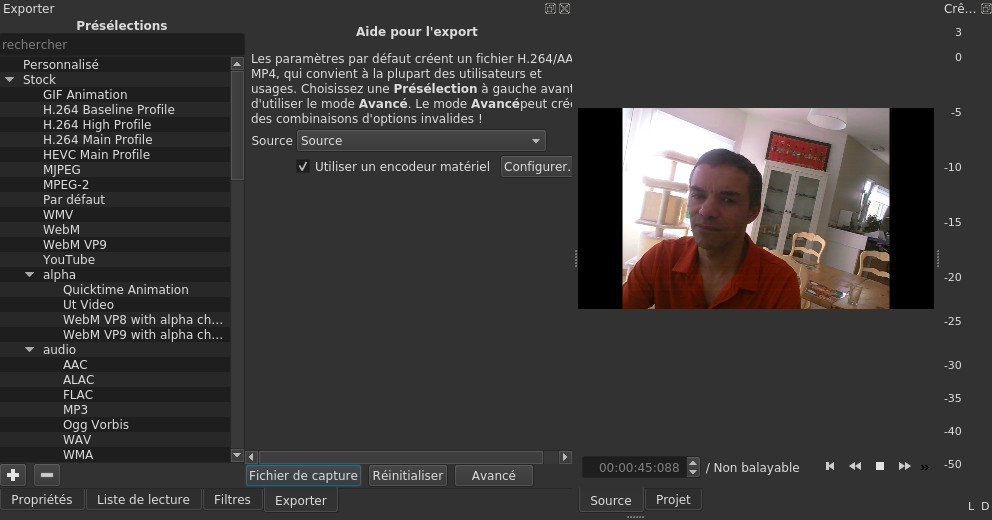
We
will make sure that the Source button
is on Source , then
we click on the Capture
File button
and indicate a location and a file name
to capture the webcam
This
will automatically start recording, then
click on the Stop
Capture button
and you can add the video to the
timeline using the button to place it to the right of
the last clip of the selected track or
the button to insert it where the cursor
is on the selected track. In the same
way, you can record your own voice via
the microphone by choosing JACK
Audio or PulseAudio .
to place it to the right of
the last clip of the selected track or
the button to insert it where the cursor
is on the selected track. In the same
way, you can record your own voice via
the microphone by choosing JACK
Audio or PulseAudio . Exporting to the final video
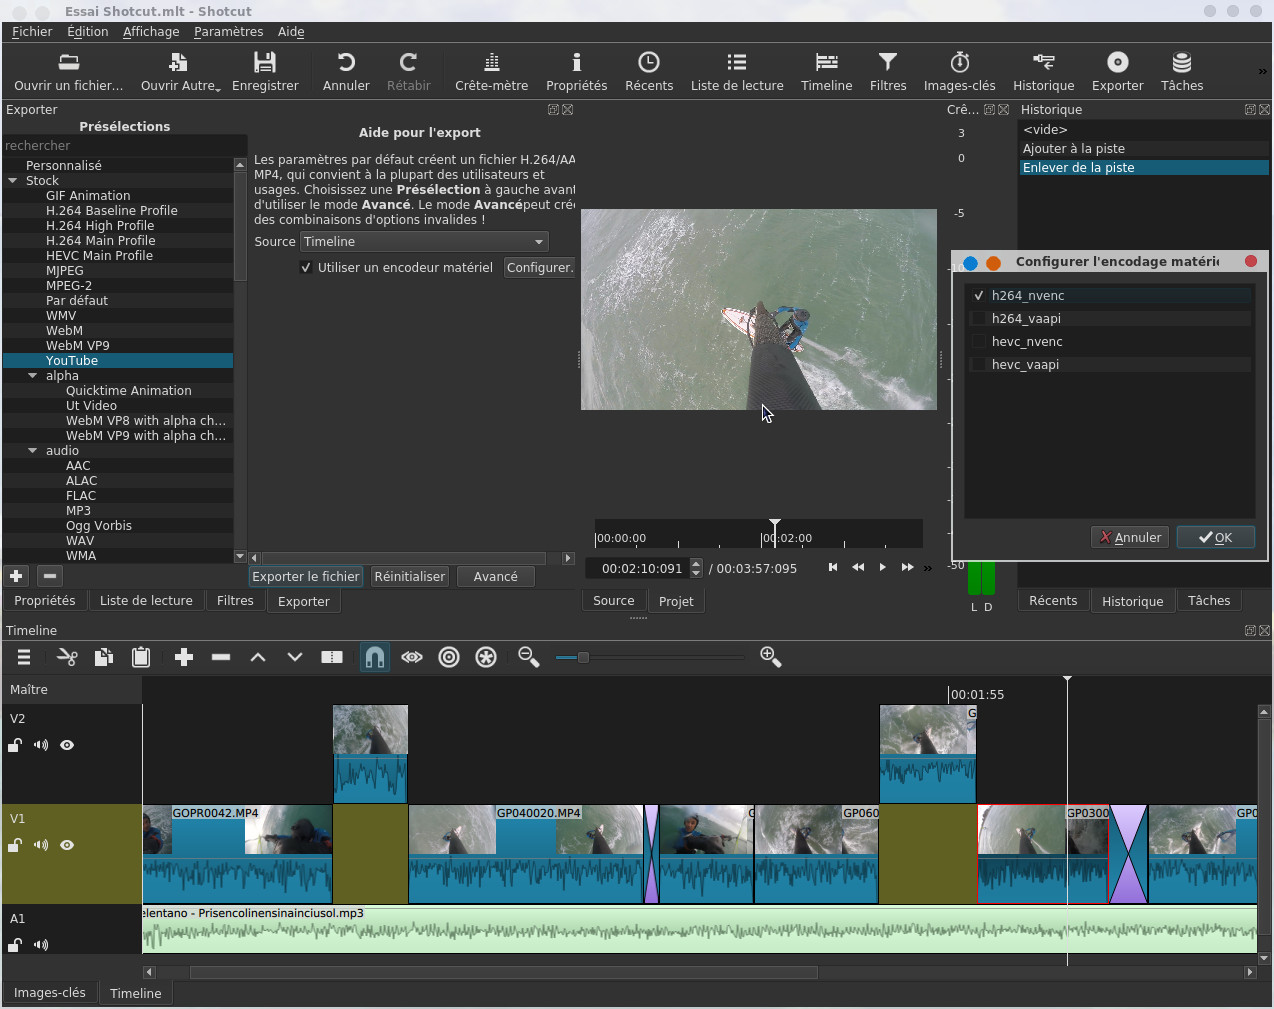
Now you can export your video by clicking on the Export button ,
in the format I chose the YouTube
format,
at the Source level, you
will have to make sure that Timeline is
selected, I chose to launch the rendering
with hardware acceleration, we can see in
the screenshot below the hardware encoding
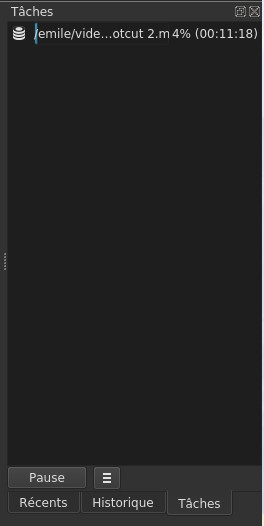
configuration window. Then click on the Export
file button the
rendering task appears in the task list
| Back to FUNIX home page ] |