 Welcome
 Linux
Linux Unix
Unix Download
Encourage FUNIX
The consultation of the site is completely free and without advertisements. Donations are nevertheless appreciated to pay for hosting and encourage its author
Multimedia
Video editing
- The basics of video editing
- Installation of video editing software
- Editing your video with Kdenlive
- Editing your video with Cinelerra
- Editing your video with OpenShot Video Editor
- Editing your video with Pitivi Video Editor
- Editing your video with Flowblade Video Editor
- Editing your video with Shotcut
- Installation of video editing software
- Editing your video with Kdenlive
- Editing your video with Cinelerra
- Editing your video with OpenShot Video Editor
- Editing your video with Pitivi Video Editor
- Editing your video with Flowblade Video Editor
- Editing your video with Shotcut
Edit your video with kdenlive
Network and system
Email management
[ Object , create a title , create an animated title ( with a sequence of images , with the animation generator , with glaxnimate ), create a subtitle , create a subtitle by automatic voice recognition , place the titles ]
Managing titles and subtitles with Kdenlive
Last modified
August 2, 2024
This site has been automatically translated with Google Translate from this original page written in french, there may be some translation errors
This page is part of a tutorial to explain video
editing with kdenlive and which includes the following topics:
This site has been automatically translated with Google Translate from this original page written in french, there may be some translation errors
Object
Create a title
Now we will prepare
a simple title as an instruction for our video, from
the Project->Add
Title Video menu.
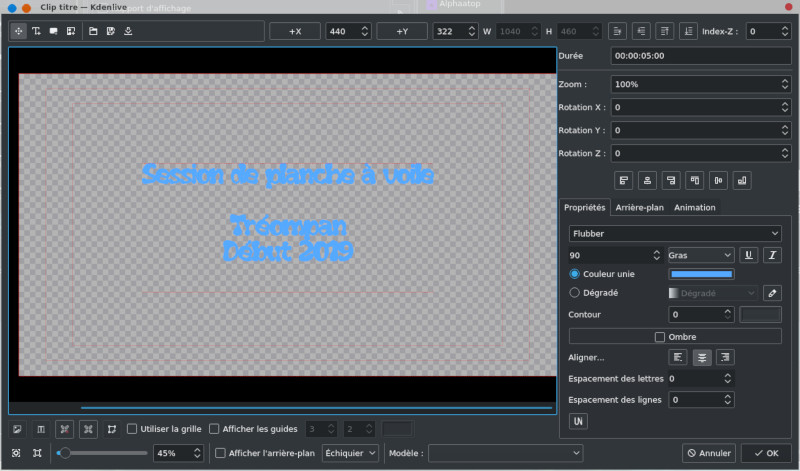
We first start by
defining the font size (between 75 and 90), the color,
and then you can write only after. Note that you can
add a background image and make animations. We can
also very easily make a title animation that scrolls
in the Star Wars style. In the example given, we will
stick to something very simple. After clicking OK , your title clip
appears in the list with the other clips in the
project tree.
Some additional tips
for going further, at the level of the buttons in the
title window  :
:
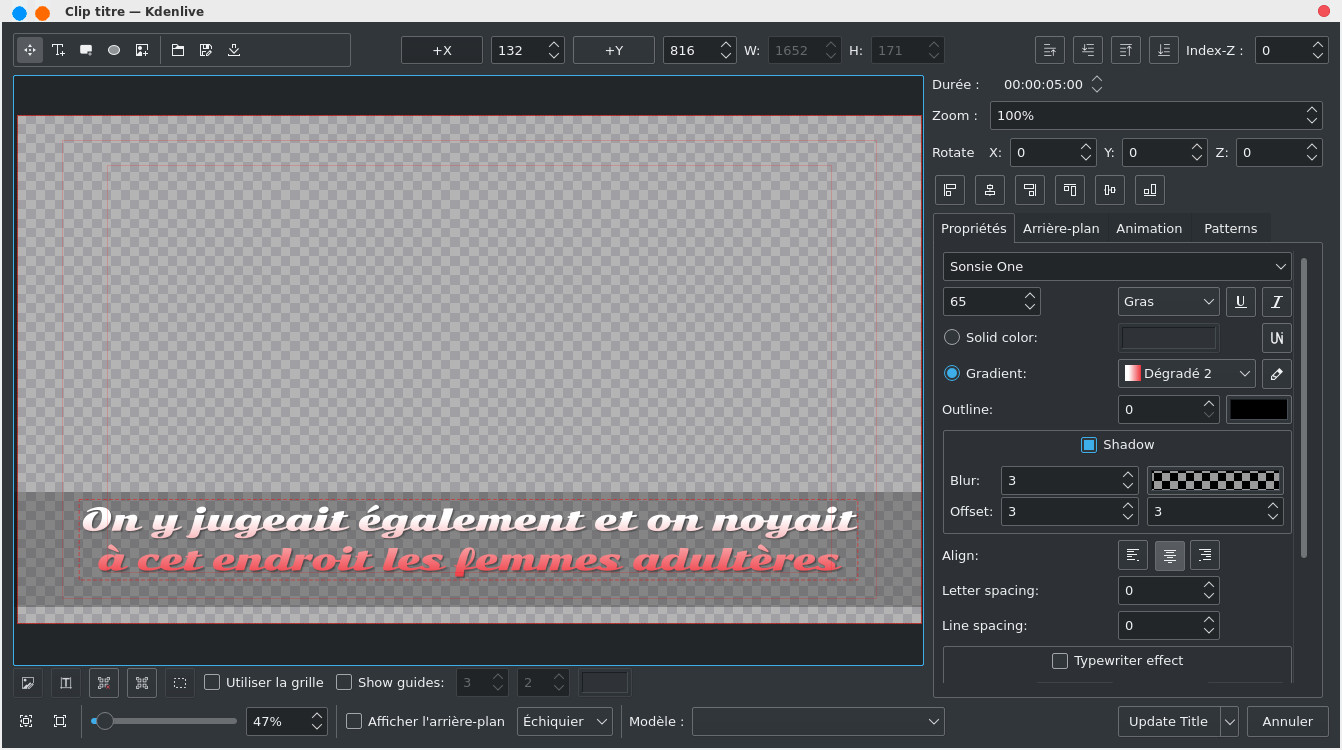
We then create another generic end title which will be placed at the end of the edit and we will proceed in exactly the same way for all the possible subtitles which we can place in the video.
:
- the first button on the left is used to move an object (text, image, shape style)
- the second allows you to add a text type object
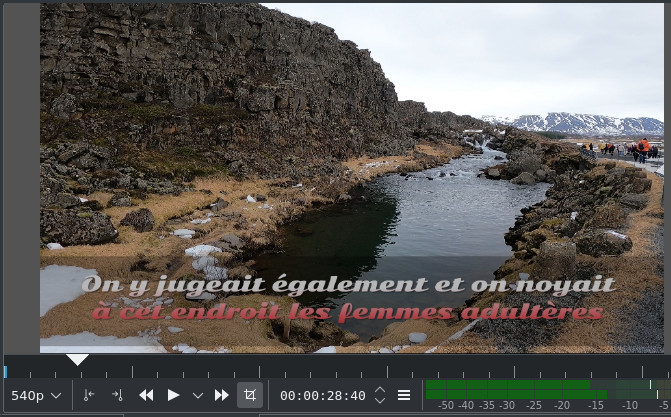
- the third allows you to add a rectangle-type shape, this can be useful to reinforce the contrast so that the text is more visible like this
and this will give
this once integrated into the video
- Let's continue the enumeration with the fifth button, it's the same thing but with the shape of an ellipse
- The sixth button allows you to add an image as a wallpaper
- the seventh button allows you to open a file in title format
- the eighth button allows you to save the title in a file in title format
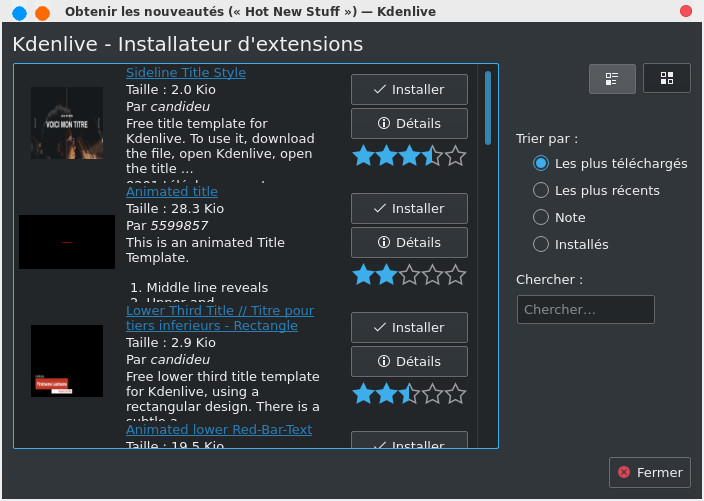
- The last button allows you to download additional title templates from the community
We then create another generic end title which will be placed at the end of the edit and we will proceed in exactly the same way for all the possible subtitles which we can place in the video.
Create an animated title
With a sequence of images
We will now discuss importing a sequence of images, what is the point? It could be to make a slideshow, in this case we will take a sequence of images to create an animation, they were created with Synfig Studio and we will place them at the beginning of our montage. We import them from the Project->Add an image sequence menu , in the window below I have indicated the directory that contains the images, the image format and the time between 2 images (in this case it is very short to give the animation effect).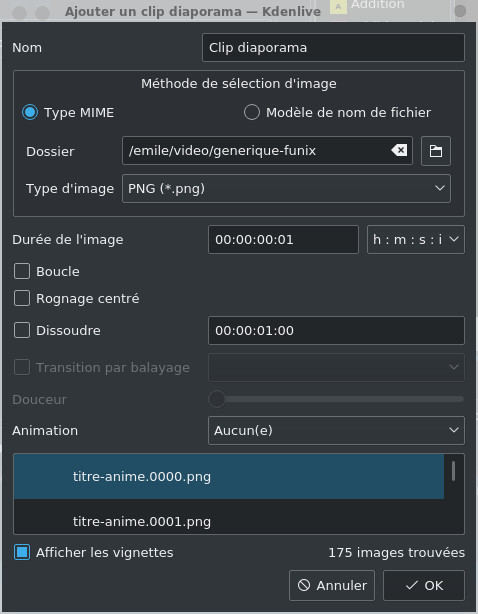
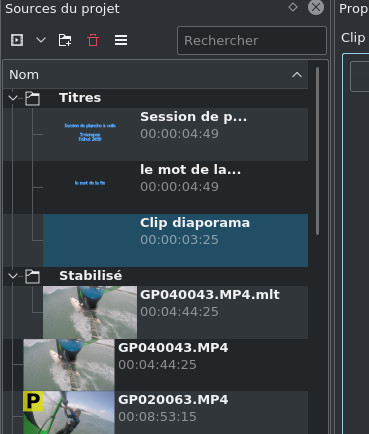
and this is what it
looks like at the Project
Sources level , we can see
our two title clips and the slideshow clip that I
placed in a previously created Titles directory, by
default it takes the name of the text, but you can
rename them.
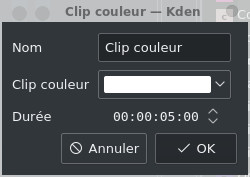
We now finish by importing a clip with a white background that we will use for the slideshow clip. We go to Project->Add a colored video , we choose the color, we can leave the Duration by default.
There you go, there you go, we have almost everything we need to start our editing, we will come back to the page on the rough cut to add the soundtrack if necessary. I also import my jingle, the screaming sound of the seagull that we find at the beginning of my videos on my youtube channel.
Other
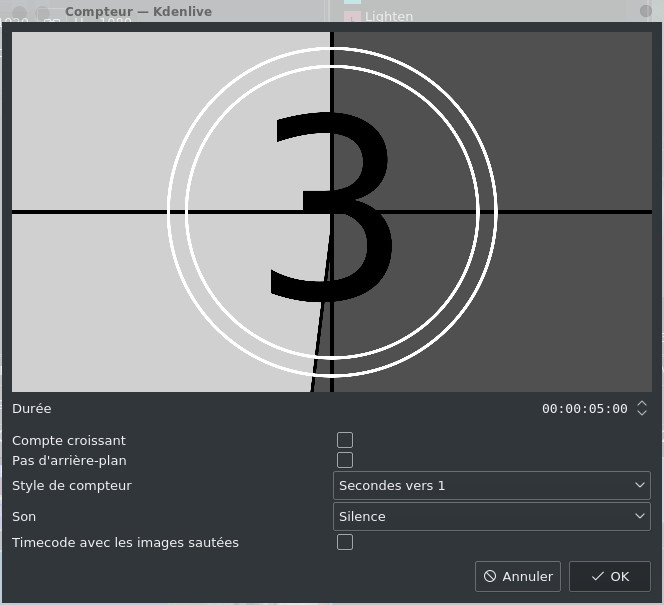
cool stuff useful for credits, in Project->Generators or by clicking in the
Project Sources area from the context
menu, you can easily generate a counter that will look
great at the beginning of the video
You can also generate a pattern or noise, just like on a good old analog TV. However, it is not as powerful as OpenShot Video Editor which offers 3D animated titles using blender.
 we see that the Subtitles track appears, by
double clicking on this track, we insert a subtitle
and you can type your text directly at the timeline
level or even from the Subtitles sub window accessible
via the View->Subtitles menu.
we see that the Subtitles track appears, by
double clicking on this track, we insert a subtitle
and you can type your text directly at the timeline
level or even from the Subtitles sub window accessible
via the View->Subtitles menu.
You can also generate a pattern or noise, just like on a good old analog TV. However, it is not as powerful as OpenShot Video Editor which offers 3D animated titles using blender.
You also have the
possibility to create 2D animations with Glaxnimate which is integrated
into kdenlive and a brief
description of which is given here.
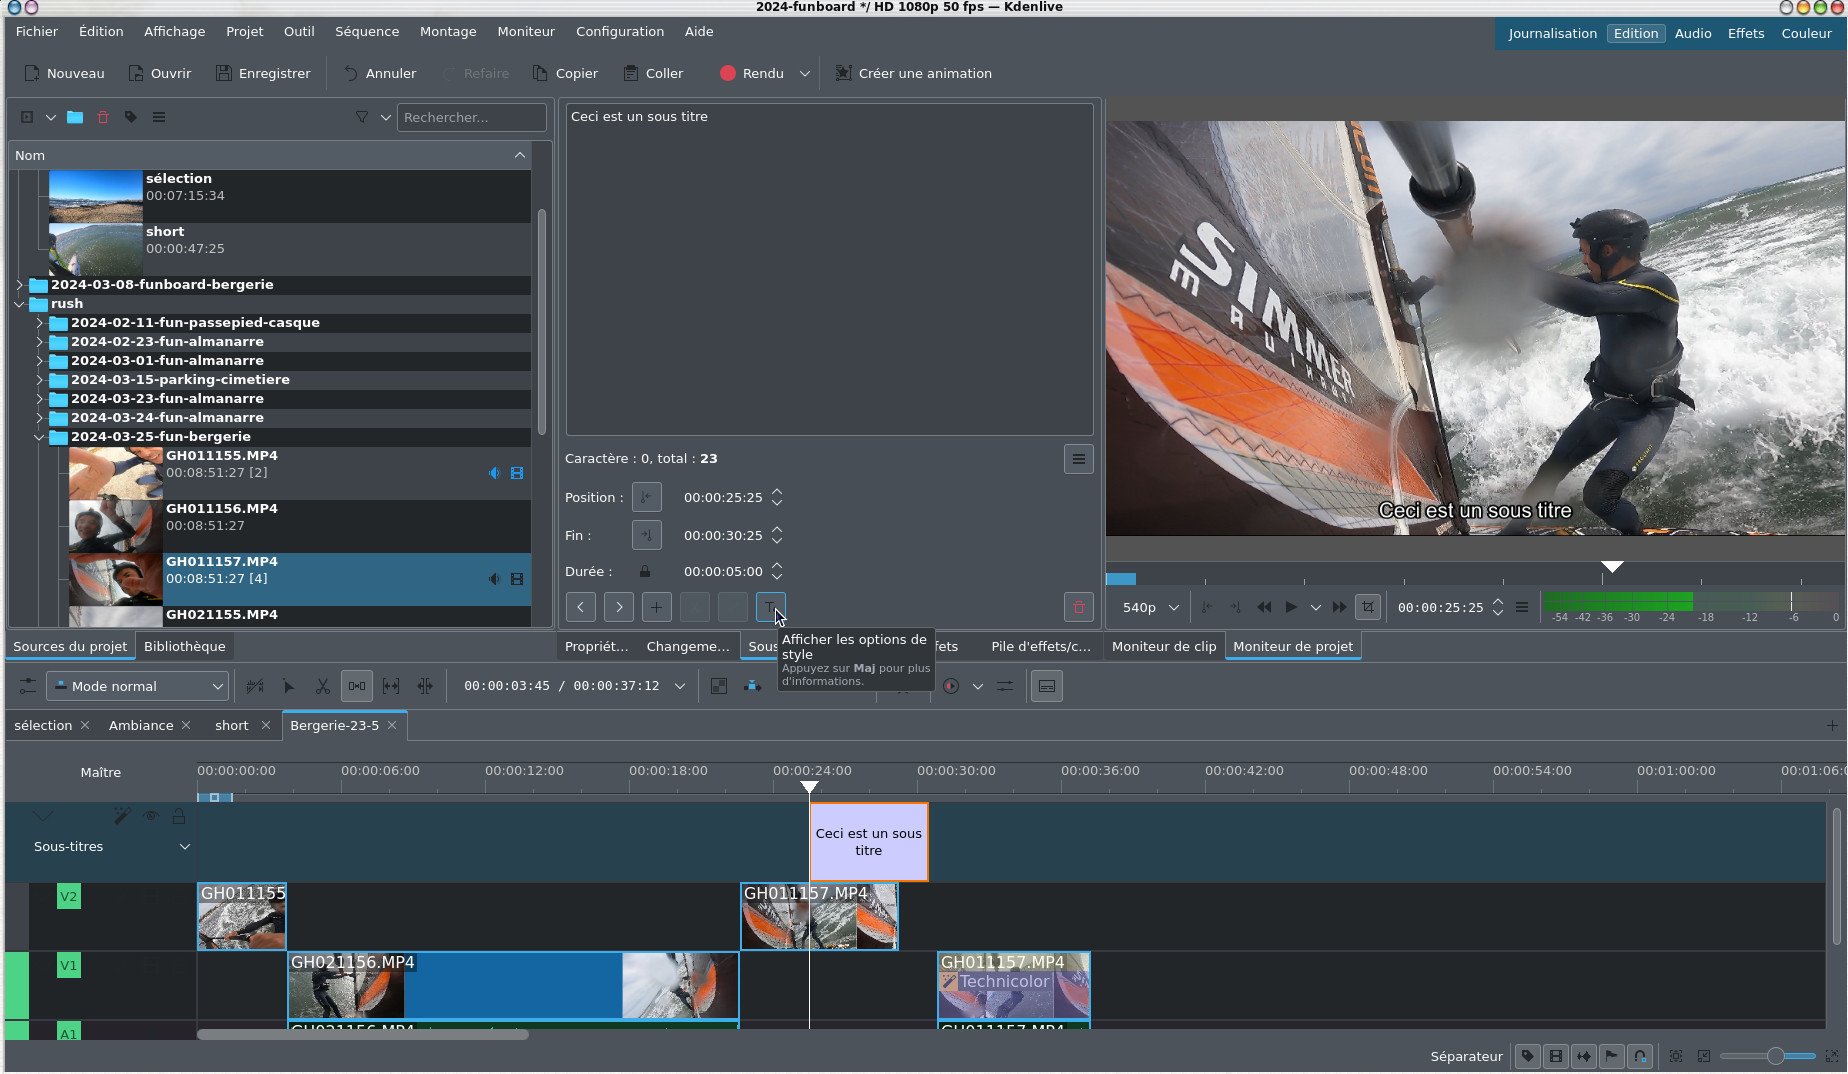
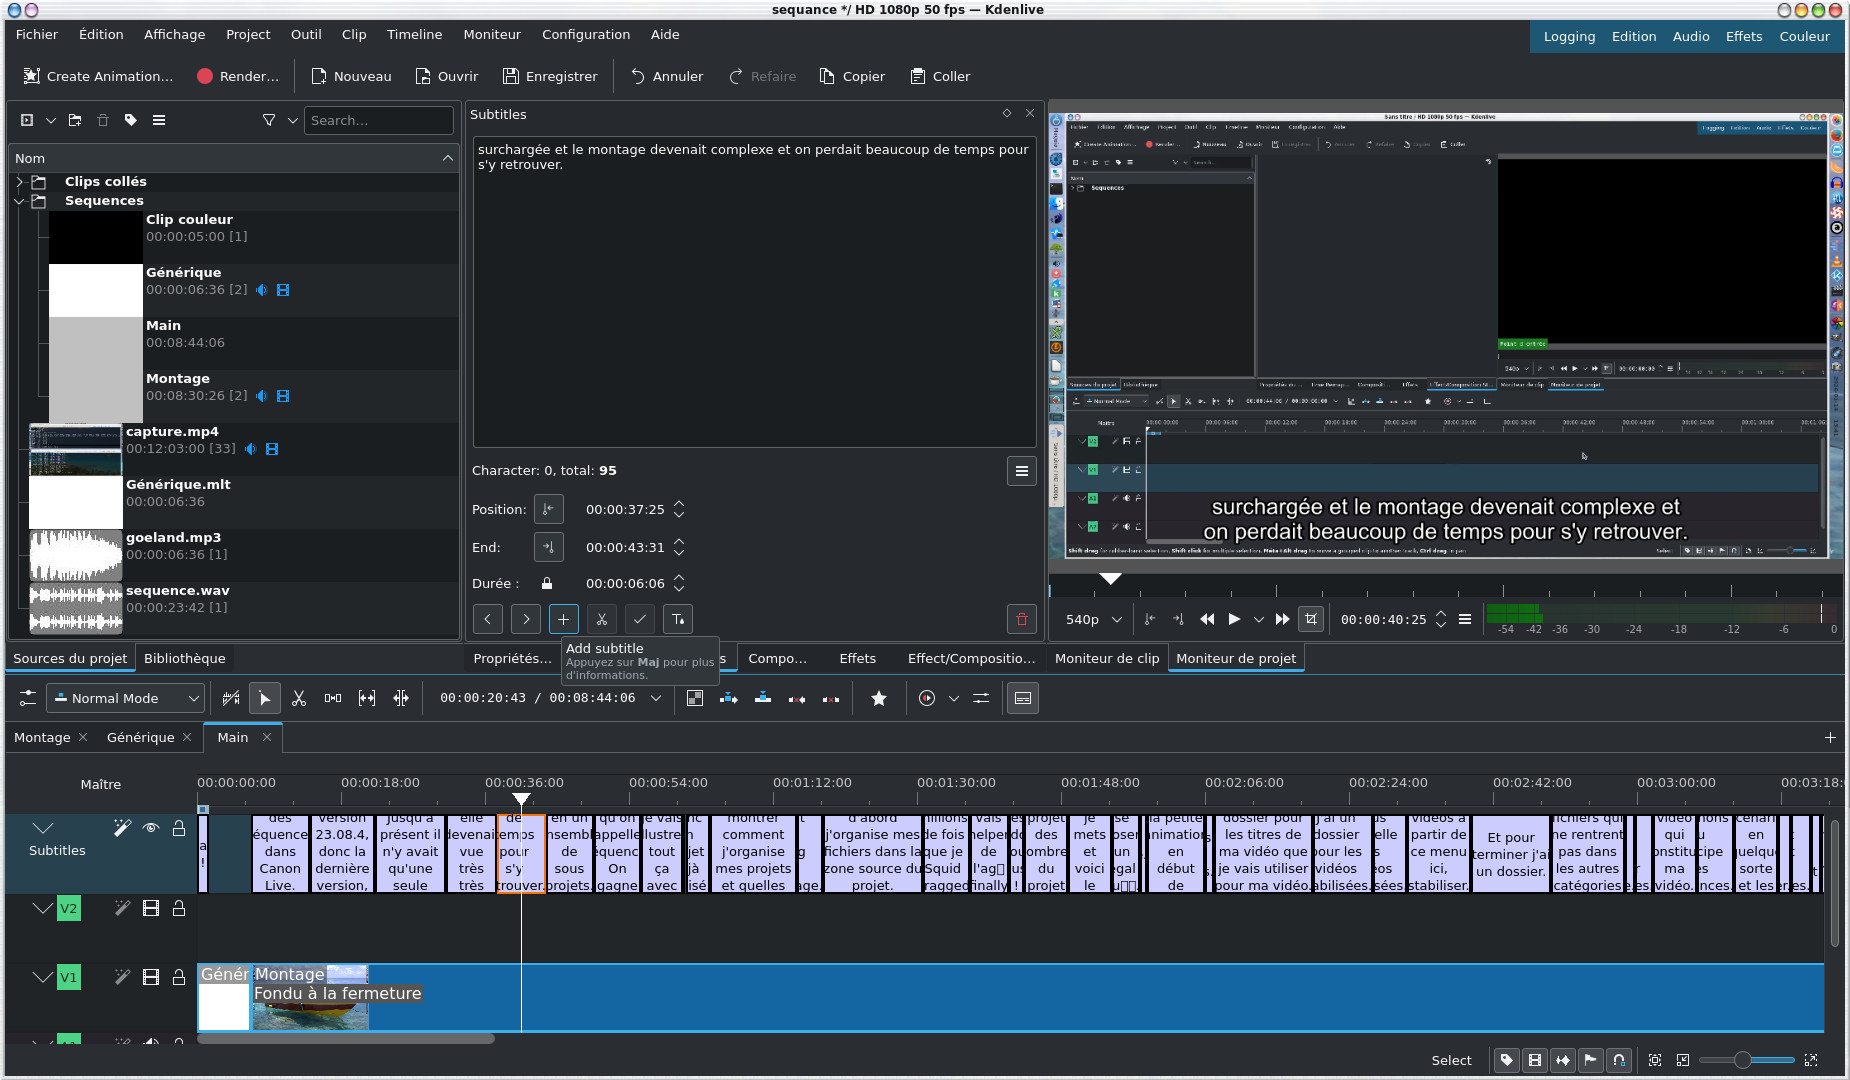
Create a subtitle
You can add subtitles to your video, at the timeline level we will click on the toolwe see that the Subtitles track appears, by
double clicking on this track, we insert a subtitle
and you can type your text directly at the timeline
level or even from the Subtitles sub window accessible
via the View->Subtitles menu. You will notice the
subtitle configuration window accessible via the
button  which allows you to
customize the style, pointed to by the mouse below.
which allows you to
customize the style, pointed to by the mouse below.
which allows you to
customize the style, pointed to by the mouse below. You can also import a
.SRT subtitle file or
export your own .SRT subtitle files all accessible from
the Project menu .
If you want to know
more about the use of subtitles I refer you to this page (thanks to its
author Gérald by the way) which explains how to
integrate subtitles. The context being a video
recording of a drone which integrates telemetry data
in the form of a subtitle track.
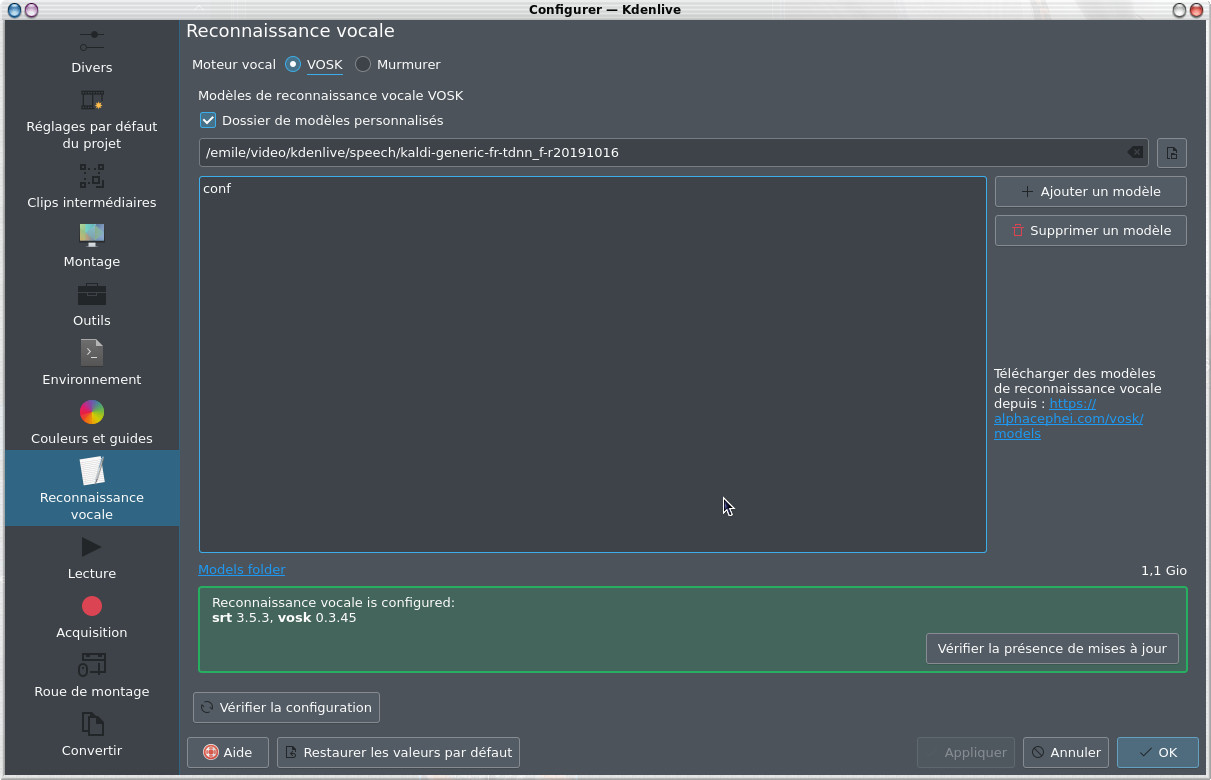
Kdenlive integrates a speech recognition and text
transcription device to create subtitles. In the
configuration settings, there is a Speech Recognition icon for this
purpose, we will retrieve models for the French
language on this site https://alphacephei.com/vosk/models that we can import
from the window below.
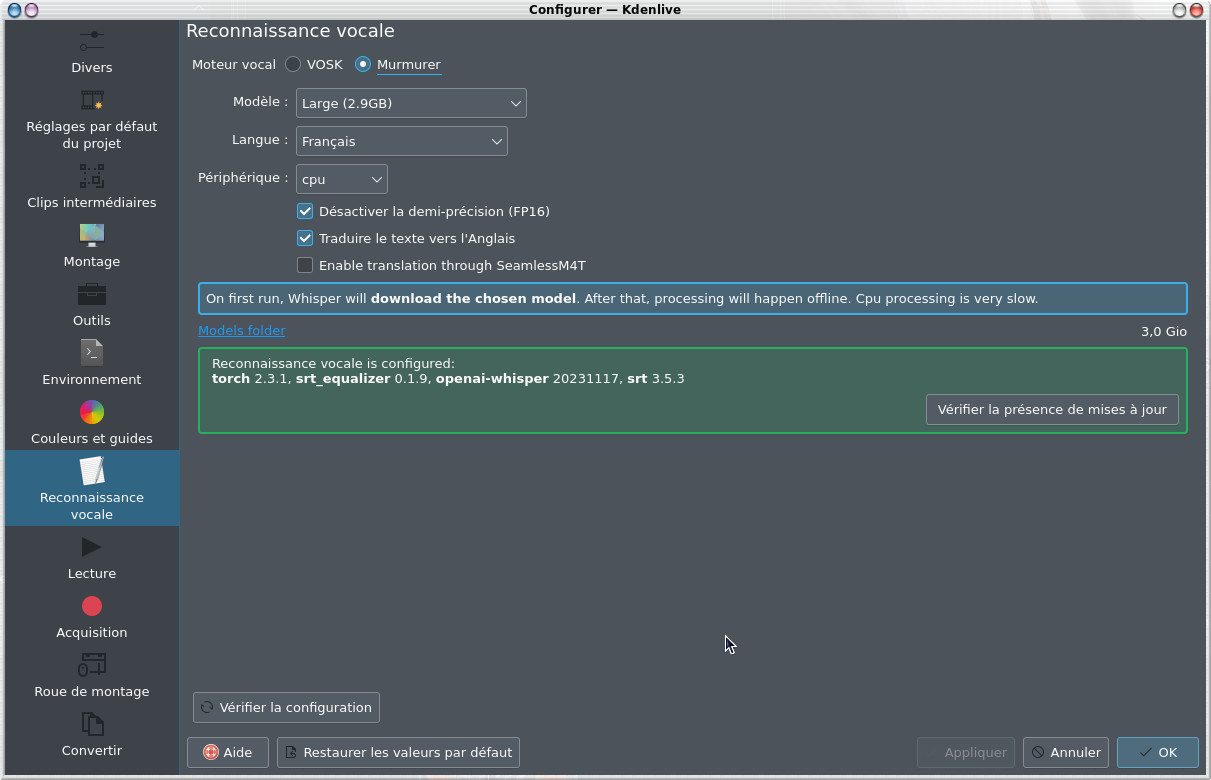
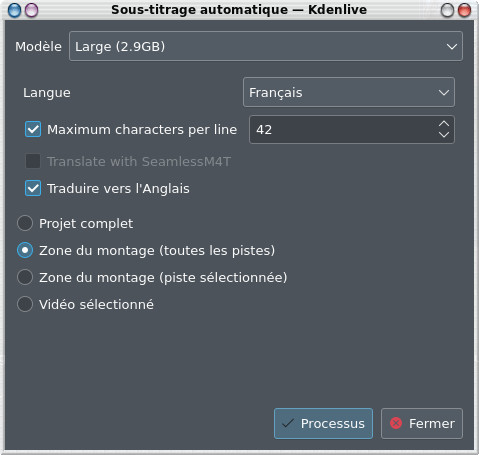
You can also use the
speech recognition system Whisper which recognizes
punctuations very well and can also automatically
translate into English. In the window below you can
choose as Computing Device the GPU instead of
the CPU which is much slower as mentioned, I disabled
the FP16 which is not recognized by my CPU.
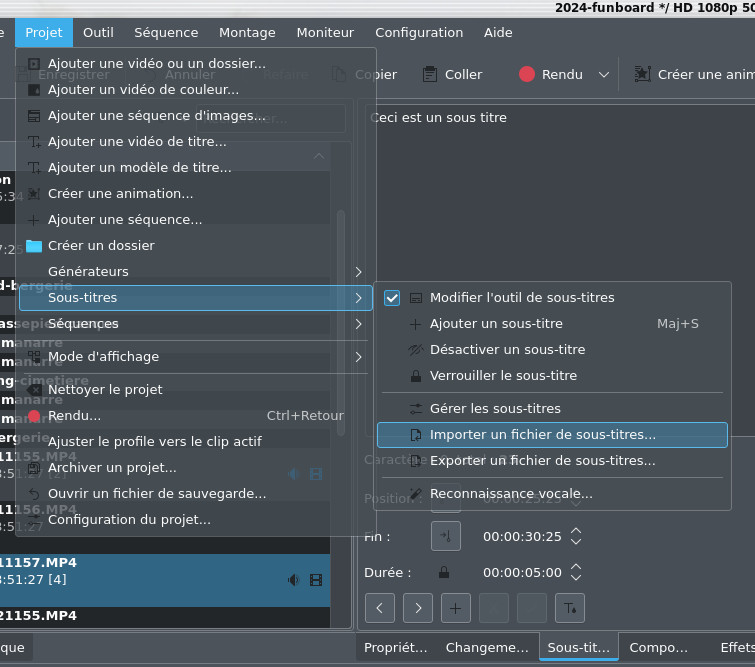
Now we can start the
speech recognition process with Whisper and translation from
the Project->Subtitles->Speech
Recognition menu, choose the
area of the timeline to transcribe, then click on Process.
 Automatic
transcription option
|
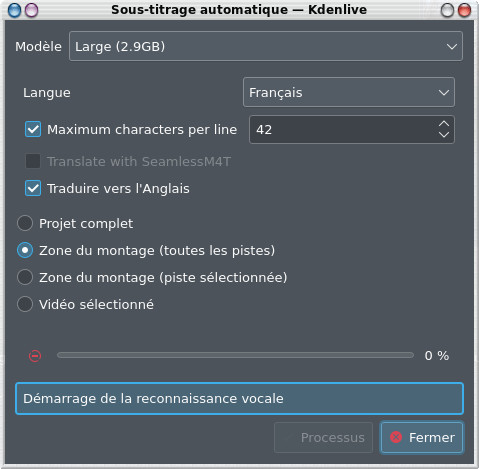 and the
calculation is gone with an automatic
translation into English
|
And it will give
something like this on a tutorial project, it works
more or less well but the generated texts could
possibly be reworked in the Subtitles space
More information
here https://docs.kdenlive.org/en/effects_and_compositions/speech_to_text.html
Place the title on the timeline
We're almost there! Let's move on to the title of the video that we created previously, we're going to make sure that it's superimposed on the first clip (still without counting the animation at the beginning). On the other hand, the title must be on track V1 above the other clips so that it is displayed correctly superimposed on the video track present in V2, so we'll have to do some clip swaps from one track to another if necessary, in the end we get this: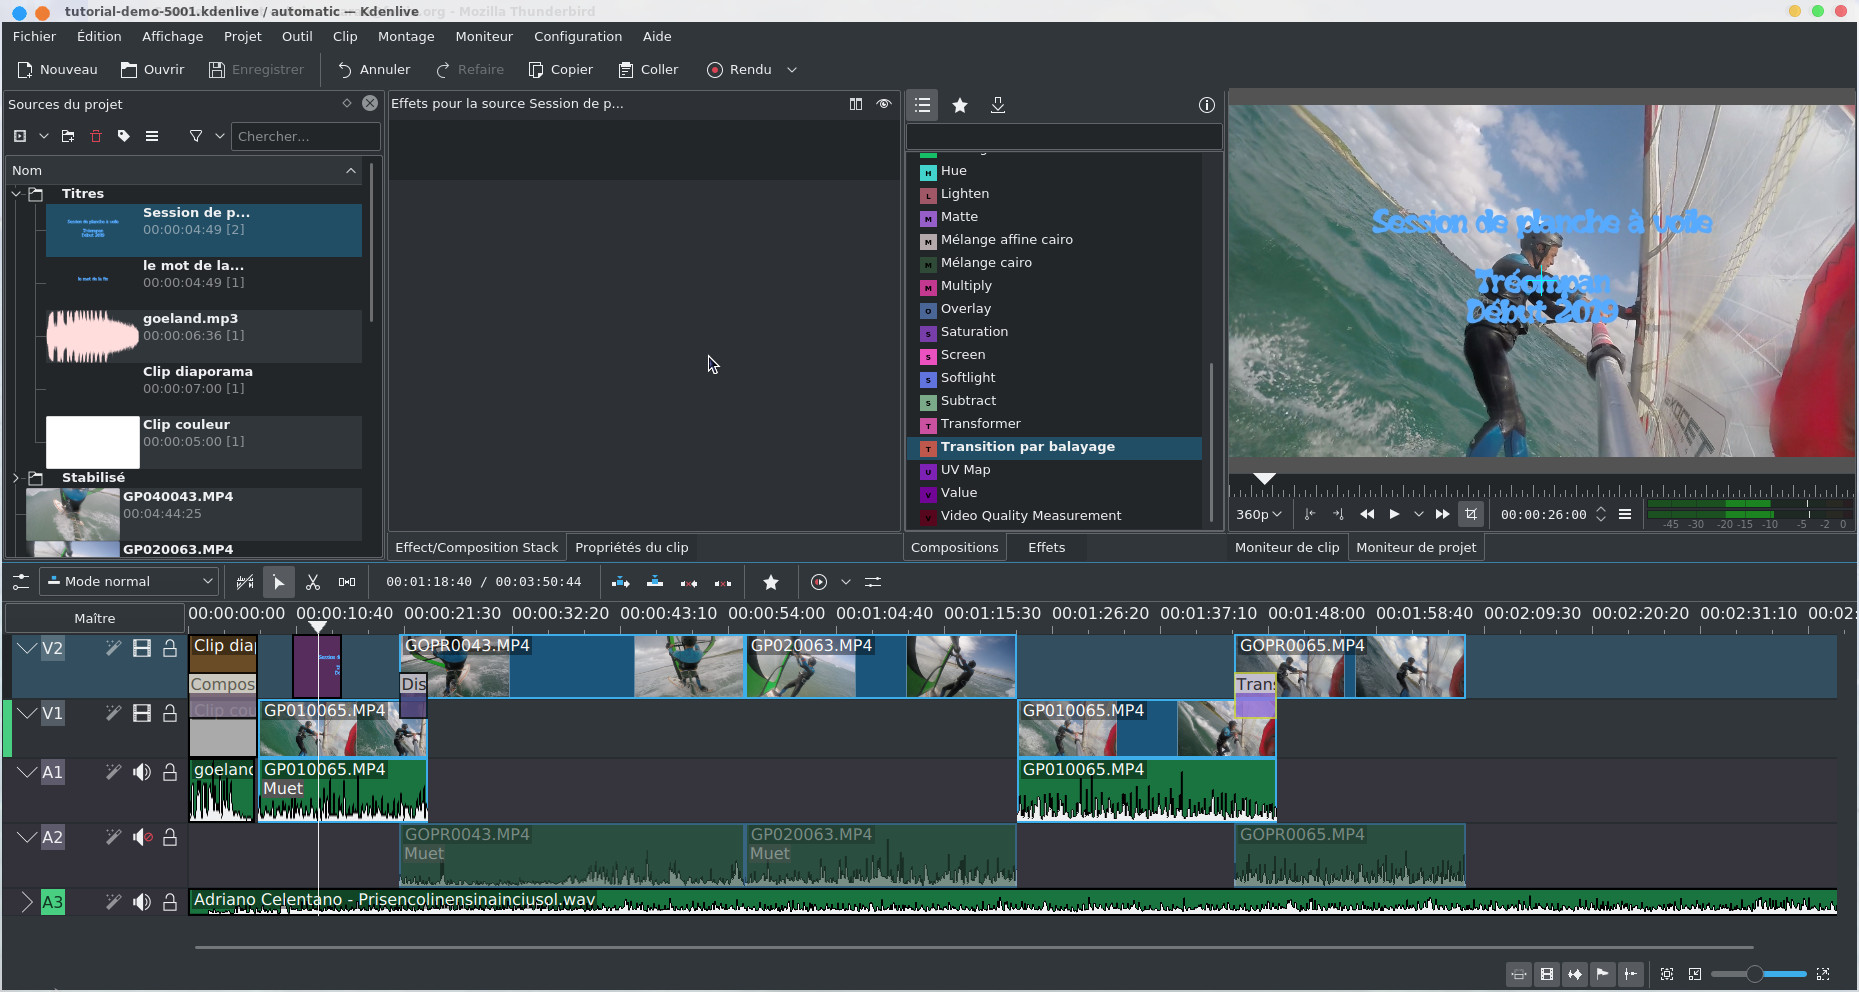
By default the title is superimposed on the clip of track V2 for the duration of the title as can be seen in the Project Monitor.
| Back to FUNIX home page ] |